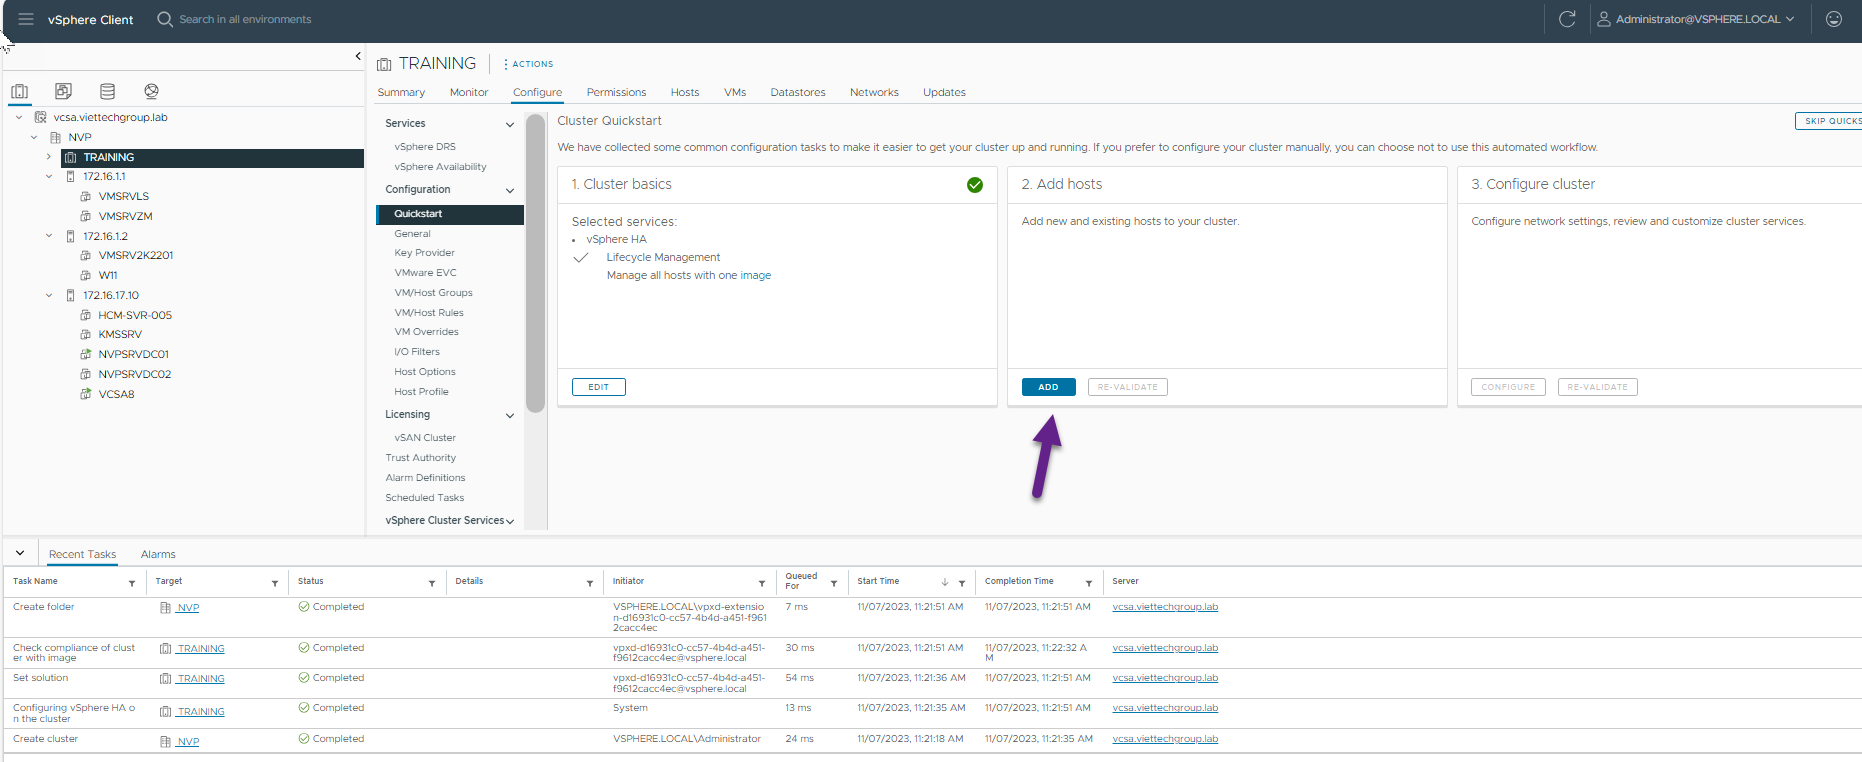
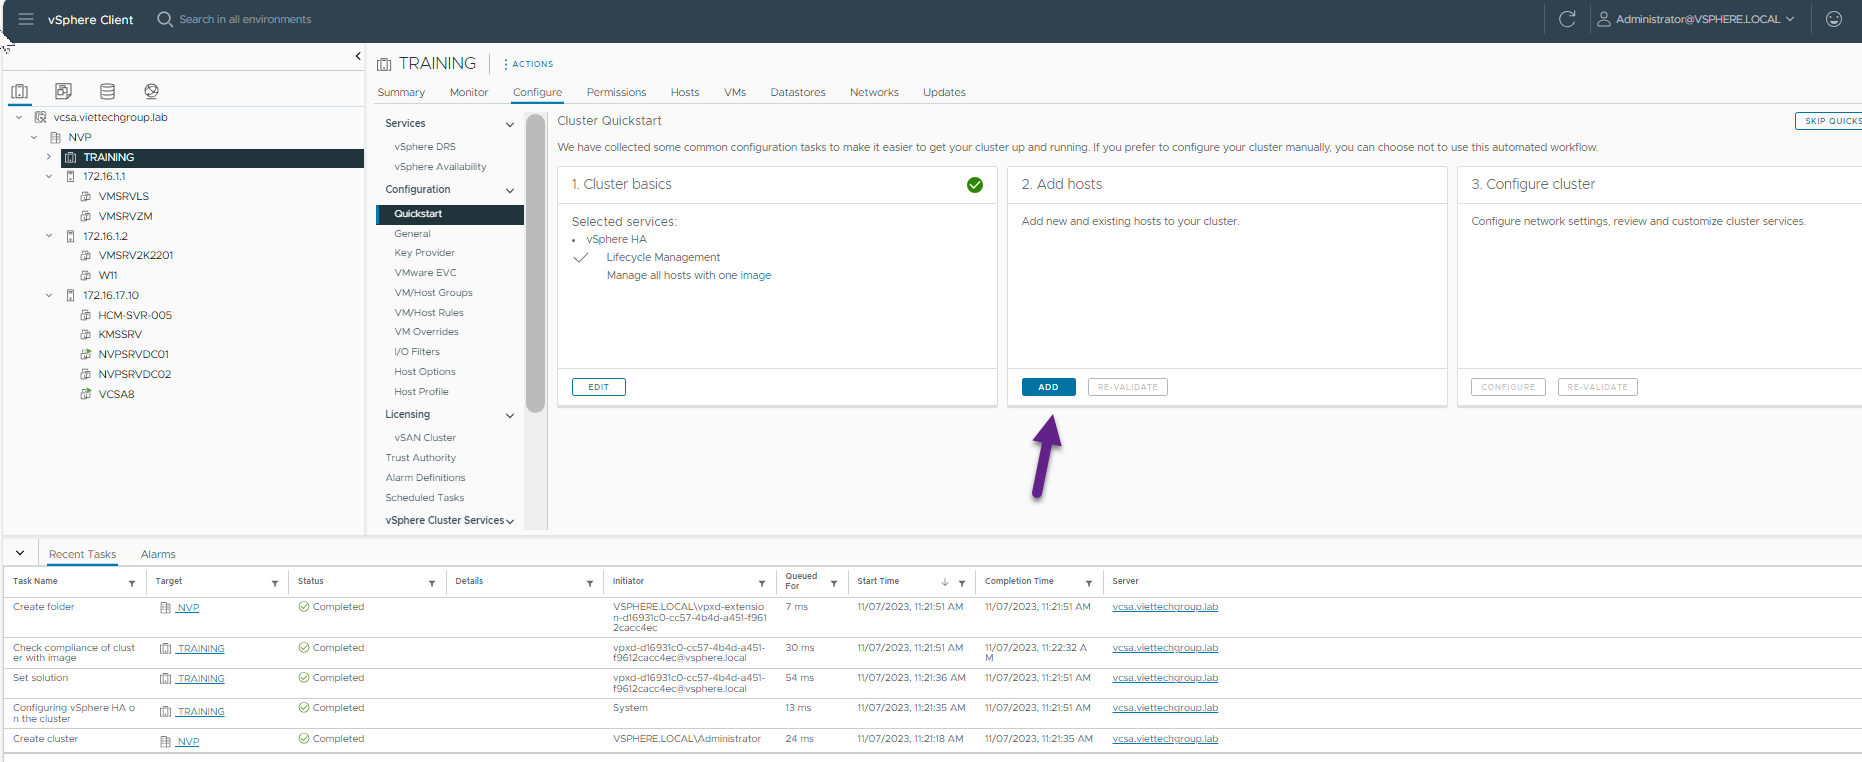
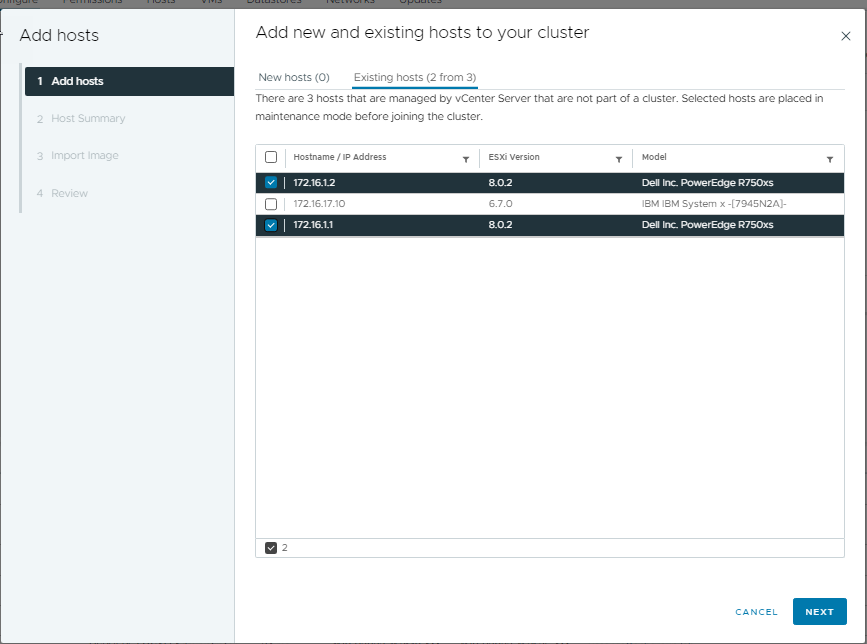
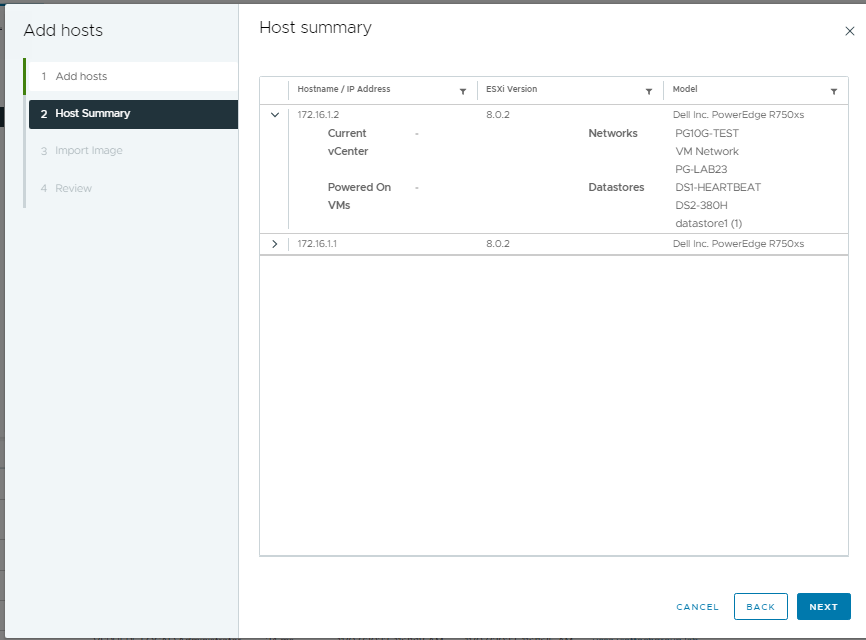
CÁCH TẠO DATACENTER VÀ ADD HOST VÀO VCENTER SERVER

CÁCH TẠO DATACENTER VÀ ADD HOST VÀO VCENTER

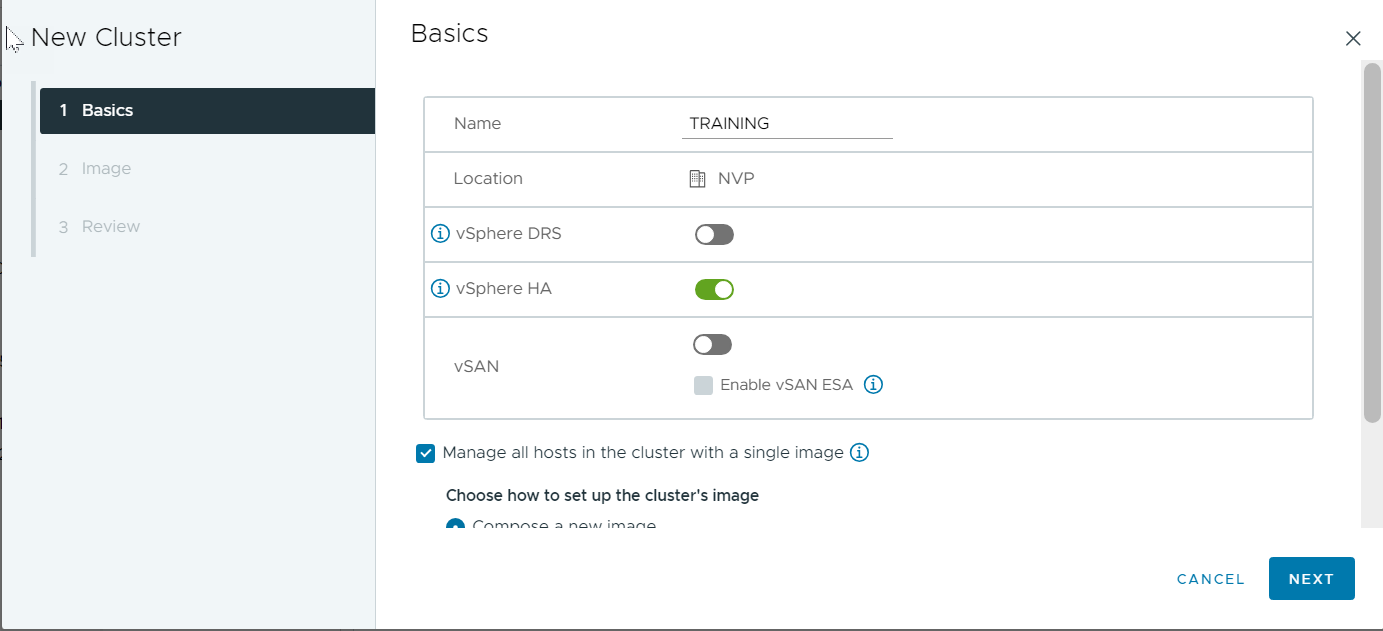
Tạo Datacenter

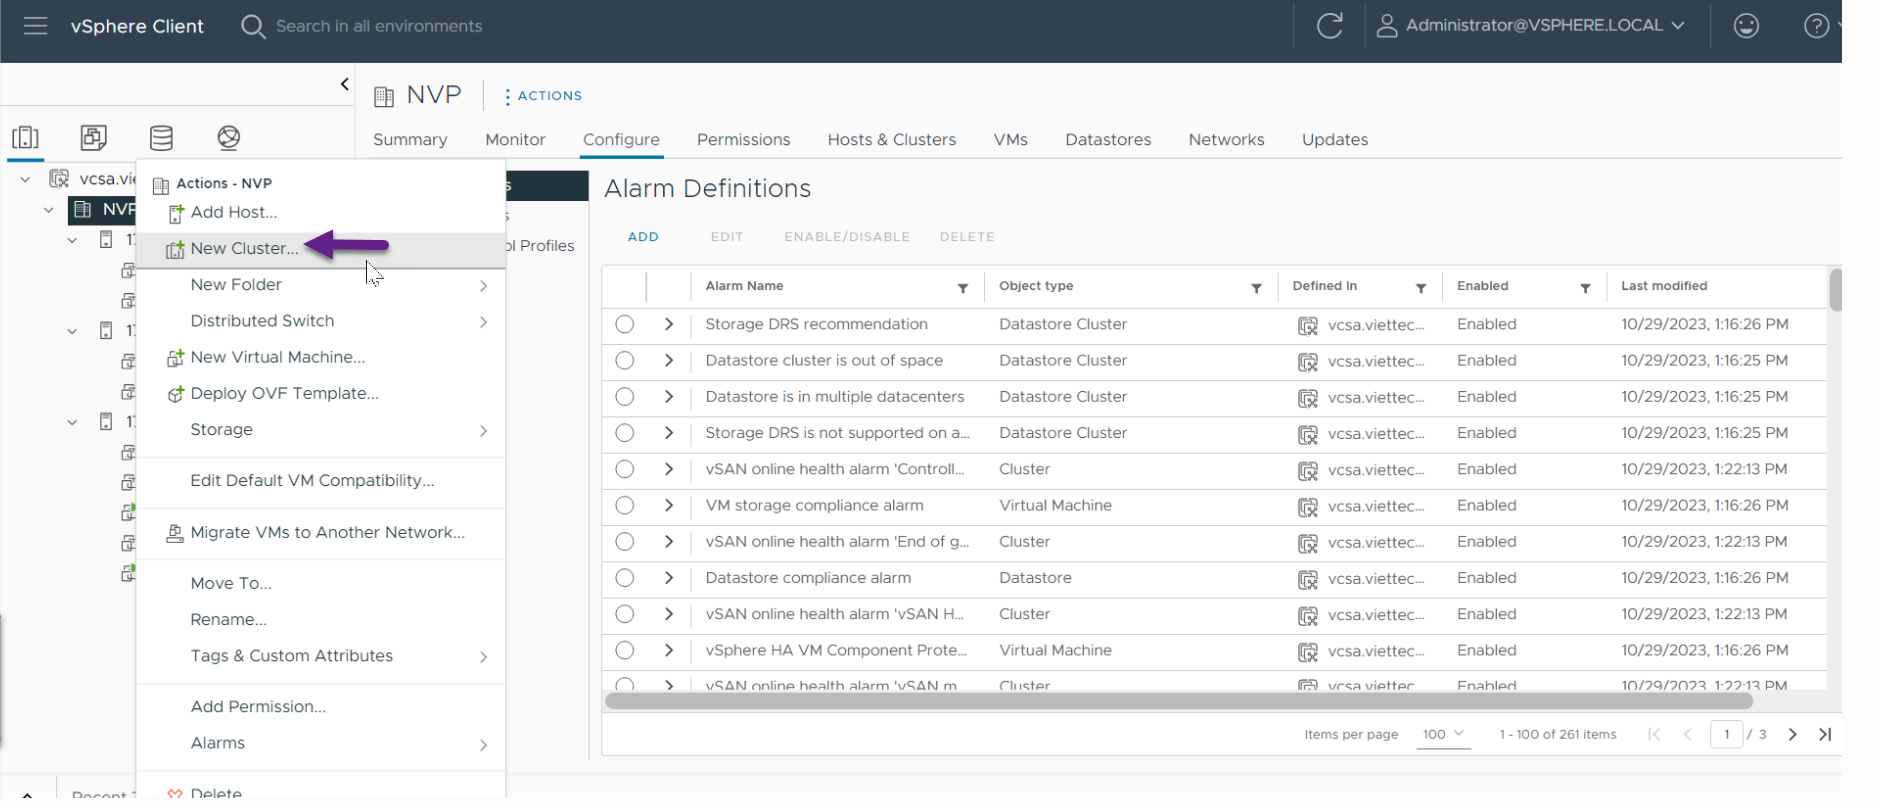
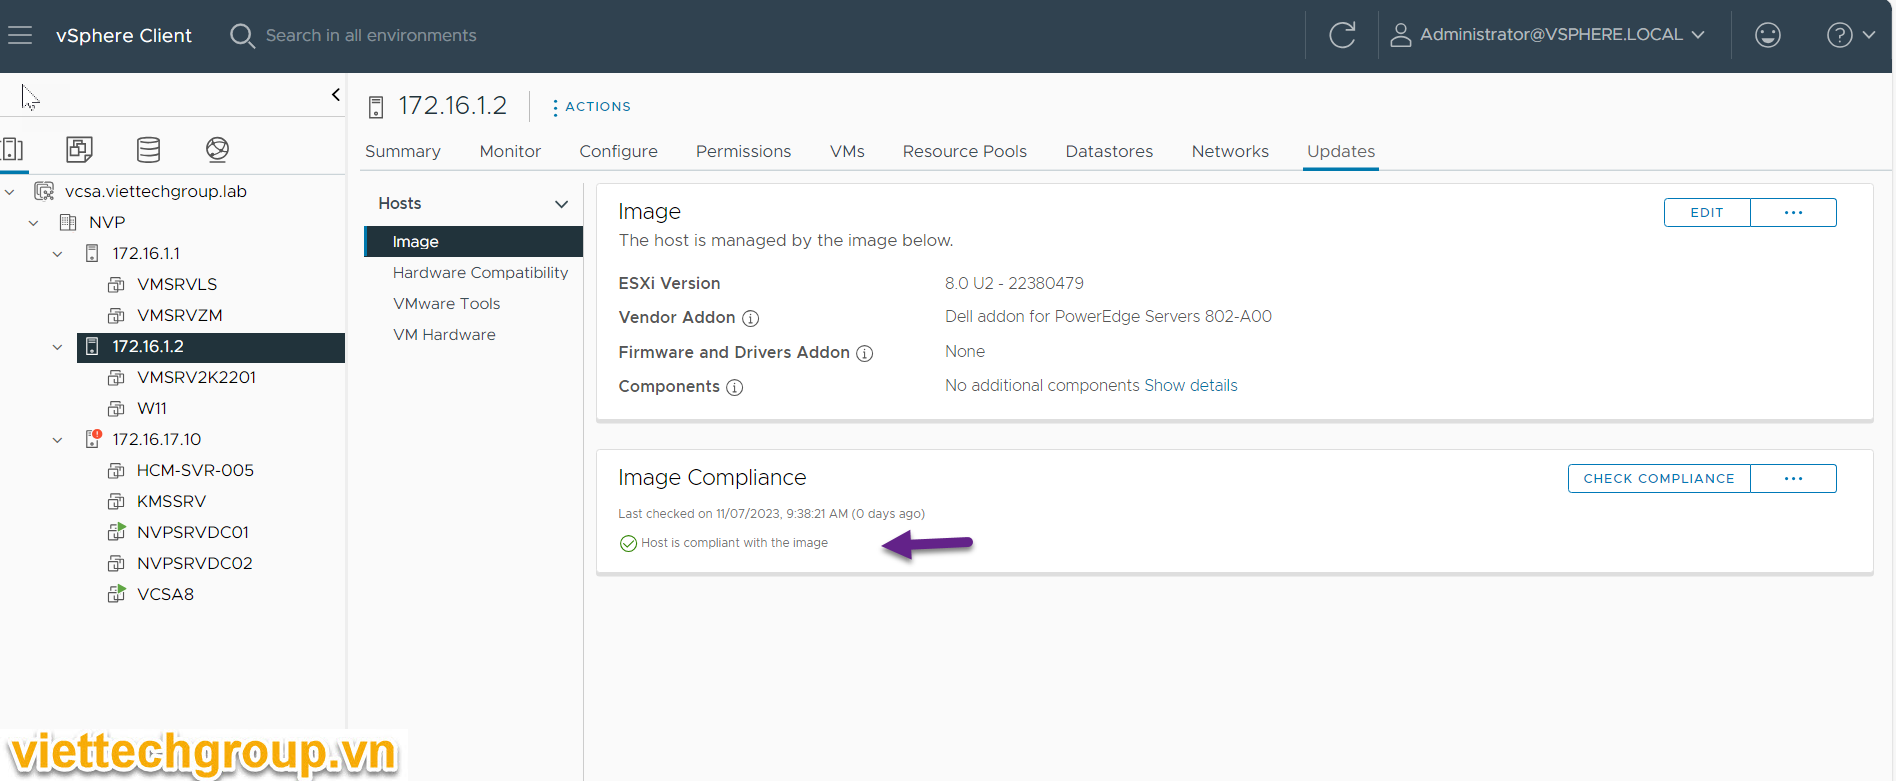
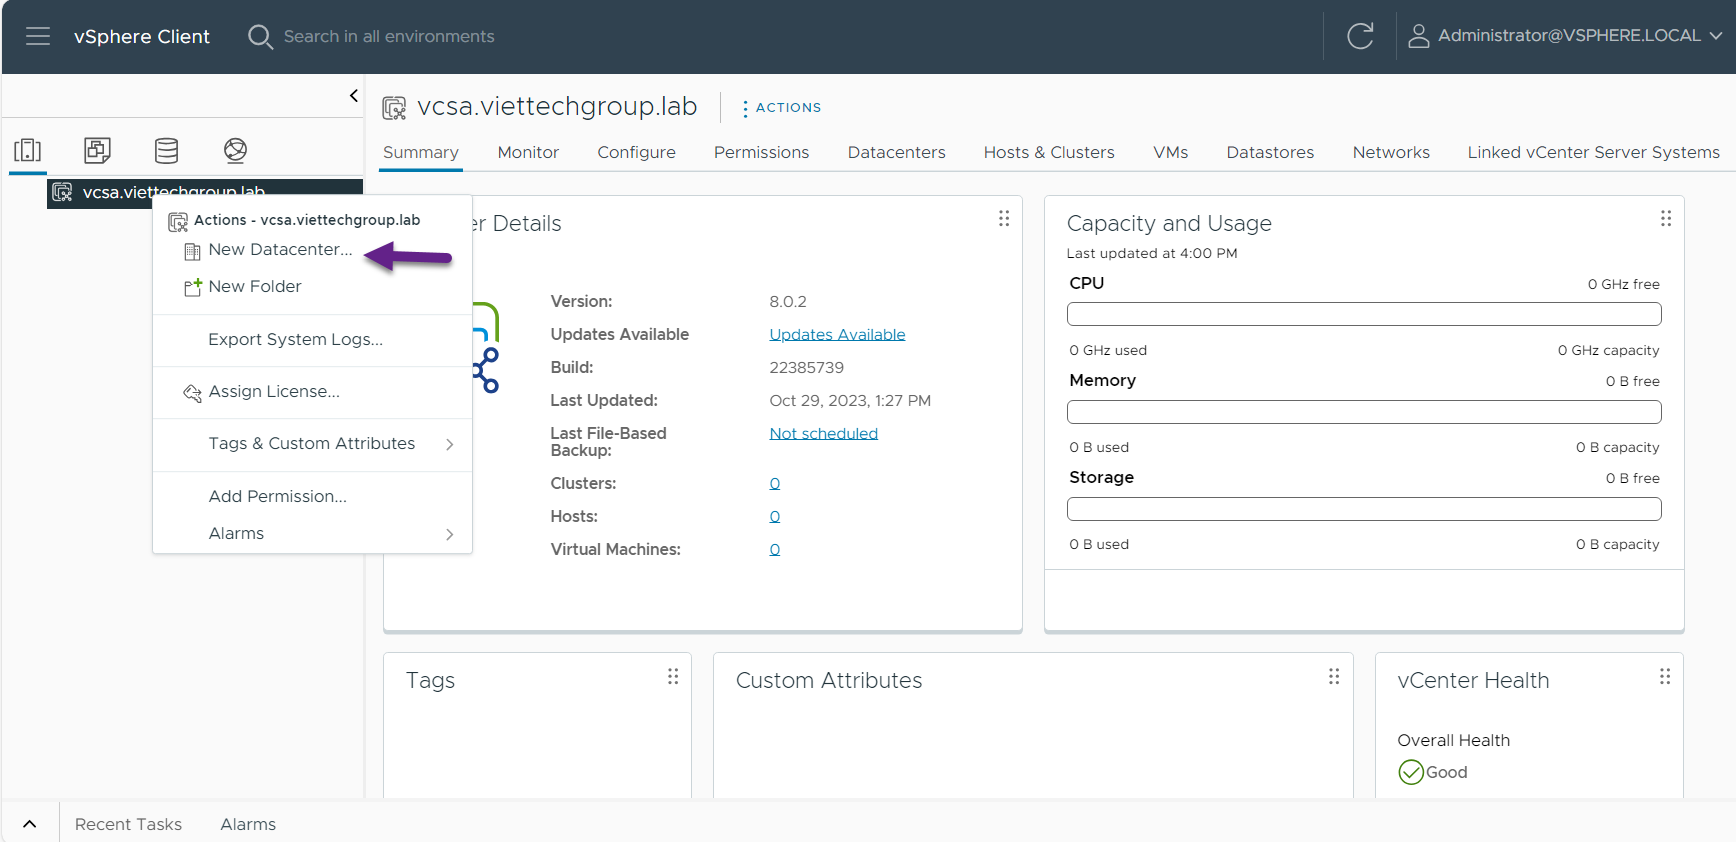
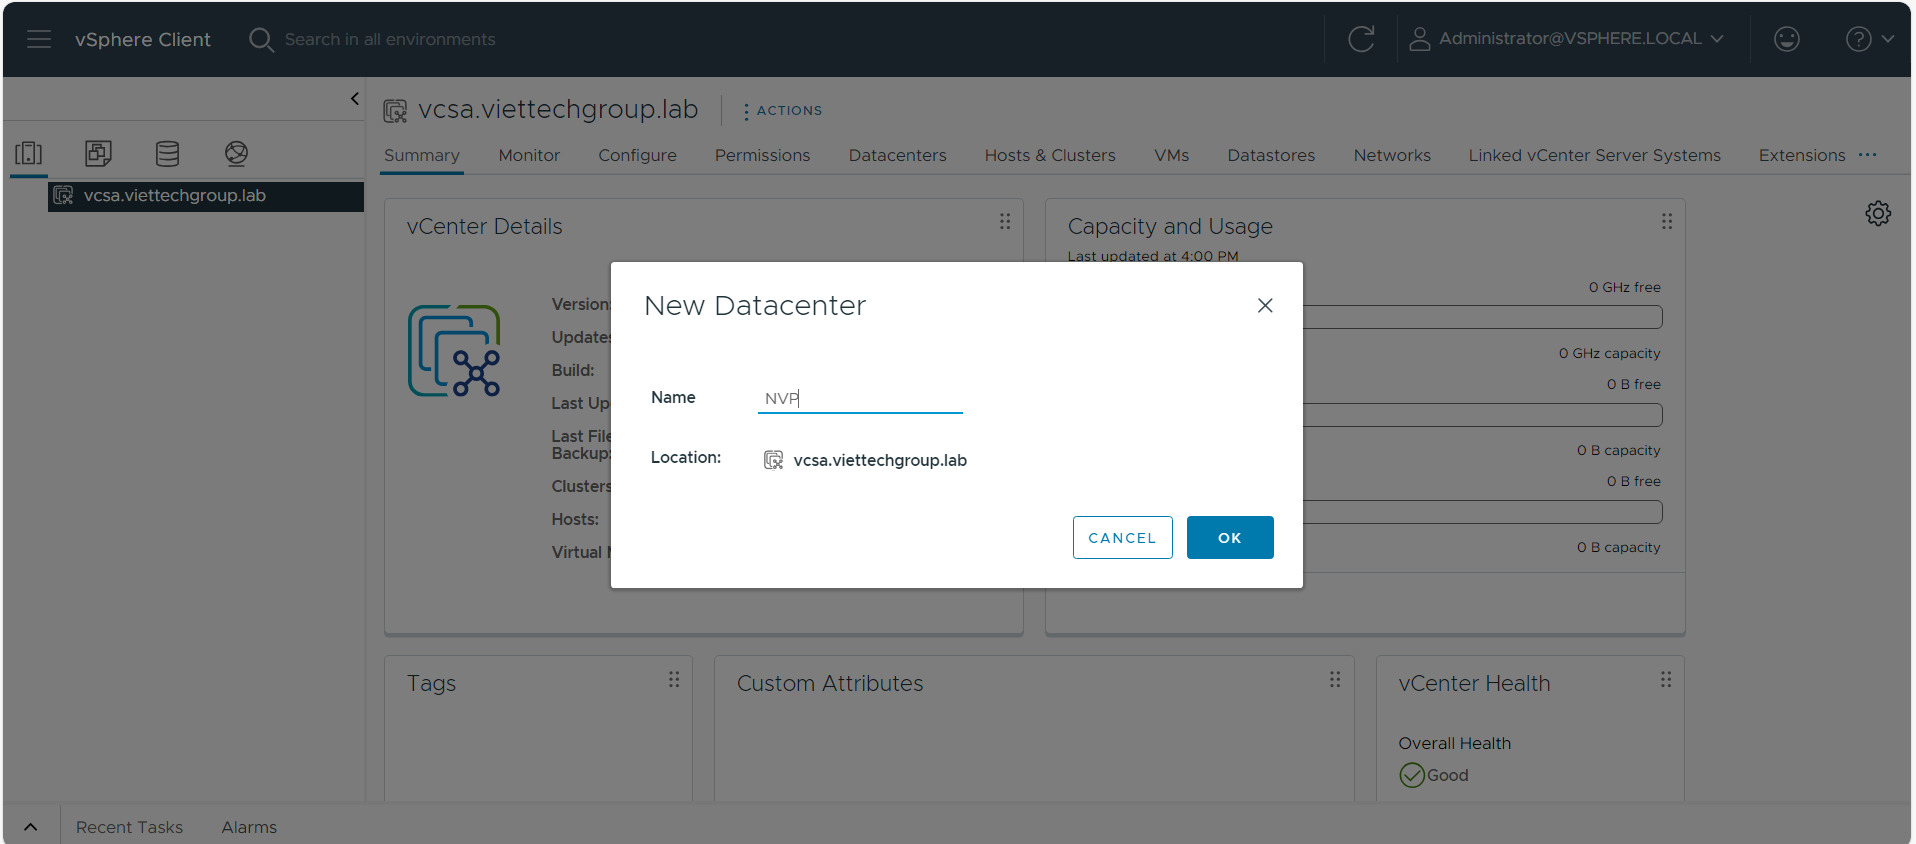
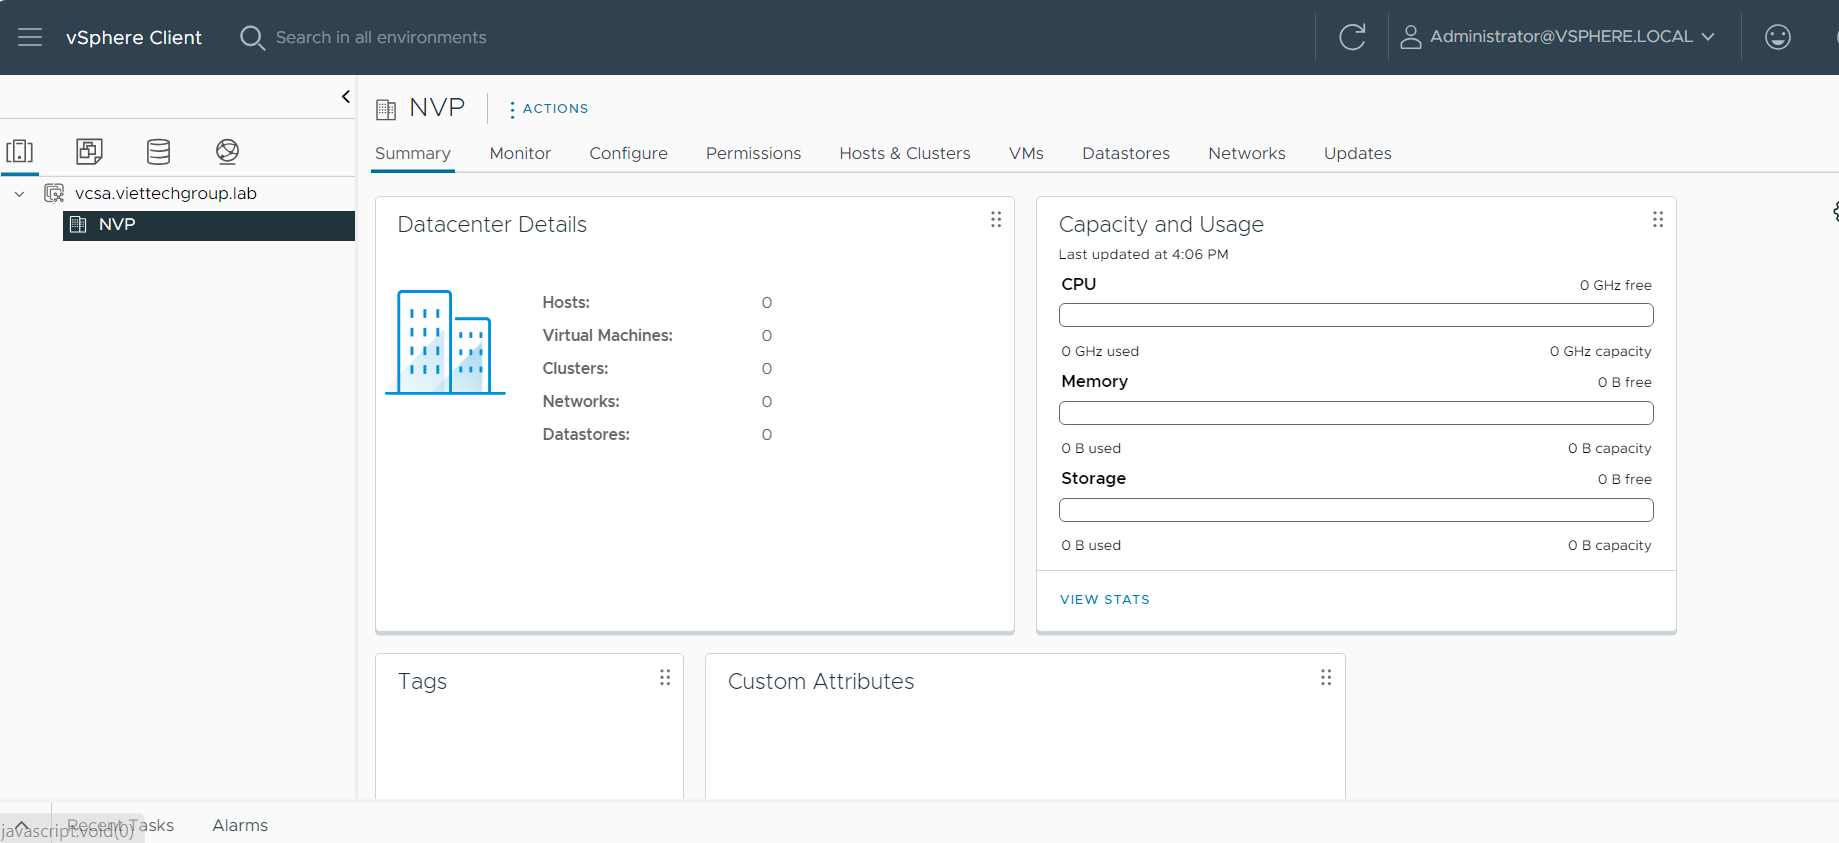
Chọn vào vcenter-> tạo new datacenter

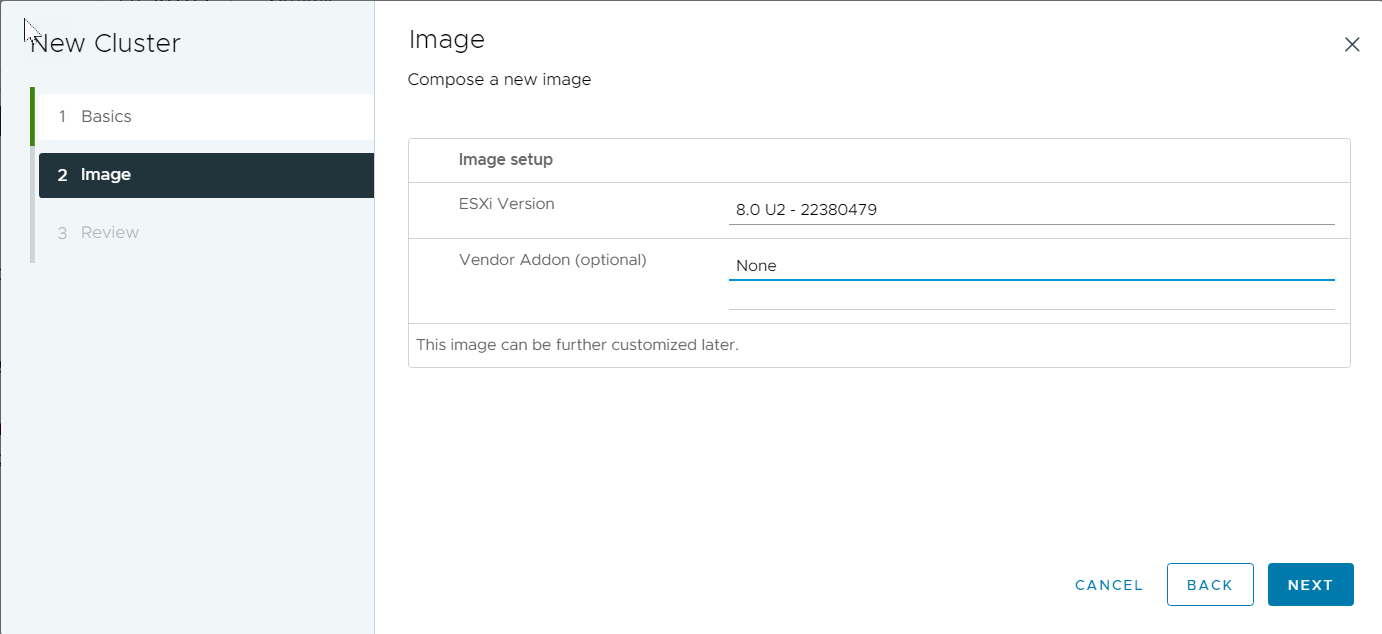
Cách thêm host vào vCenter

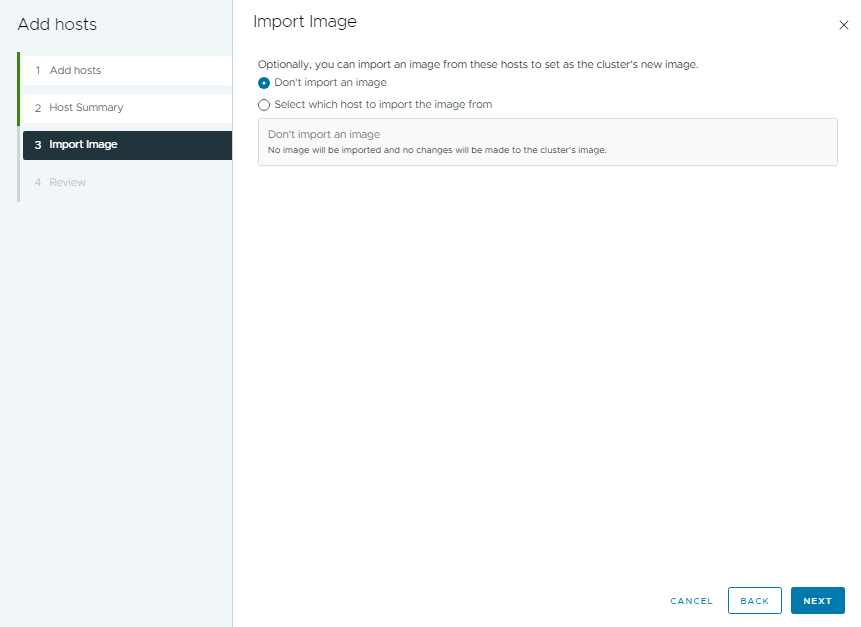
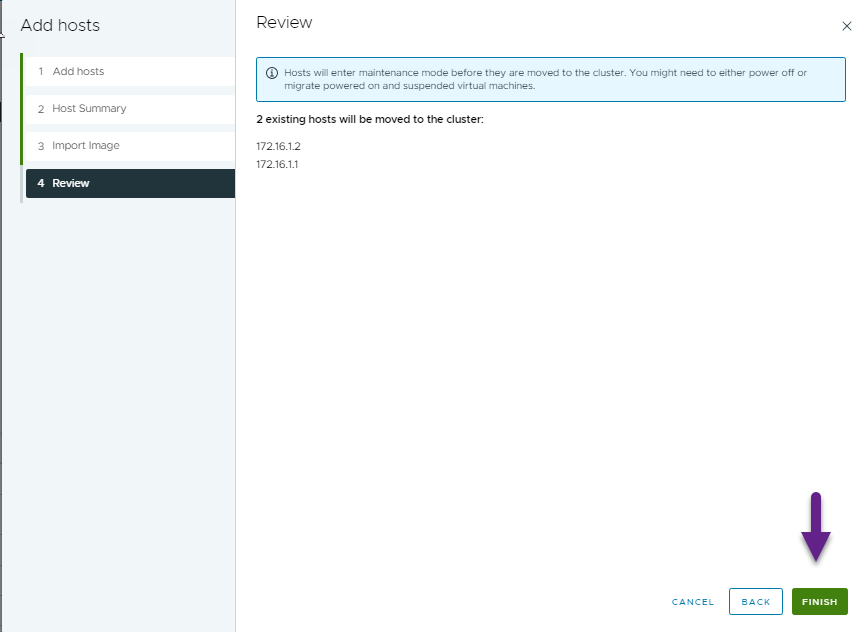
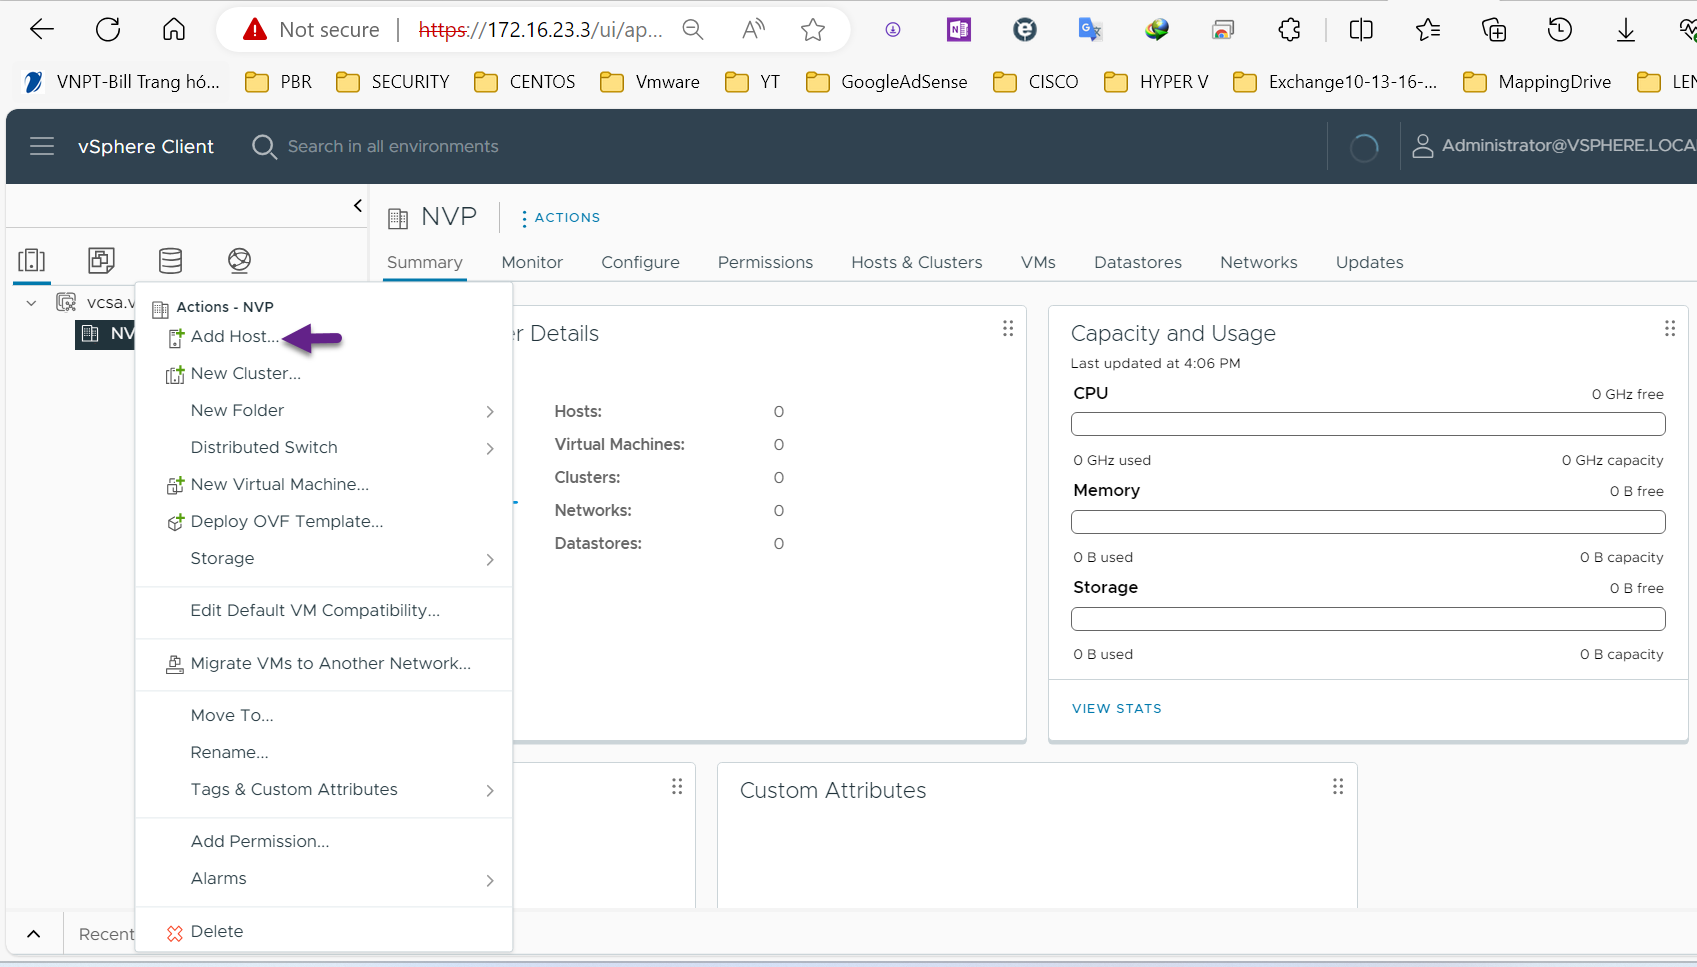
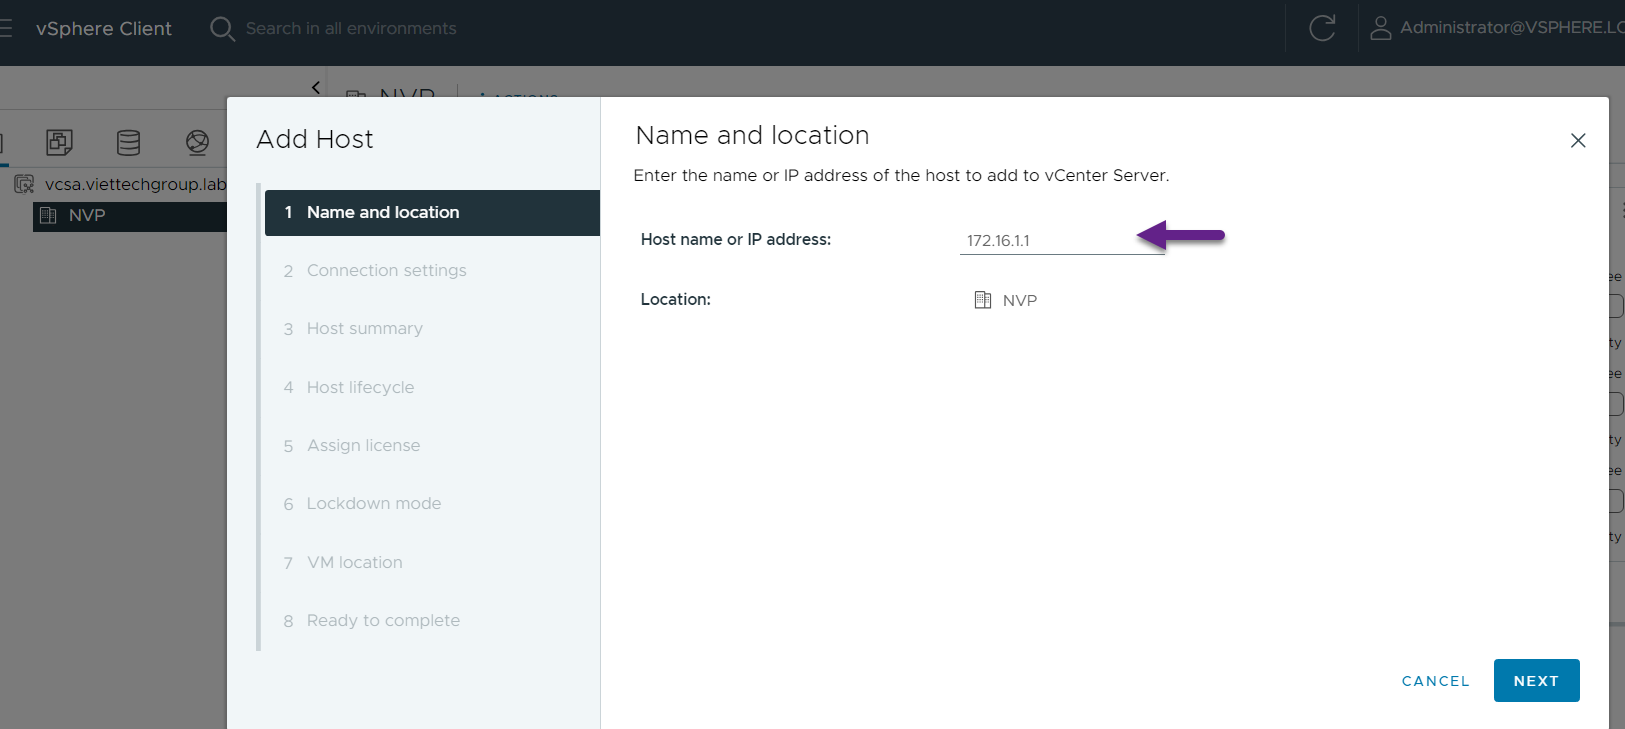
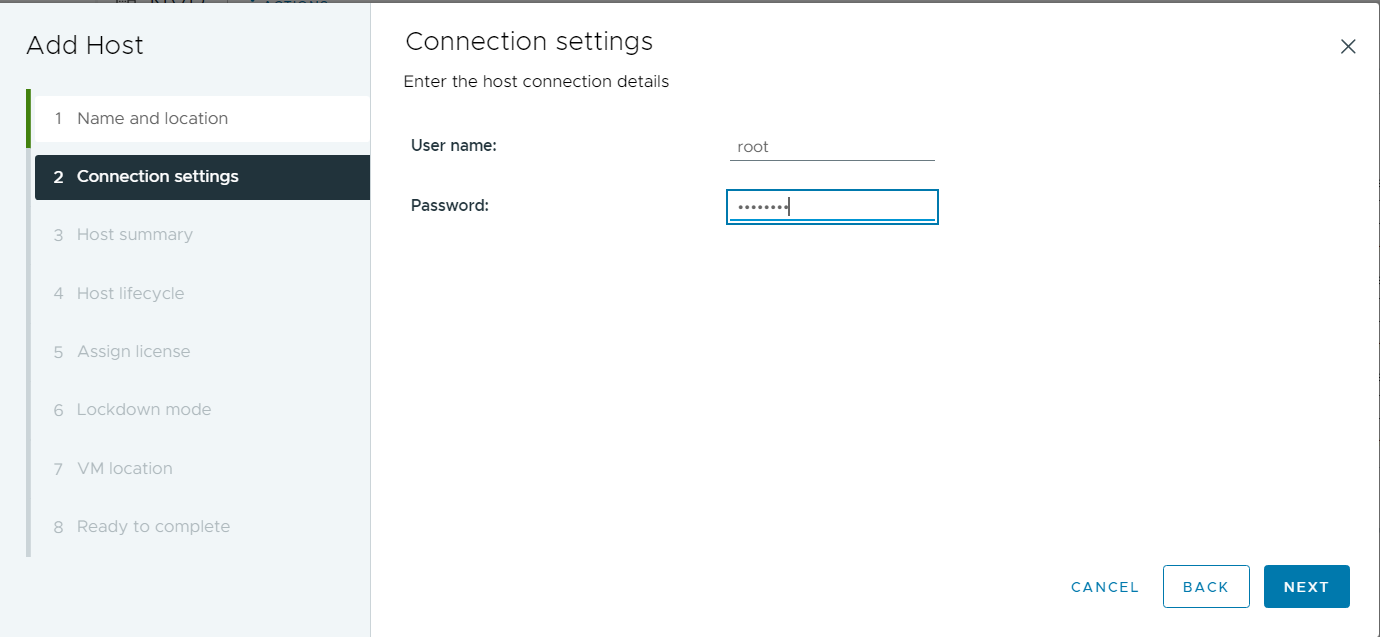
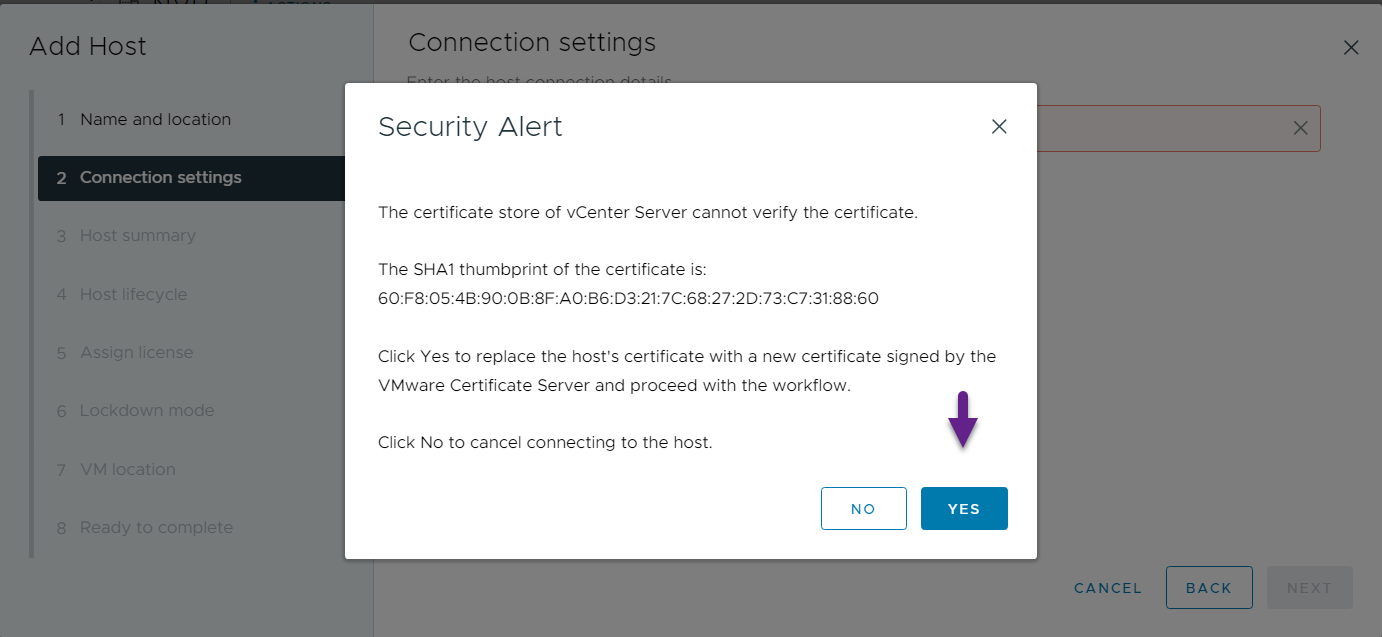
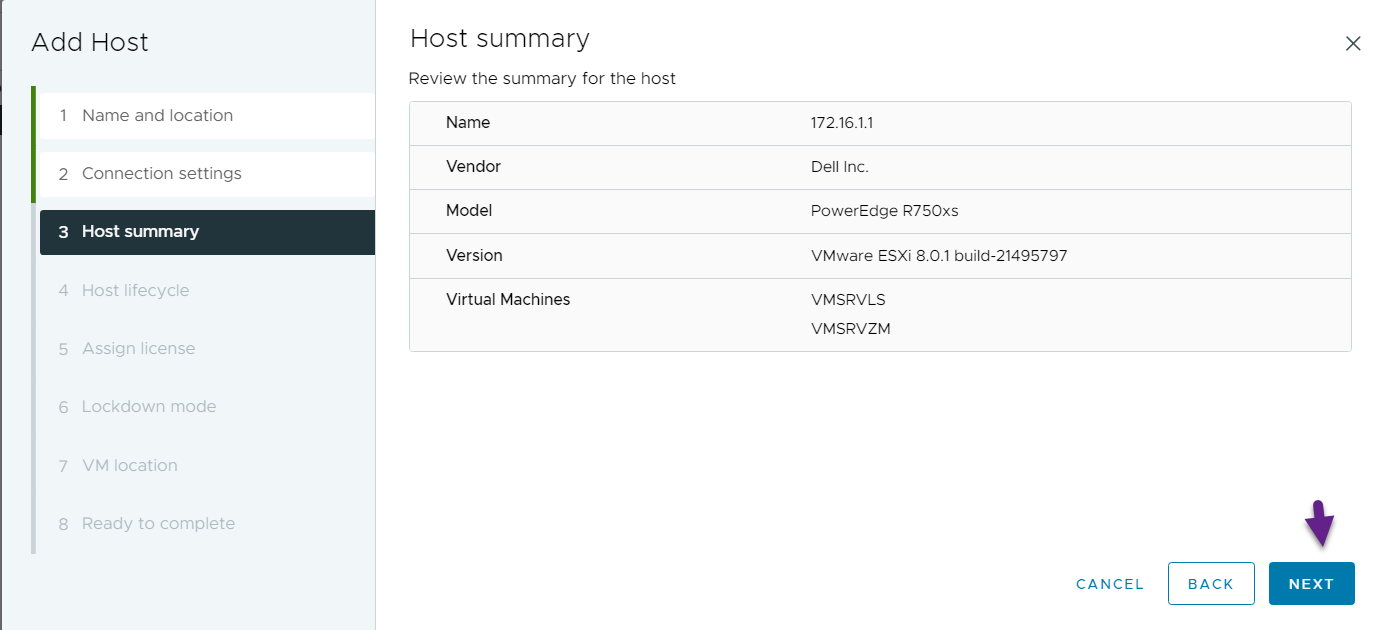
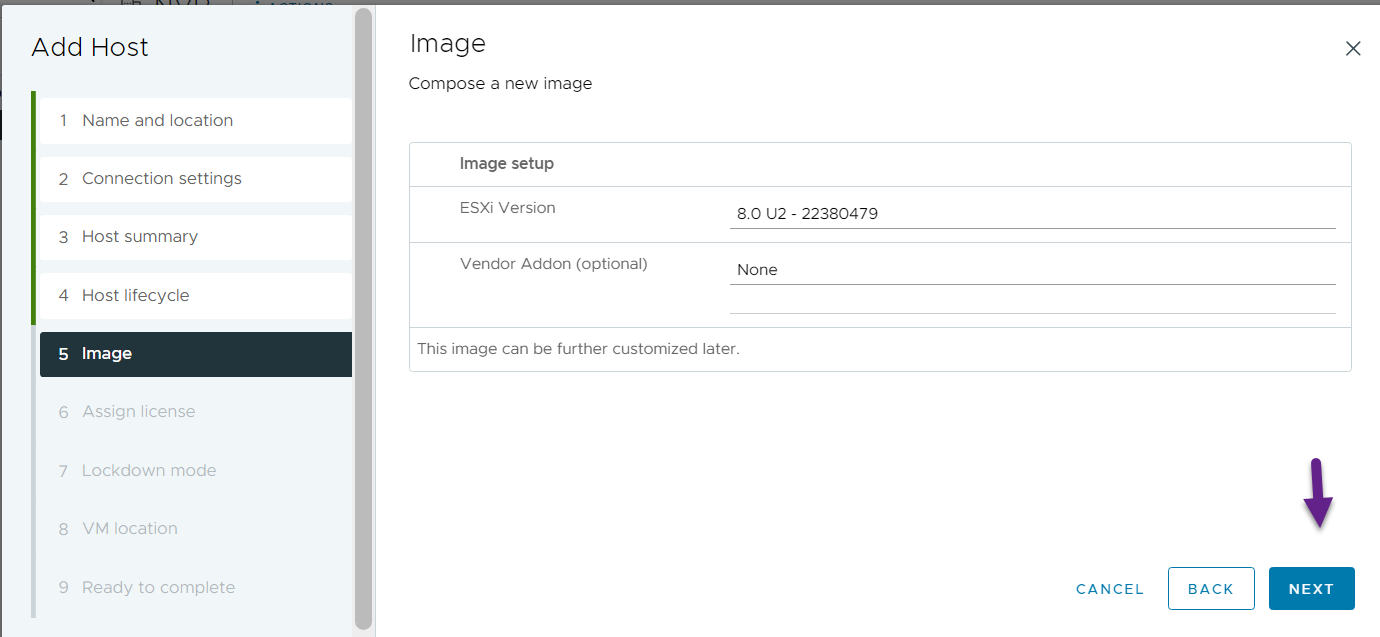
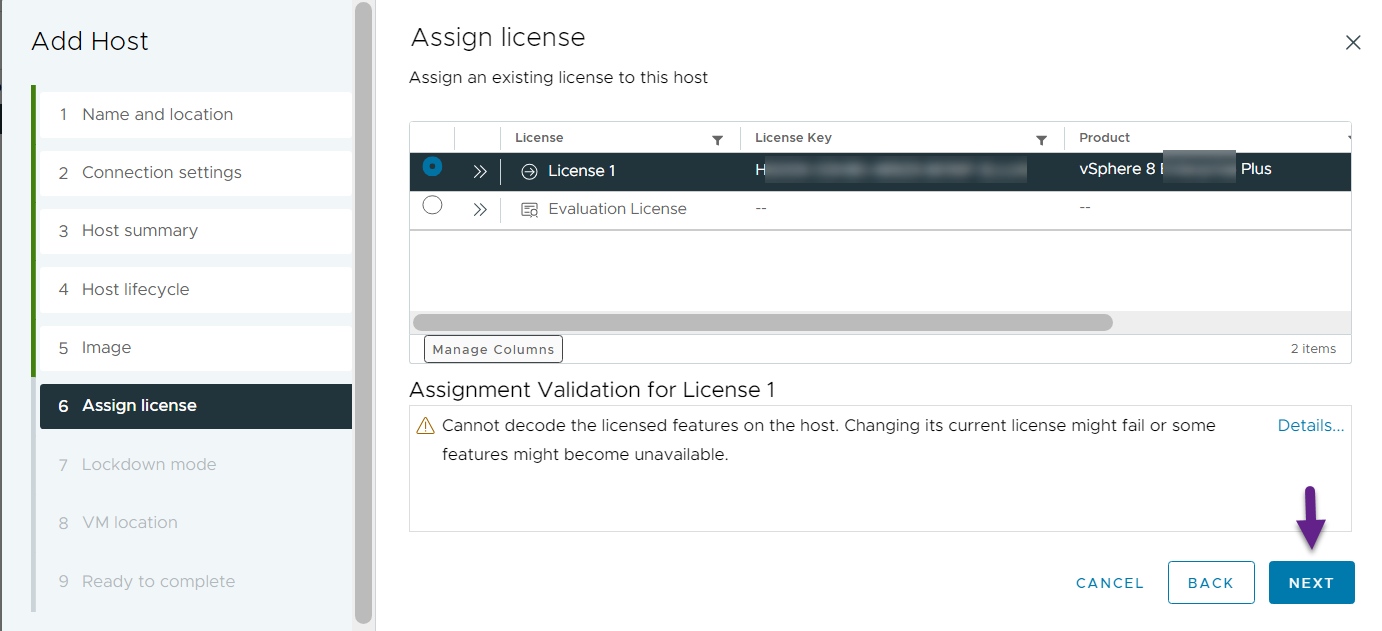
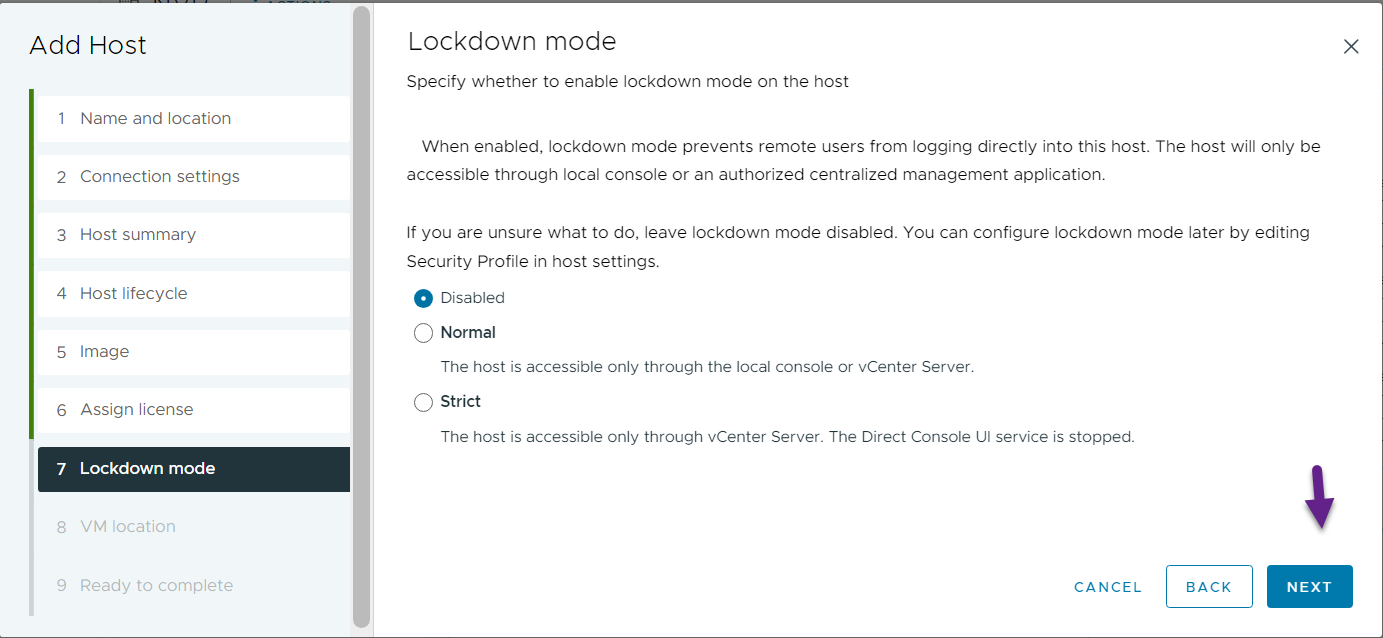
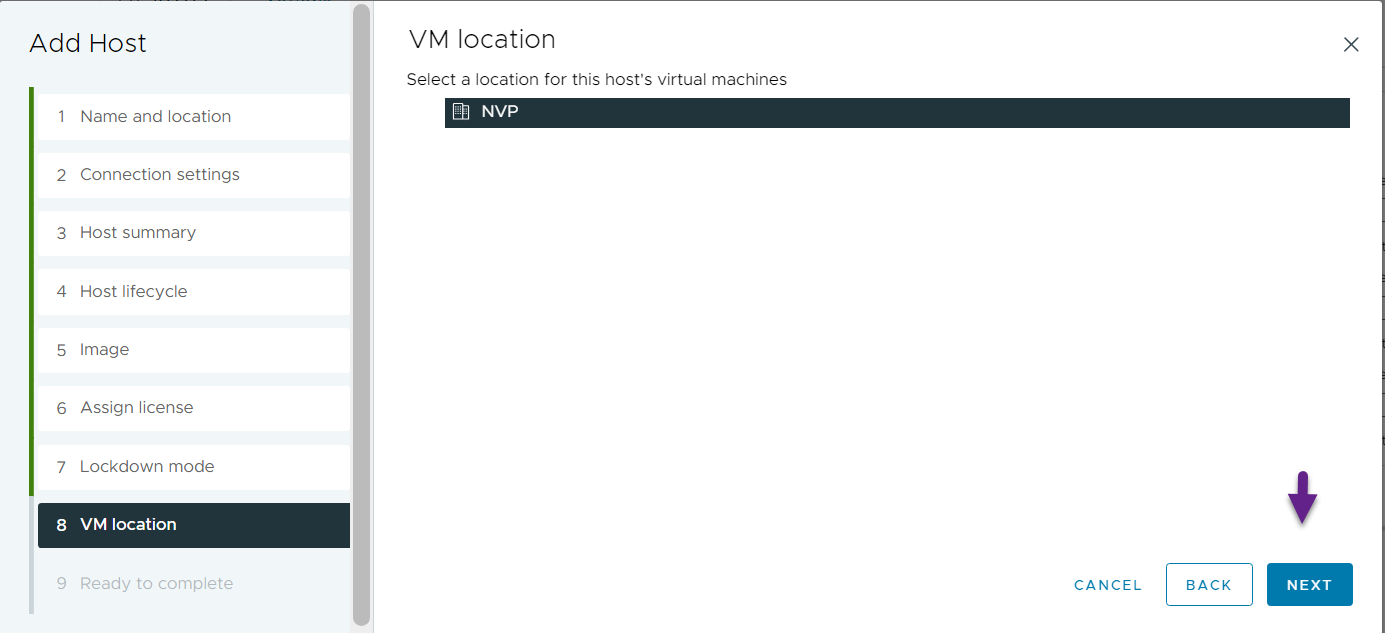
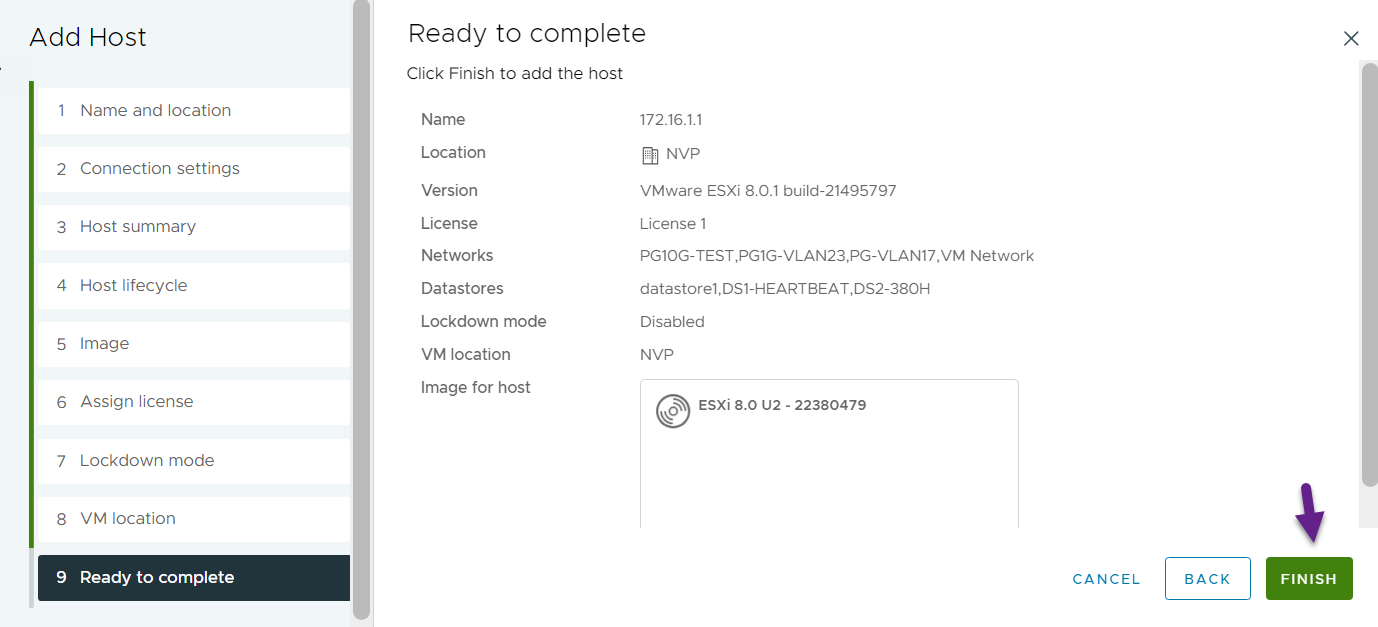
Phải chuột Datacenter-> Add host->Gỏ IP host cần thêm

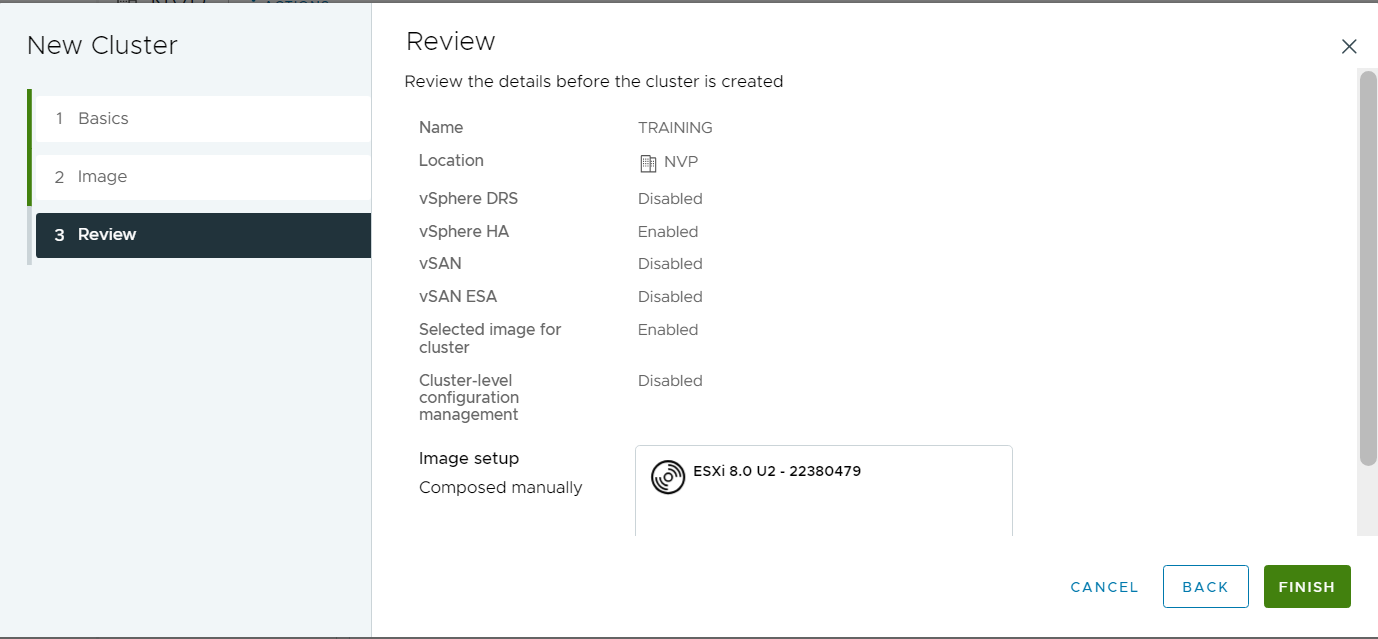
Nhập tài khoản root logon

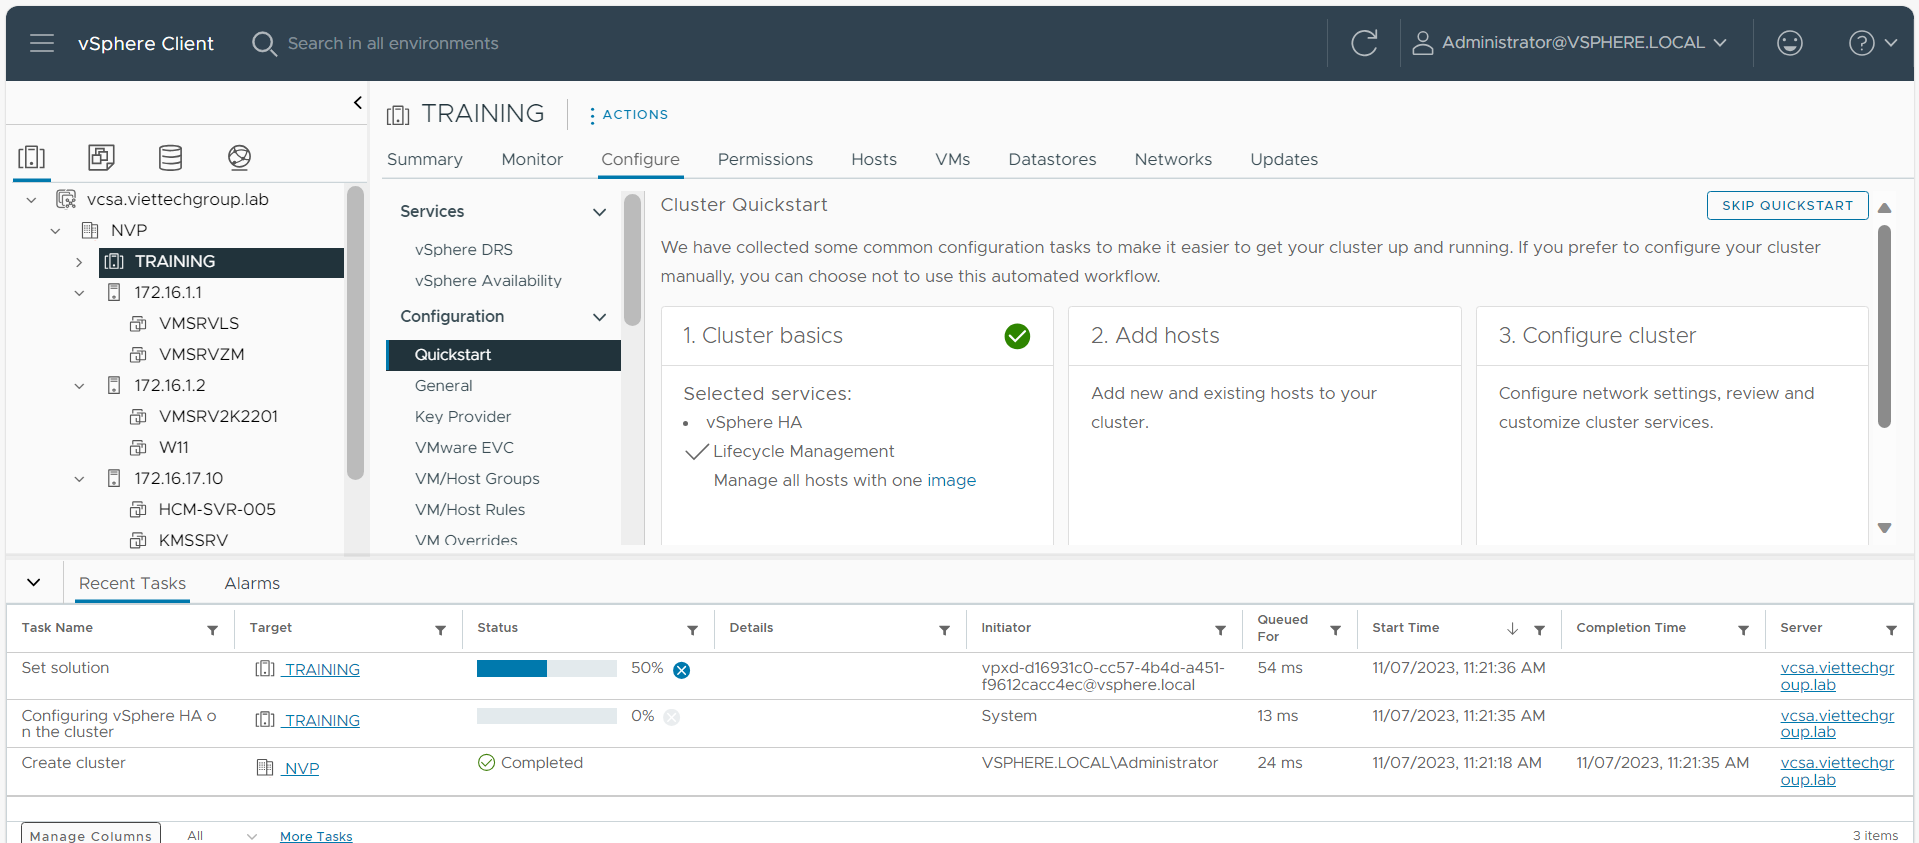
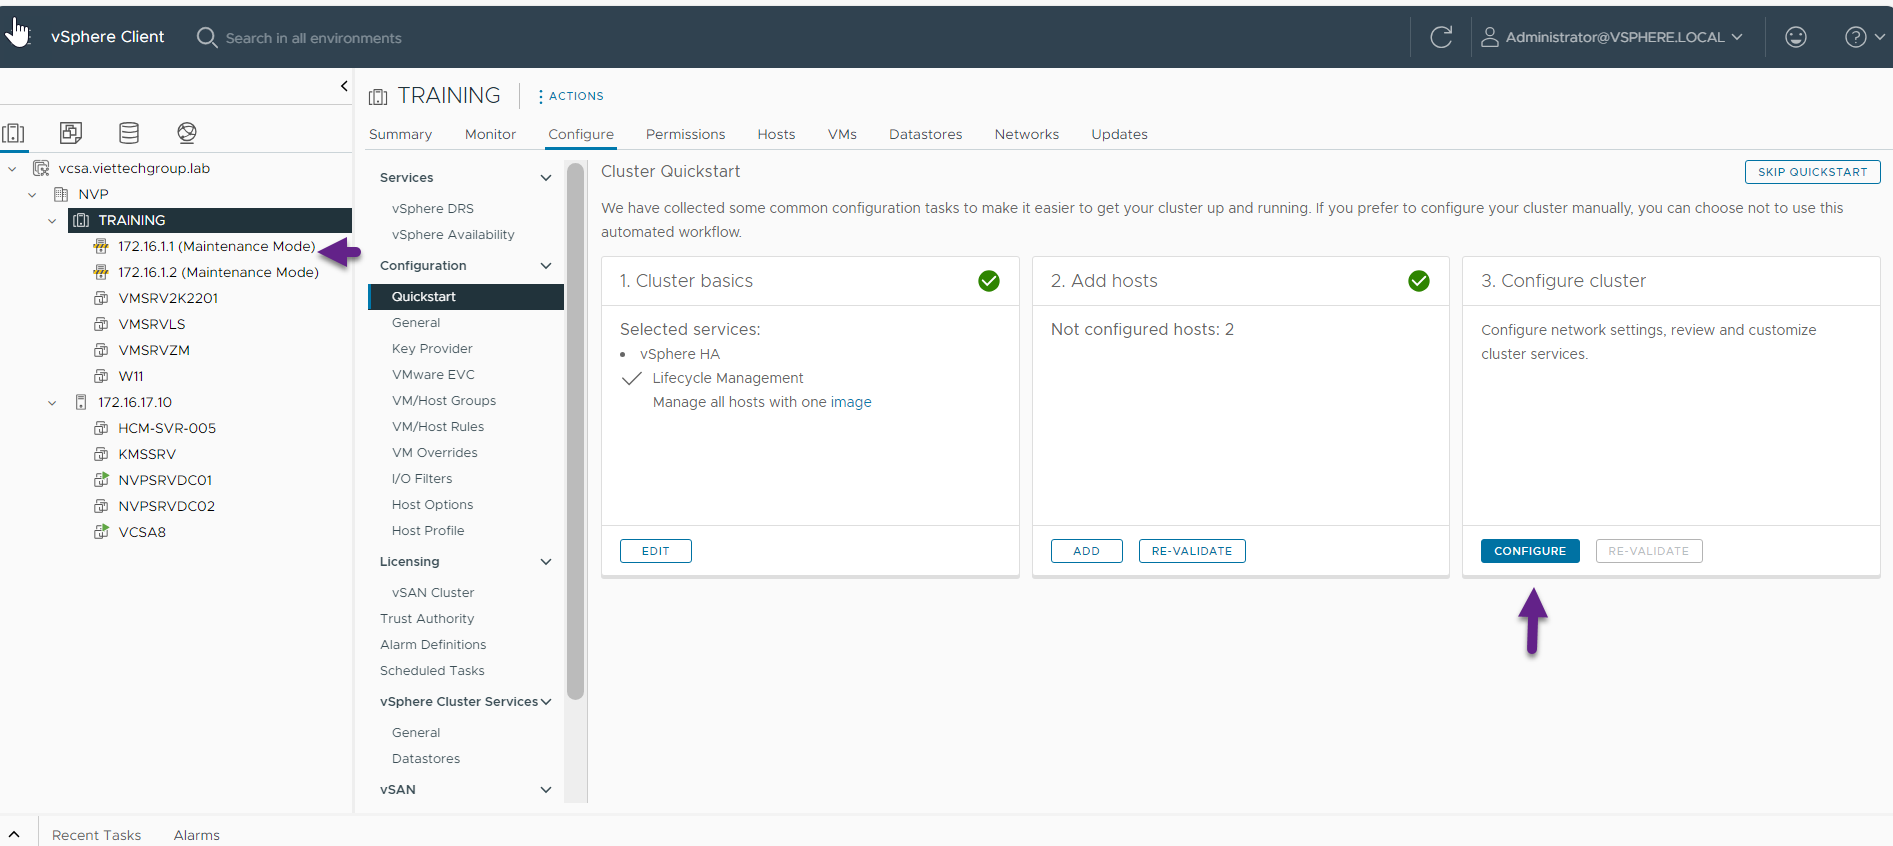
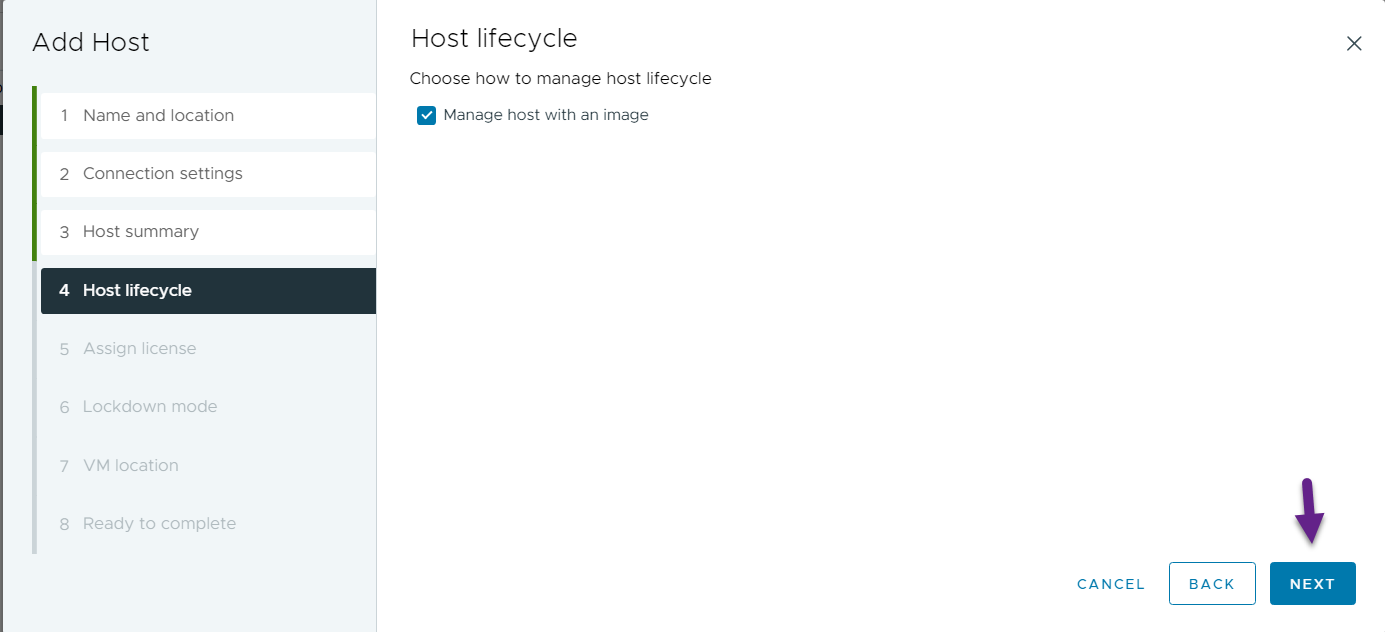
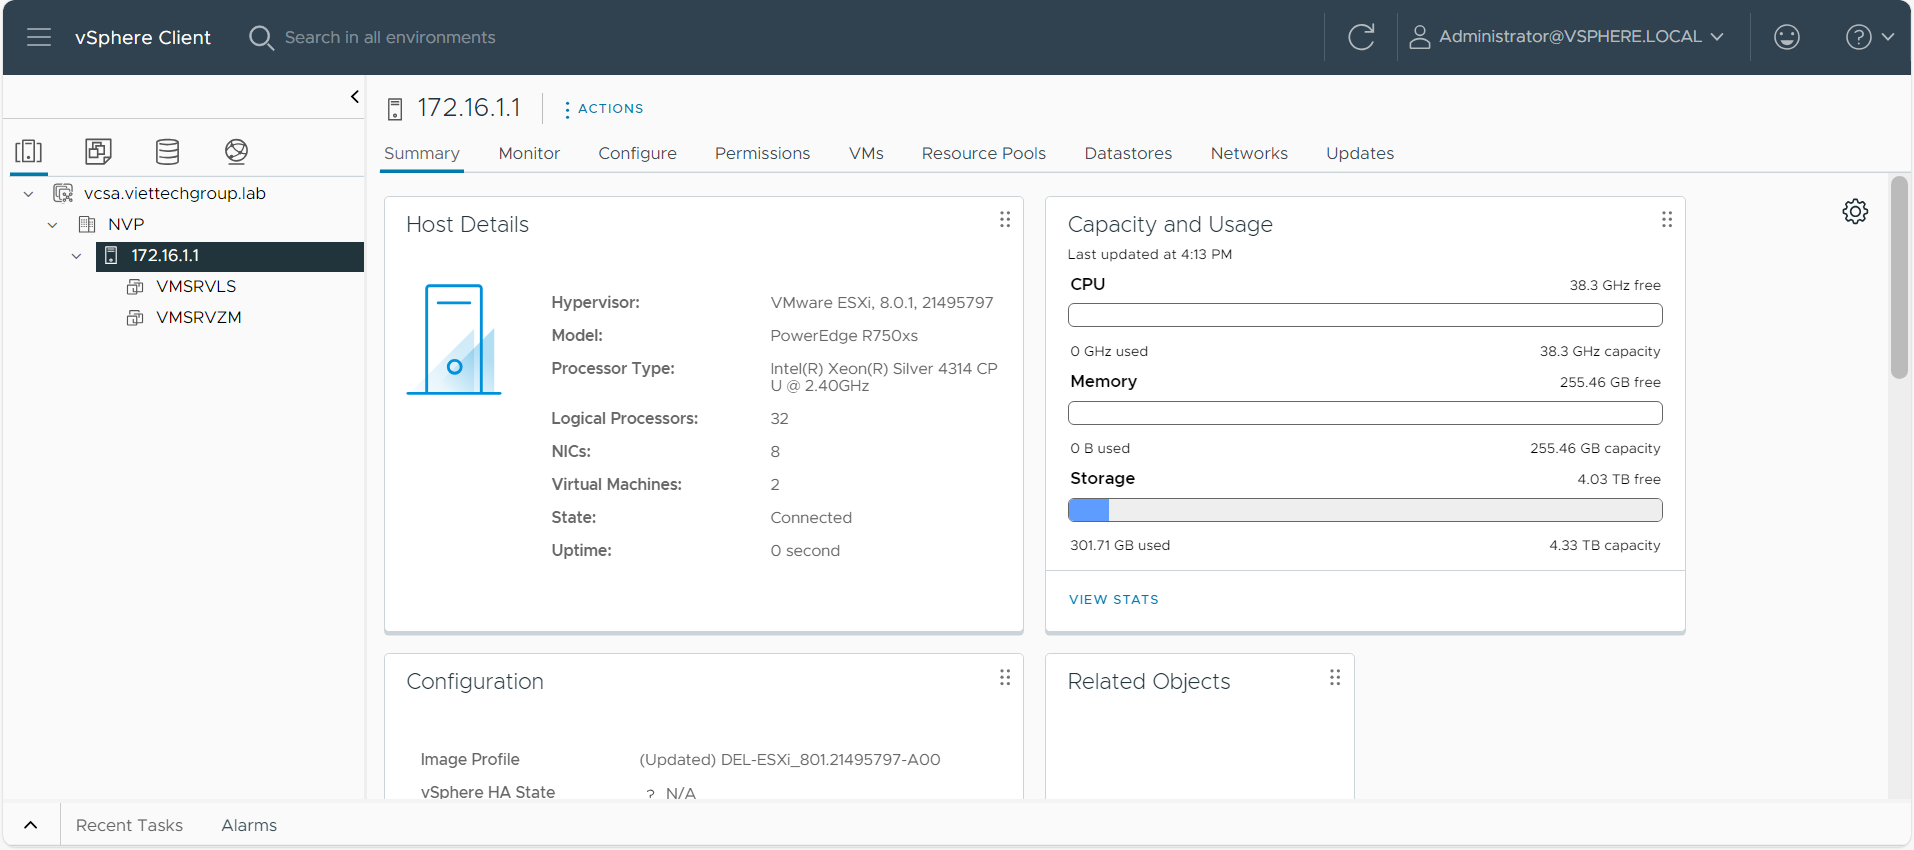
Như vậy add thành công vào vCenter

Chúc các bạn thành công

CÁCH XOÁ Distributed Virtual Switch trên Server ESXI host mất kết nối vCenter Server

Làm cách nào để dọn dẹp thủ công Công tắc ảo phân tán (VDS) trên máy chủ ESXi?

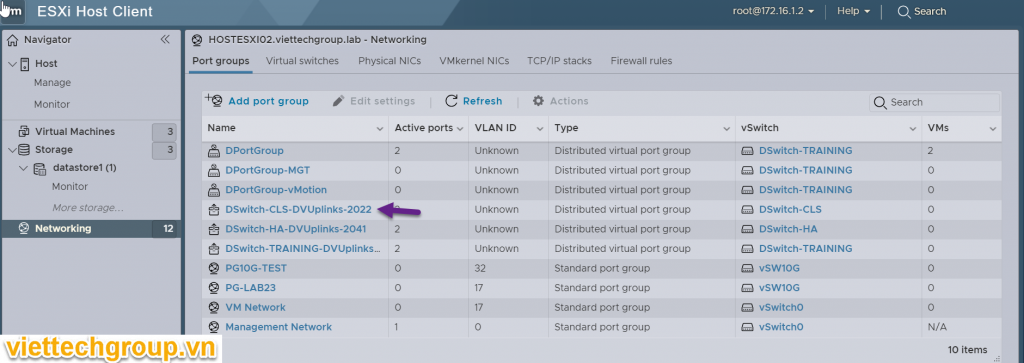
Nếu máy chủ ESXi được kết nối với Bộ chuyển mạch ảo phân tán-Distributed Virtual Switch (DVS) và bạn không thể xóa nó khỏi kho vCenter đúng cách, thao tác này sẽ dọn sạch VDS như một phần của quá trình xóa, thì bạn sẽ chỉ còn lại cấu hình VDS cũ. Nôm na bị mất kết nối vCenter và dạng trên host còn tồn tại các VDS trên host không xoá bằng vCenter được nên phải dùng cách này.

Tất nhiên, quy trình làm việc lý tưởng là dọn dẹp phần này trong vCenter Server nhưng nếu bạn bị mất quyền truy cập hoặc Máy chủ vCenter đã bị xóa và bạn có thể tự hỏi làm cách nào để dọn dẹp phần này theo cách thủ công?

Bước 0 – Đảm bảo rằng không có máy ảo hoặc giao diện VMKernel nào đang sử dụng tài nguyên DVS và Nhóm cổng phân phối (DVPG). Tạo lại vSphere Standard Switch (VSS) và các nhóm cổng tương ứng, đồng thời cấu hình lại các máy ảo và giao diện VMKernel của bạn trước khi tiếp tục. Nếu bạn cần hỗ trợ, vui lòng tìm kiếm trực tuyến vì có nhiều tài nguyên nêu rõ các bước này và điều này sẽ không được đề cập trong bài viết này.
Lưu ý: Về lý thuyết, sau Bước 0, về mặt kỹ thuật, bạn có thể chuyển sang Bước 5 và chỉ cần xóa cơ sở dữ liệu VDS nhưng tôi muốn dọn sạch tài nguyên trước bước đó nhưng điều này cũng có tác dụng nếu bạn đang gặp khó khăn.

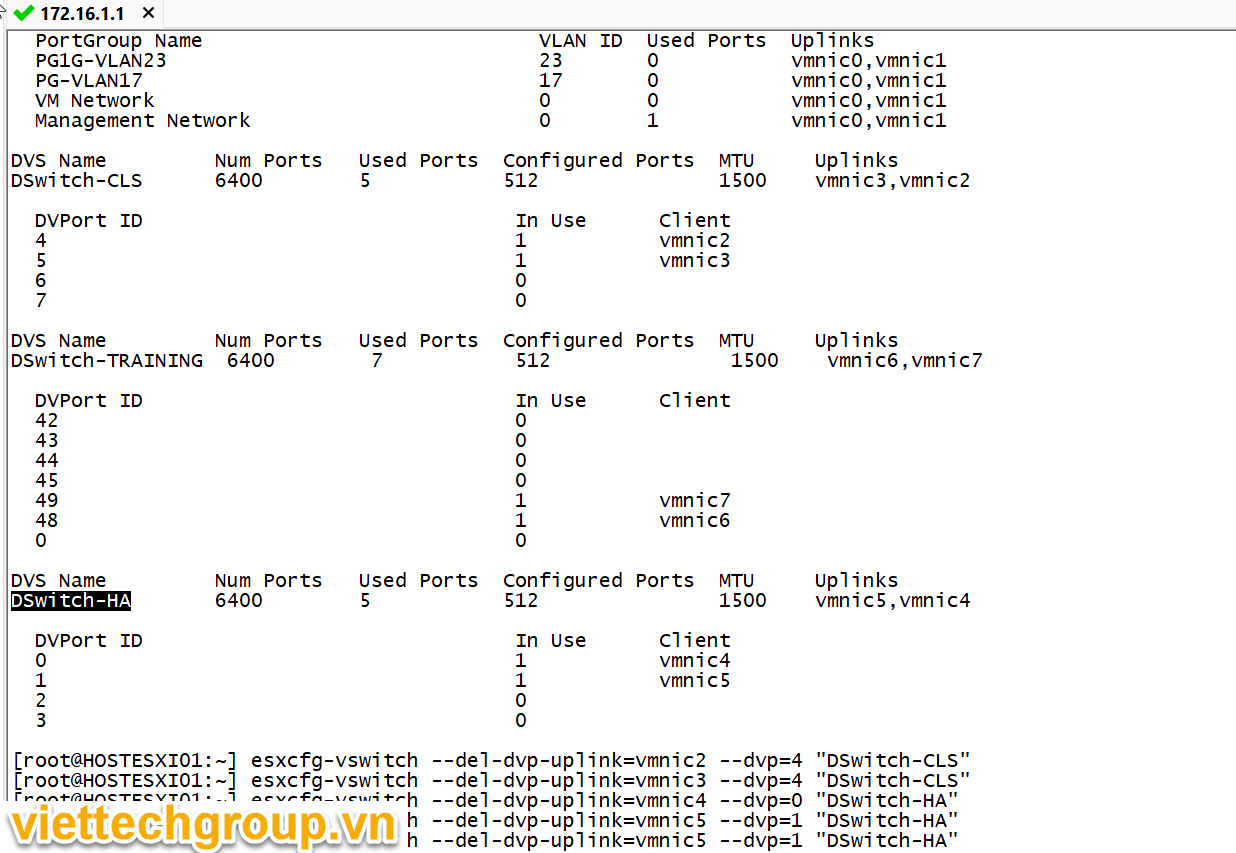
Bước 1 – Chạy lệnh sau để liệt kê VDS hiện tại và các cổng đường lên liên quan đã được định cấu hình. Trong ví dụ bên dưới, tôi có một VDS có tên foo với một đường lên vmnic1 đang sử dụng cổng 9 . Môi trường của bạn có thể được định cấu hình khác nhau, vì vậy vui lòng ghi lại những giá trị này vì bạn sẽ cần nó trong các bước tiếp theo.

esxcfg-vswitch -l

Bước 2 – Xóa đường lên khỏi VDS bằng cách chạy lệnh sau và chỉ định đường lên, cổng đường lên và tên VDS.

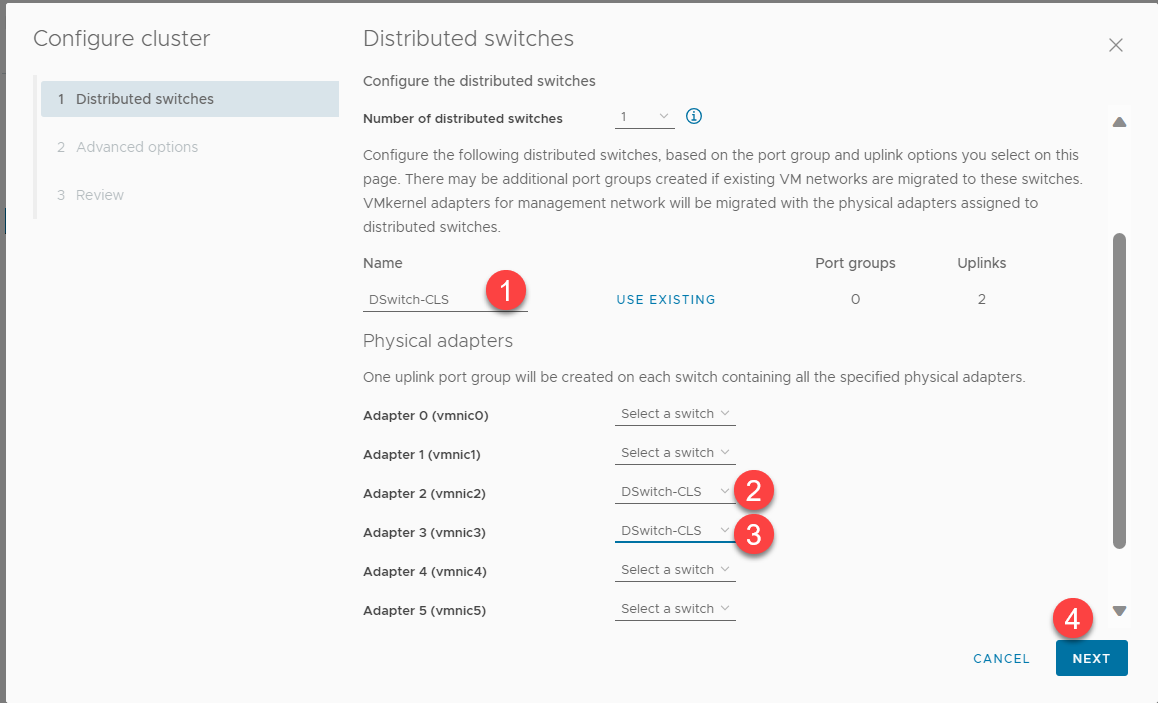
esxcfg-vswitch –del-dvp-uplink=vmnic2 –dvp=4 “DSwitch-CLS”

[root@HOSTESXI 01:~ ] esxcfg-vswitch –del-dvp-uplink=vmnic2 –dvp=4 “DSwitch-CLS”

[root@HOSTESXI 01:~ ] esxcfg-vswitch –del-dvp-uplink=vmnic3 –dvp=4 “DSwitch-CLS”

[root@HOSTESXI 01:~ ] esxcfg-vswitch –del-dvp-uplink=vmnic4 –dvp=0 “DSwitch-HA”

[root@HOSTESXI 01:~ ] esxcfg-vswitch –del-dvp-uplink=vmnic5 –dvp=1 “DSwitch-HA”

[root@HOSTESXI 01:~ ] esxcfg-vswitch –del-dvp-uplink=vmnic7 –dvp=49 “DSwitch-TRAINING”

[root@HOSTESXI 01:~ ] esxcfg-vswitch –del-dvp-uplink=vmnic6 –dvp=48 “DSwitch-TRAINING”

Bước 3 – Xóa VDS bằng cách chạy lệnh sau và chỉ định tên VDS.

[root@HOSTESXI 01:~ ] net-dvs -d DSwitch-HA

[root@HOSTESXI 01:~ ] net-dvs -d DSwitch-TRAINING

[root@HOSTESXI 01:~ ] net-dvs -d DSwitch-CLS

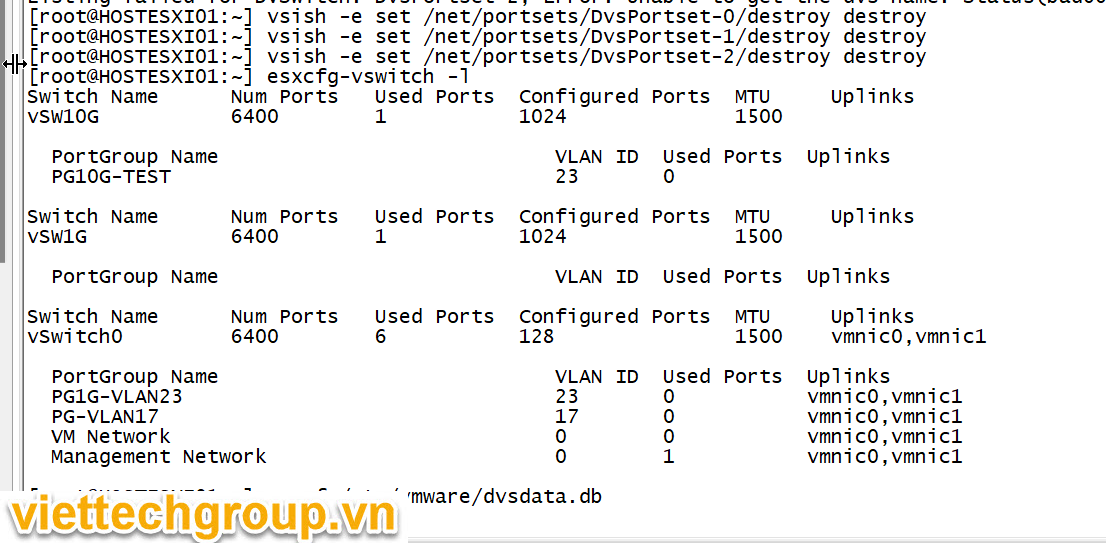
[root@HOSTESXI 01:~ ] esxcfg-vswitch -l

Bước 4 – Tùy thuộc vào số lượng DvsPortset-N, bạn sẽ cần chạy lệnh bổ sung này và thay thế N bằng giá trị được quan sát từ bước trước.

vsish -e set /net/portsets/DvsPortset-0/destroy destroy

vsish -e set /net/portsets/DvsPortset-1/destroy destroy

vsish -e set /net/portsets/DvsPortset-2/destroy destroy

Bước 5 – Tiếp theo, chúng tôi xóa tệp cơ sở dữ liệu VDS cần thiết nếu không VDS sẽ được tạo lại trong lần khởi động lại tiếp theo.

rm -f /etc/vmware/dvsdata.db

Bước 6 – Cuối cùng, khởi động lại máy chủ ESXi và VDS sẽ bị xóa hoàn toàn.

Như vậy phương nguyễn hướng dẫn các bạn remove vds trên esxi mà không qua vcenter nhé.

Phương Nguyễn Viết.

Chúc các bạn thành công

HƯỚNG DẪN SETUP EXCHANGE 2019 ON WINDOWS SERVER 2019 CORE STANDARD

Microsoft_Exchange_(2019-present).svg

HƯỚNG DẪN SETUP EXCHANGE 2019 ON WINDOWS SERVER 2019 CORE STANDARD

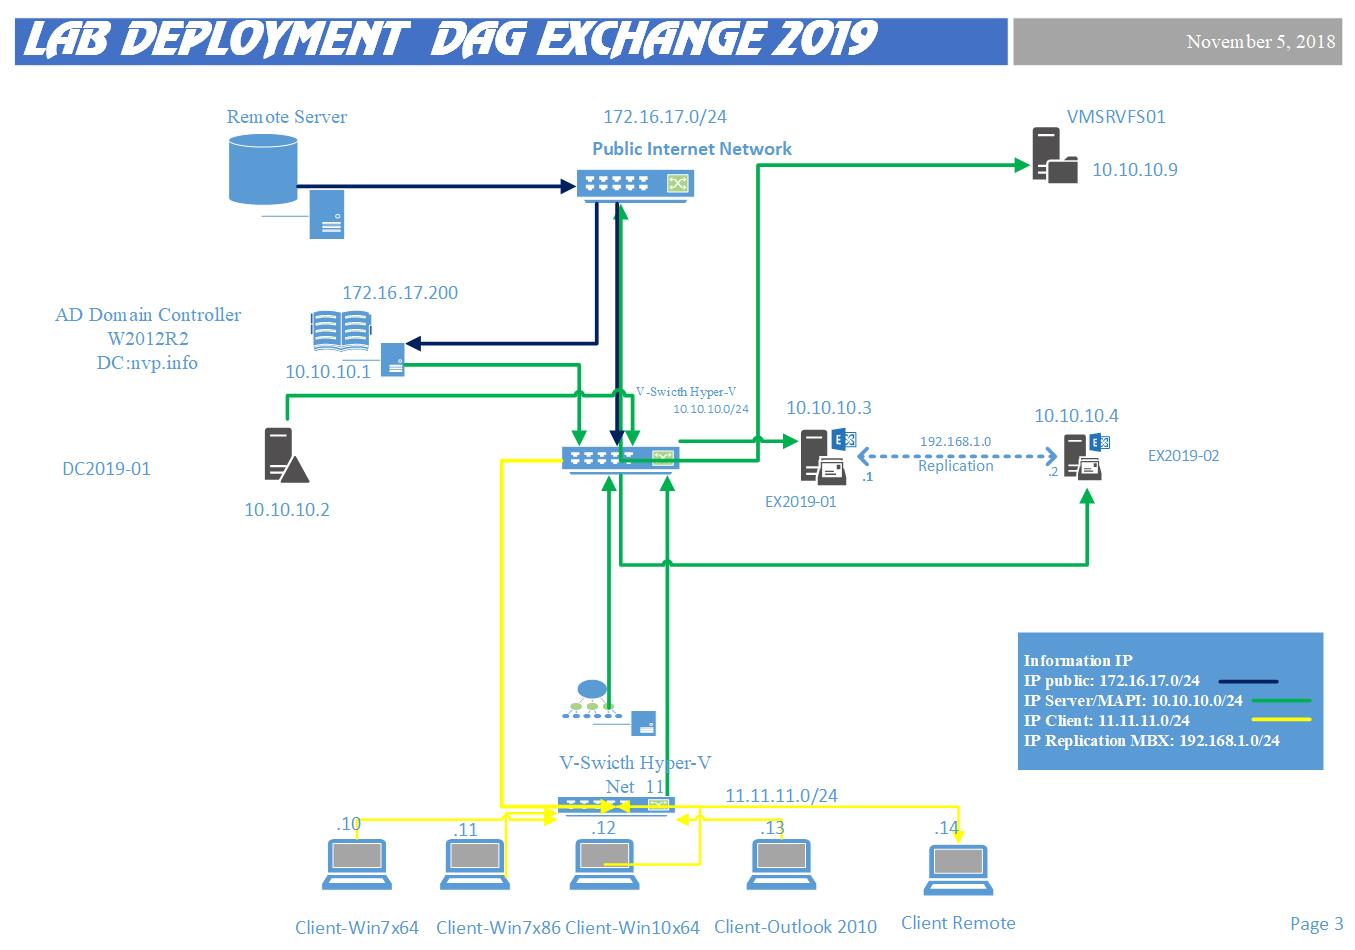
Mô hình

D:\DOCUMENTS\EXCHANGE2019\SoDo-DAG 2019.jpg

Lab

ServerName

IP Address

SM

GW

DNS

Roles

DC2019-01

10.10.11.1

24

10.10.11.254

10.10.11.1

Domain Controller 2019

EX2019-01

10.10.11.3

24

10.10.11.254

10.10.11.1

Exchange 2019

Tài nguyên

ServerName

RAM

CPU

HDD

VMLSRVAD19-01

4G

1

127G

EX19

10G

2

127G

Cài đặt WS server 2019 core

Xem tài liệu tạo máy ảo tại đây 2018-11-05-HUONG DAN TAO VM TREN HYPER-V ON WINDOWS SERVER 2016.pdf

Chuẩn bị Domain controller 2019

Task Description

Screenshot

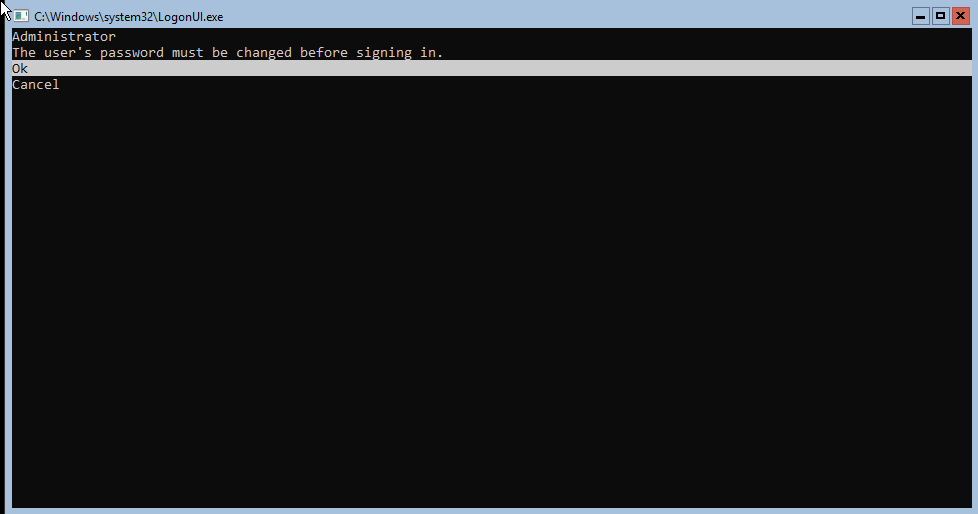
Logon

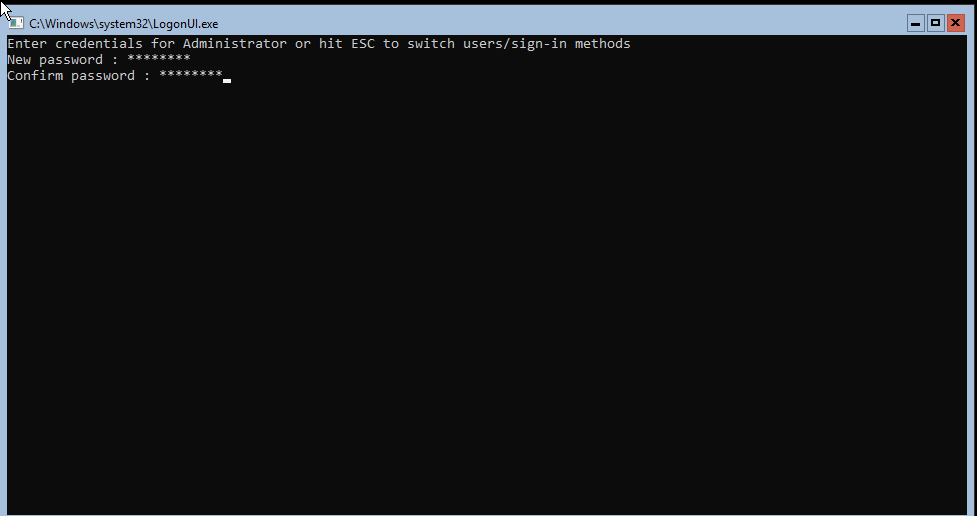
Change password

Change thành công


Cấu hình

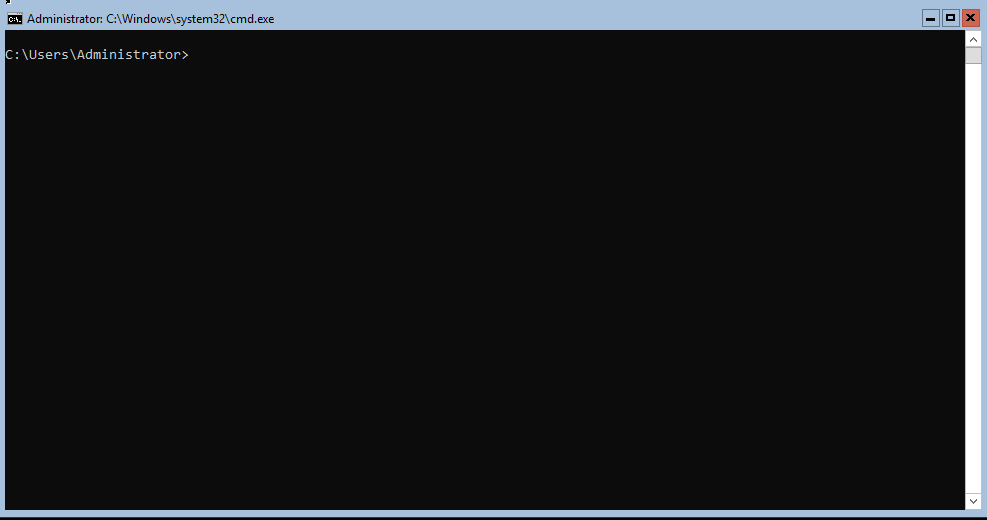
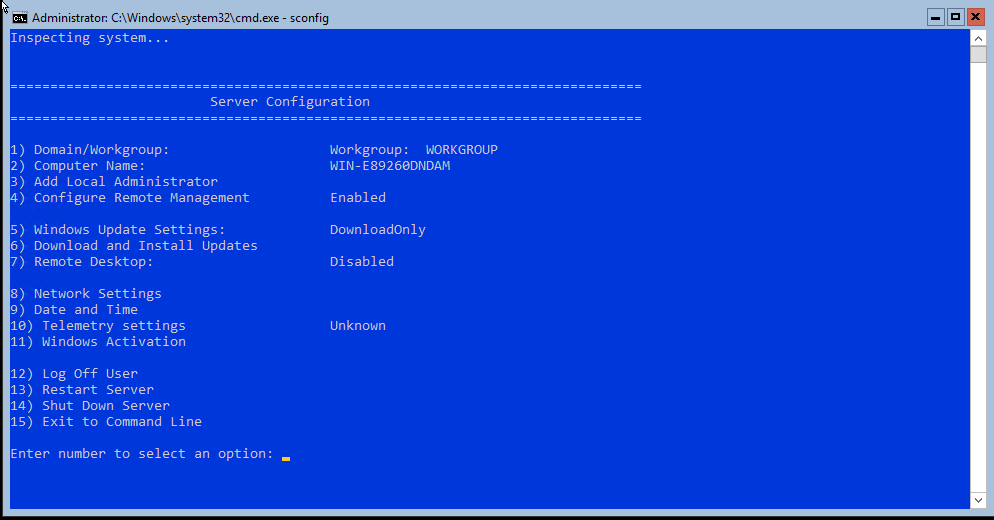
Scconfig

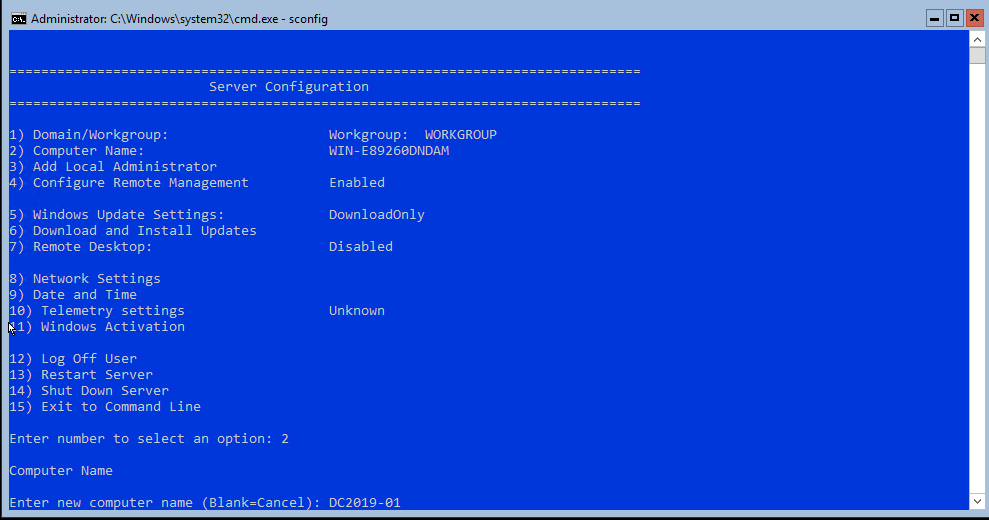
Cấu hình tên máy tính=> 2=>DC2019-01

Cấu hình tên máy tính=> 2=>DC2019-01

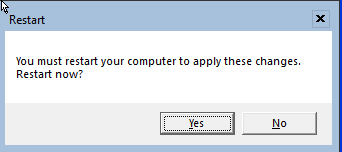
Khởi động lại DC2019-01

CẤU HÌNH NETWORKING

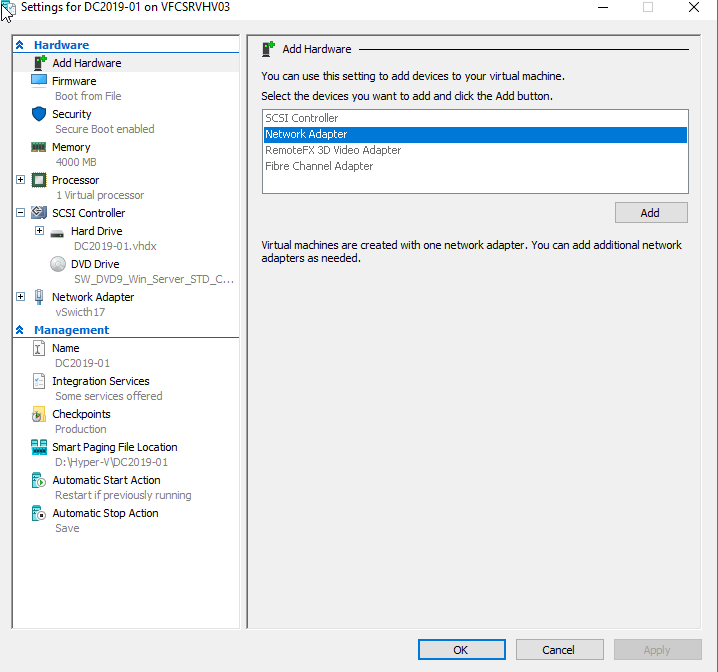
Add thêm Card net10

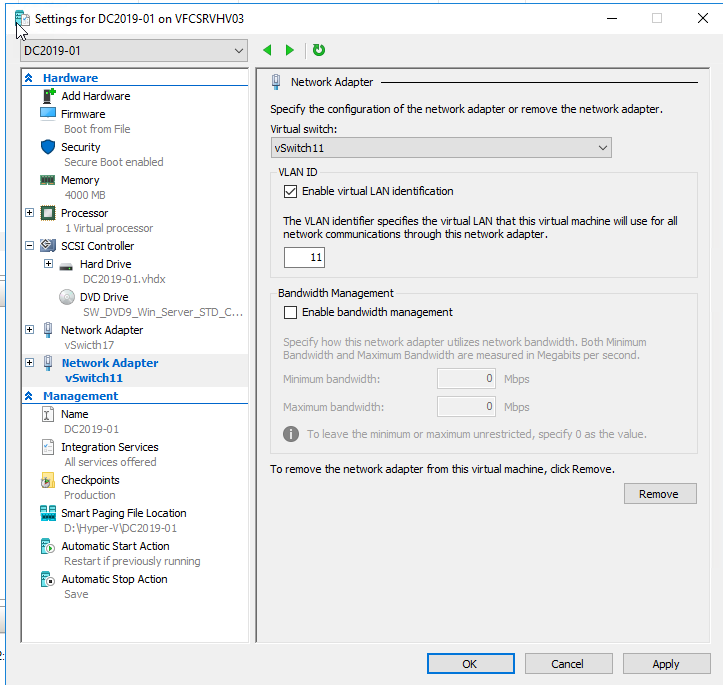
Add thêm card mạng

Chọn Tagg VLAN 11

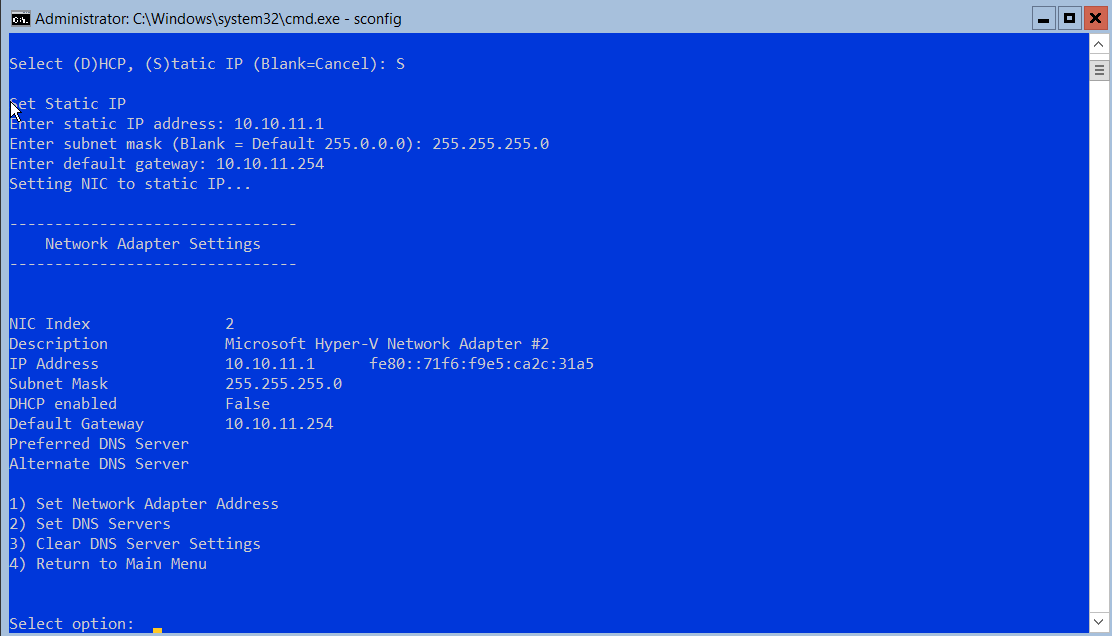
Cấu hình IP

NET11

10.10.11.1


Rename

Rename-Computer -ComputerName <new_name>

New-NetIPAddress -InterfaceIndex 6 -IPAddress 192.168.12.123 -PrefixLength 24 -DefaultGateway 192.168.12.100

Enable để copy file từ host vật lý vào trong máy ảo

Enable-VMIntegrationService -name Guest* -VMName Server2019 -Passthru

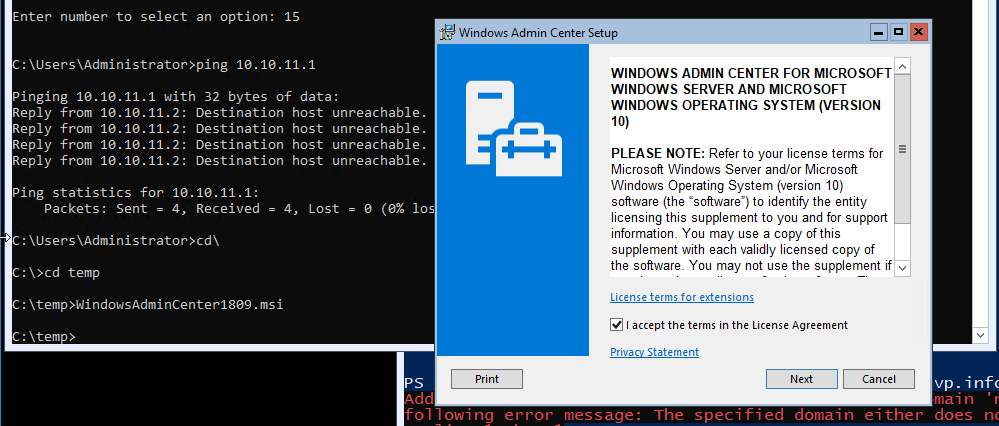
Copy-VMFile “DC2019-01” -SourcePath “C:\Users\Administrator.VFC\WindowsAdminCenter1809.msi” -DestinationPath “C:\temp\ WindowsAdminCenter1809.msi” -CreateFullPath -FileSource Host

msiexec /i C:\temp\WindowsAdminCenter1804.msi /qn /L*v log.txt SME_PORT=443 SSL_CERTIFICATE_OPTION=generate

Đăng nhập nhé

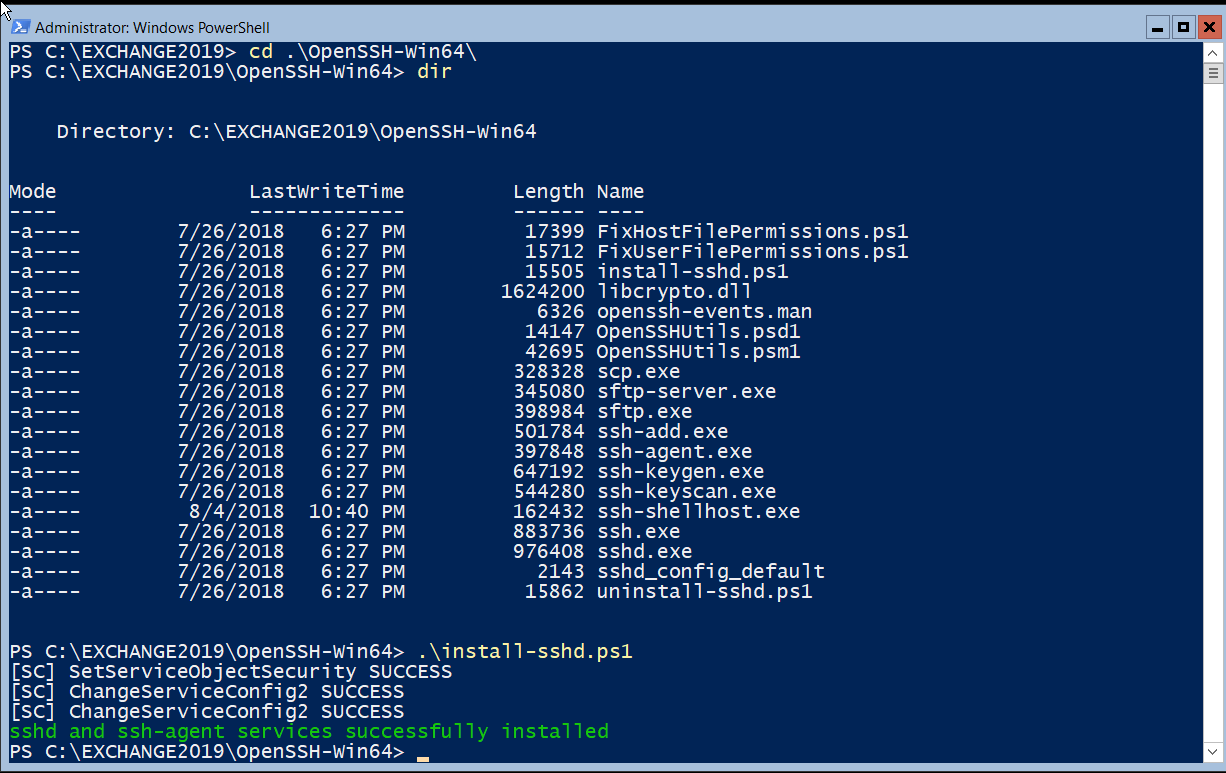
Có thể cài SSH (https://github.com/PowerShell/Win32-OpenSSH/releases )

Install-Module -Name Posh-SSH

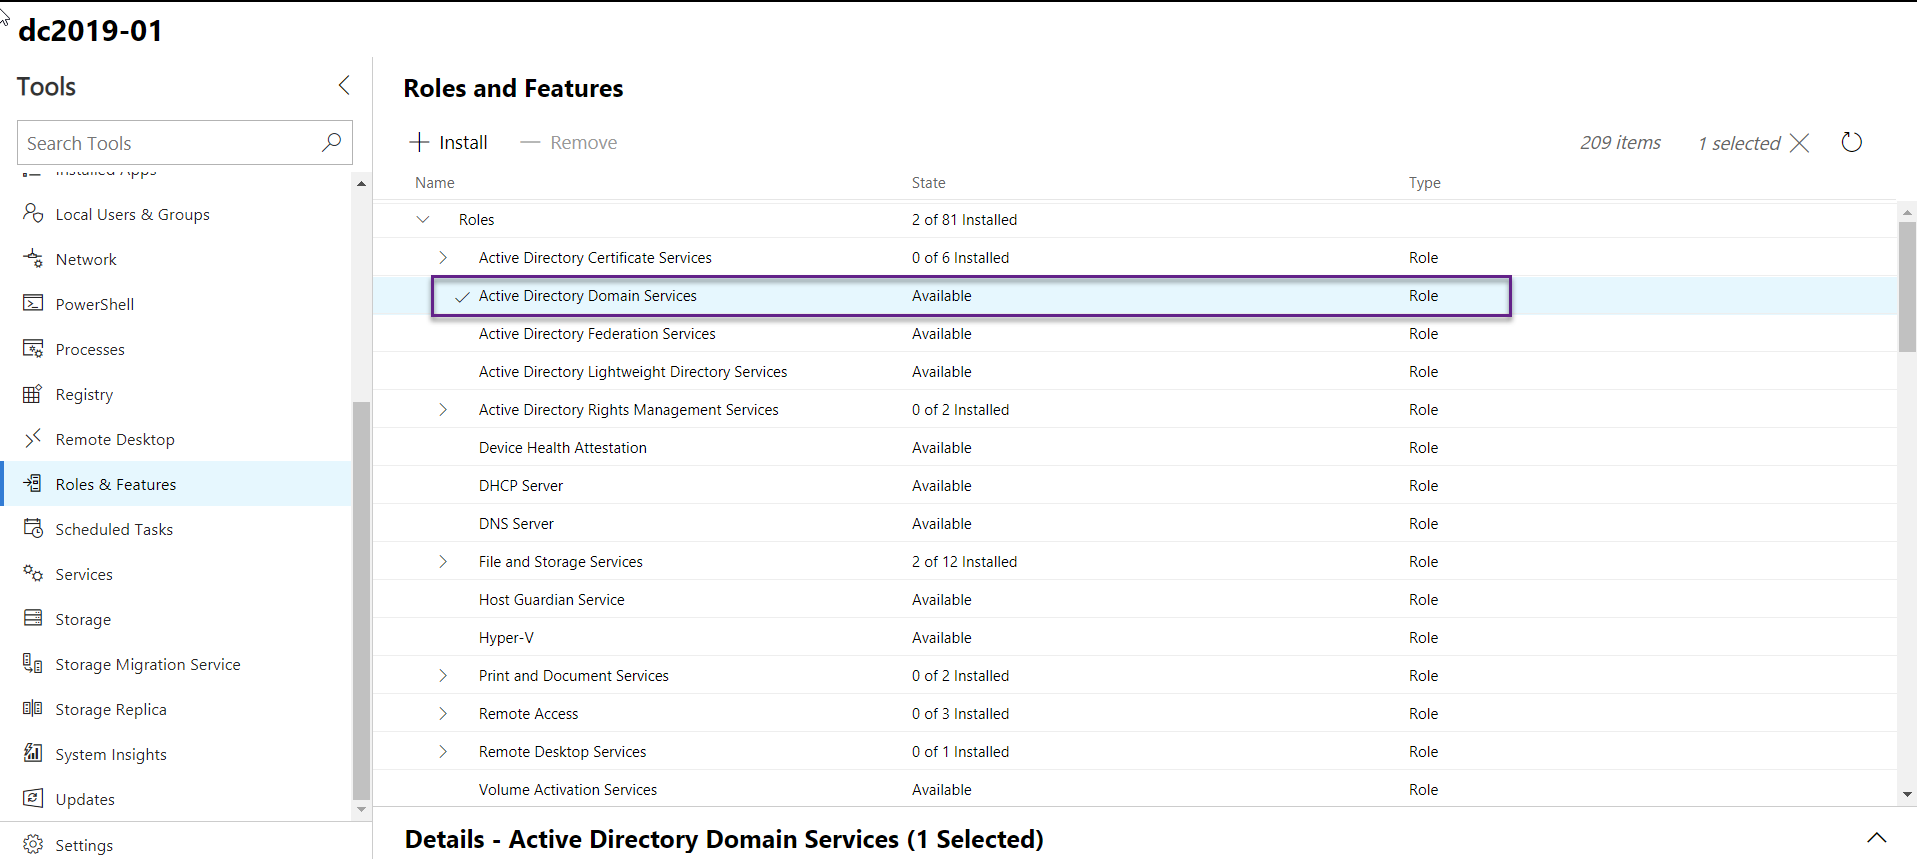
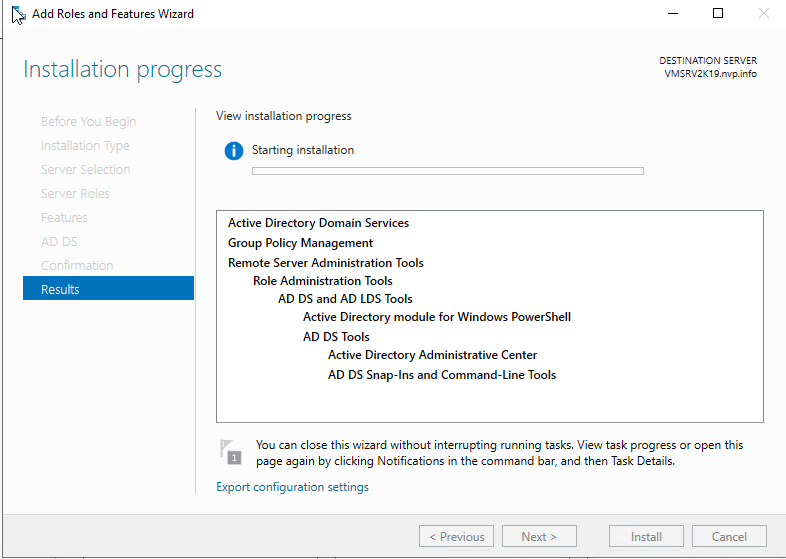
Nâng cấp DC 2019 nhé

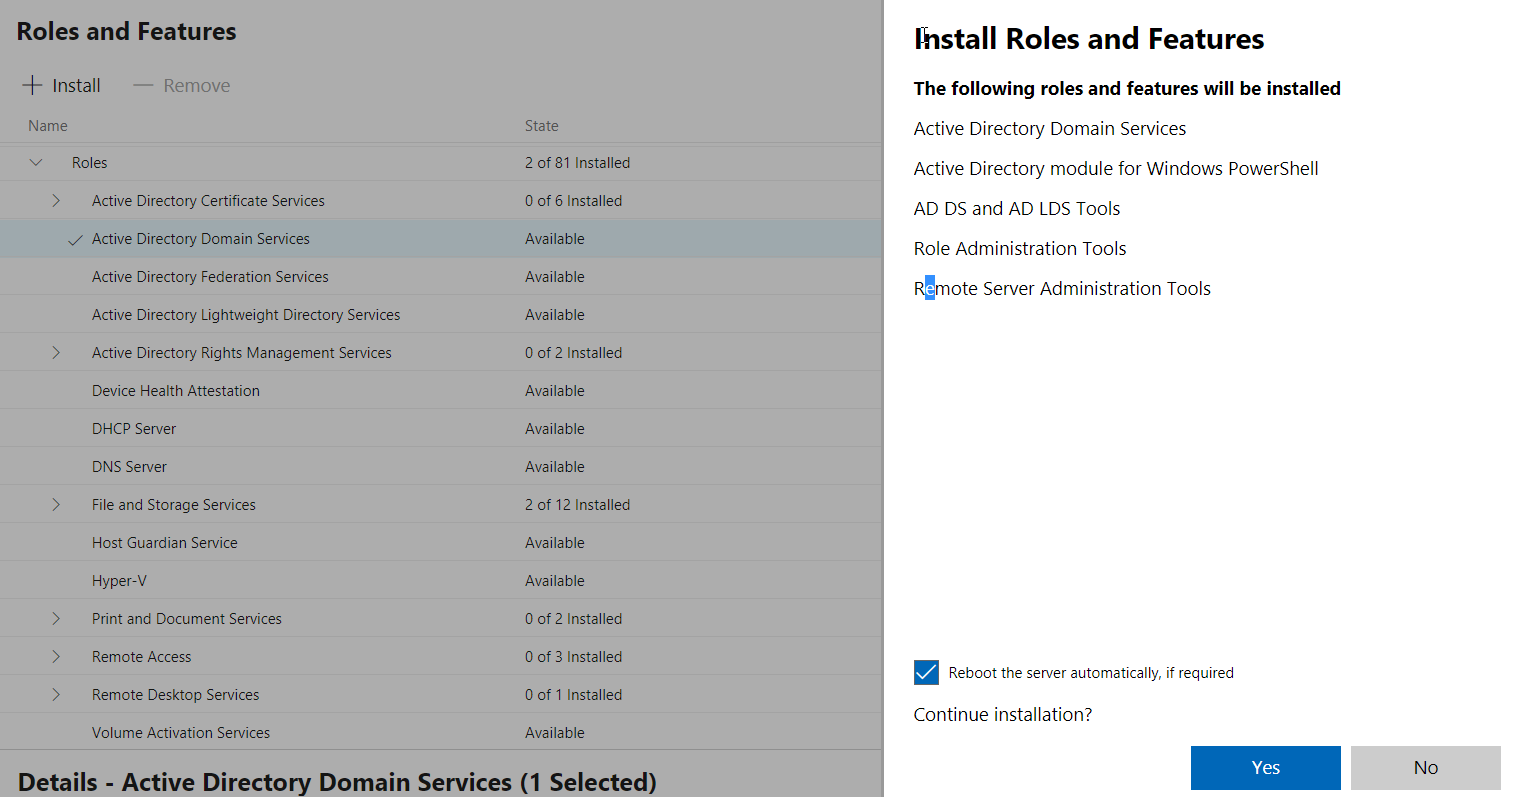
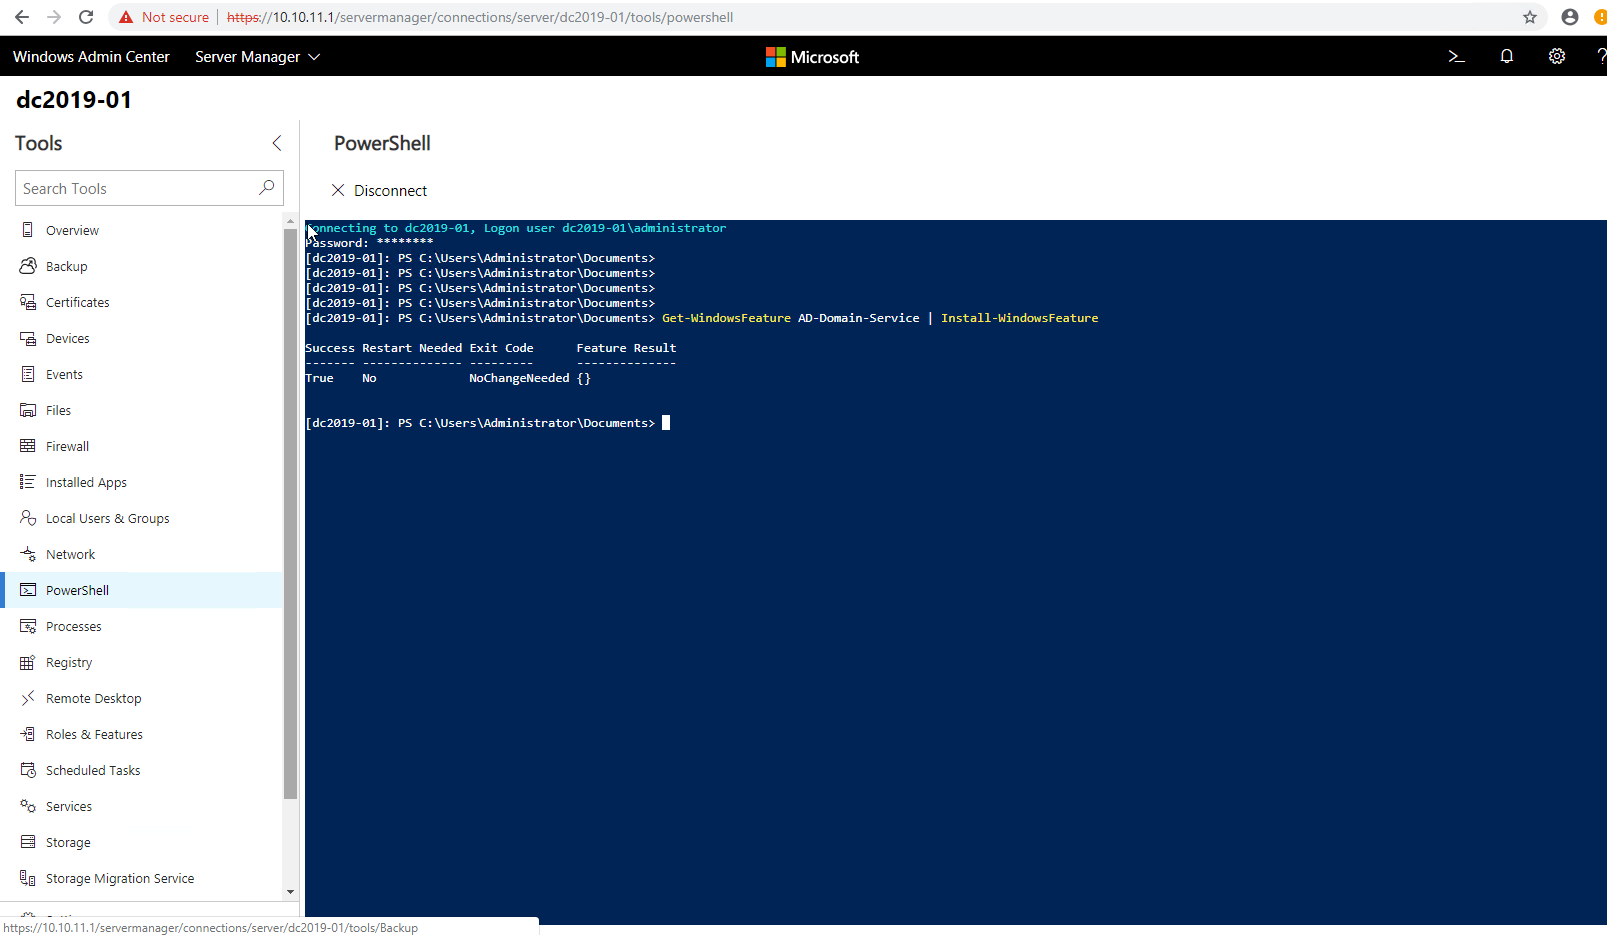
Using PowerShell

PowerShell Command to start creating Domain Controller

Get-WindowsFeature AD-Domain-Service | Install-WindowsFeature

Import-Module ADDSDeplyoment

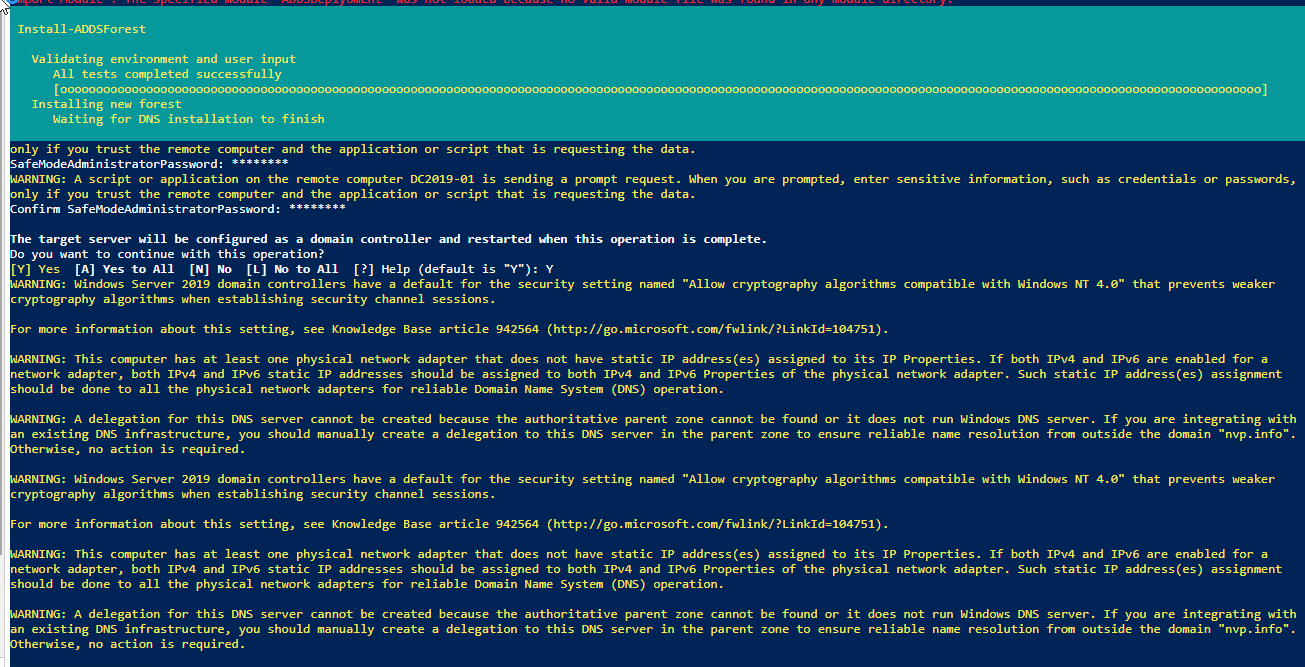
Install-ADDSForest

Install-ADDSDomainController -Credential (Get-Credential) `

-NoGlobalCatalog:$false `

-CreateDnsDelegation:$false `

-CriticalReplicationOnly:$false `

-DatabasePath “C:\Windows\NTDS” `

-DomainName ‘nvp.info’ `

-InstallDns:$true `

-LogPath “C:\Windows\NTDS” `

-NoRebootOnCompletion:$false `

-SiteName “Default-First-Site-Name” `

-SysvolPath “C:\Windows\SYSVOL” `

-Force:$true

2018-03-22 08_35_22-RDCB01 on HYPER - Virtual Machine Connection.png

Reboot

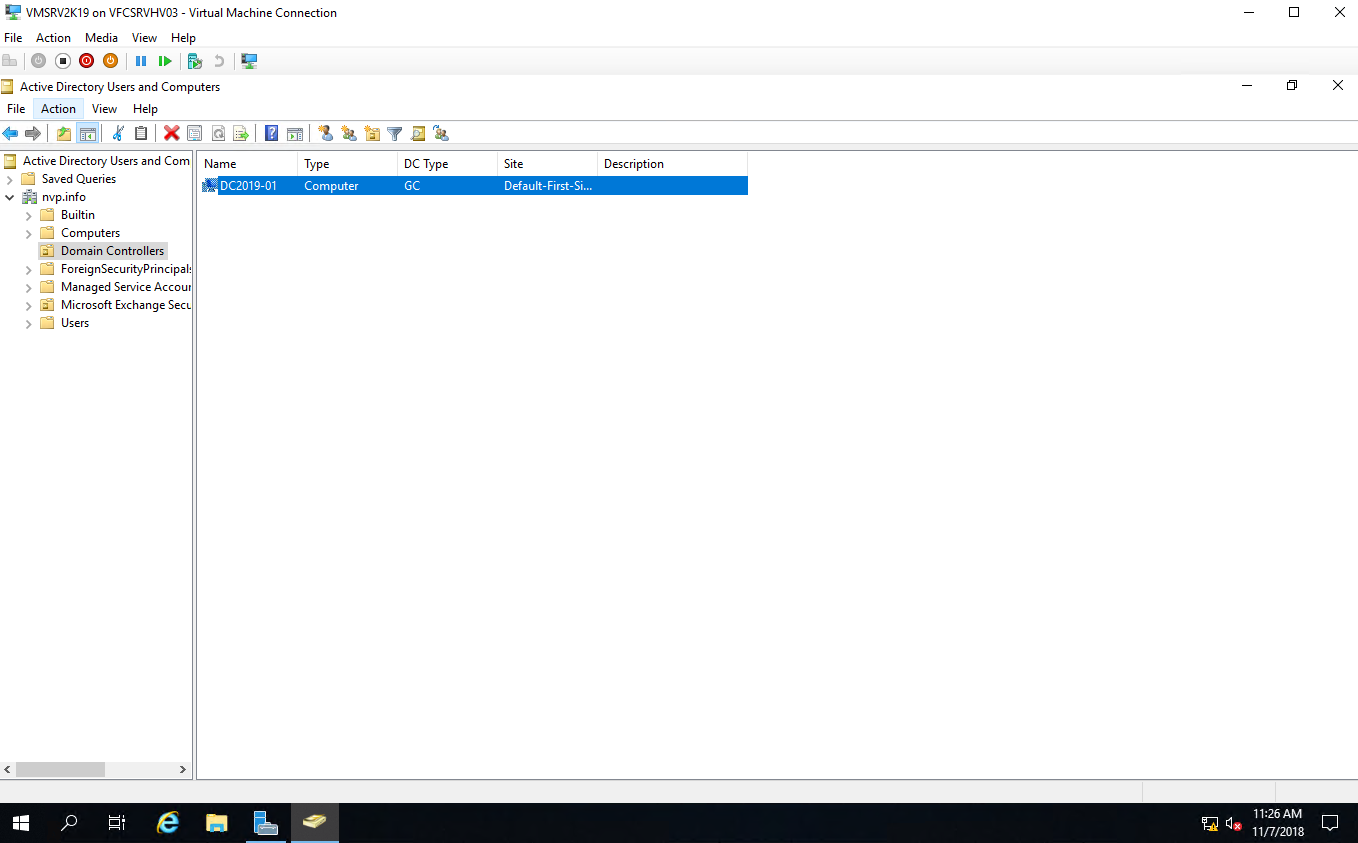
Nâng cấp thành công

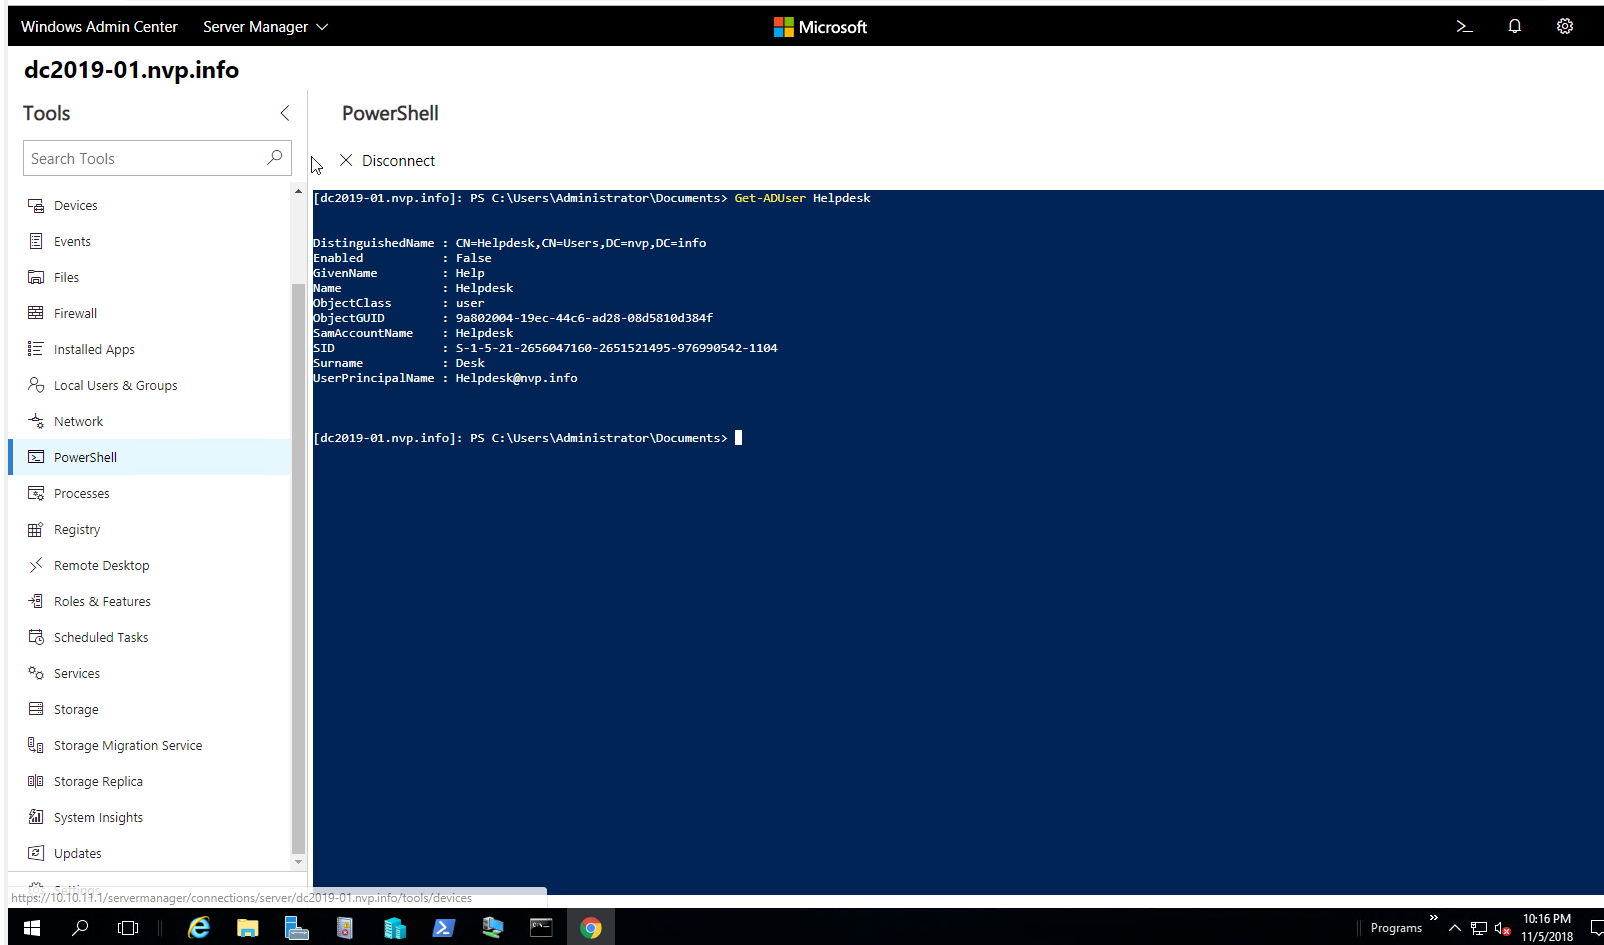
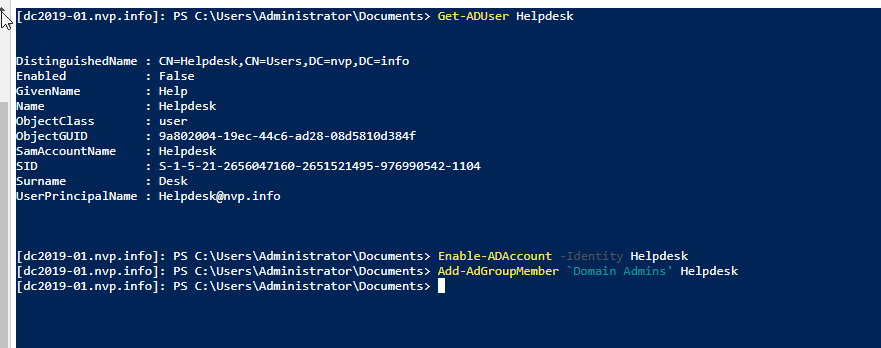
New-ADUser –Name “Helpdesk” –GivenName Help –Surname Desk –SamAccountName Helpdesk –UserPrincipalName Helpdesk@nvp.info

Set-ADAccountPassword ‘CN=Helpdesk,CN=users,DC=nvp,DC=info’ -Reset -NewPassword (ConvertTo-SecureString -AsPlainText “Test@123” -Force)

Get-ADUser Helpdesk

Enable the AD user

Enable-ADAccount -Identity Helpdesk

Add the user to Domain Admins group  

Add-AdGroupMember ‘Domain Admins’ Helpdesk

CÀI ĐẶT WINDOWS SERVER CORE EXCHANGE 2019

Tạo máy ảo tương tự như trên

Chỉ phần setup nhé

Đặt Tên : EX2019-01

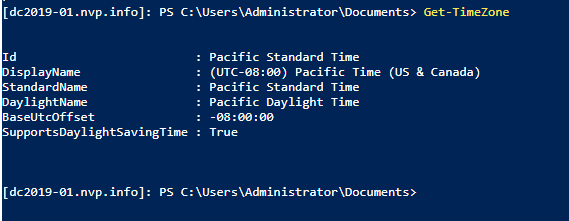
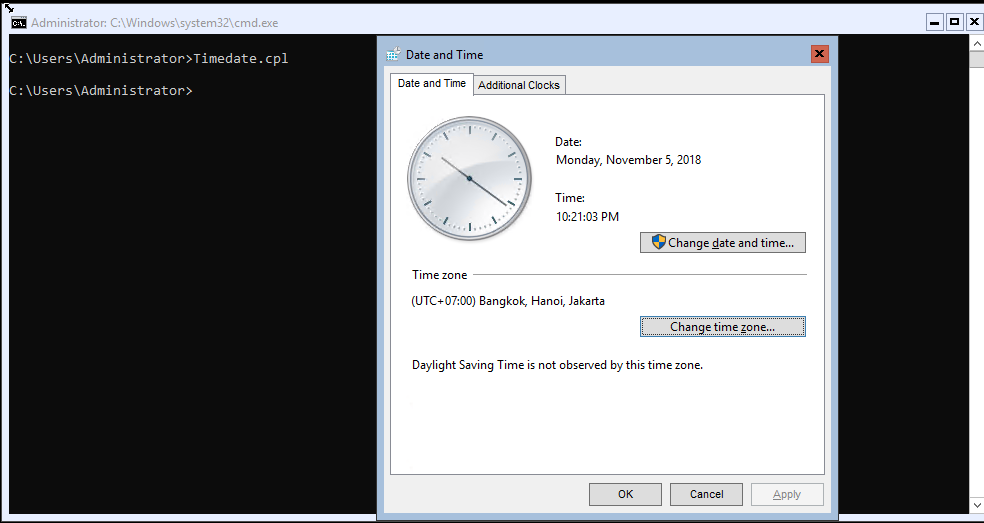
Kiểm tra setup ngày giờ Get-Timezone

Timedate.cpl

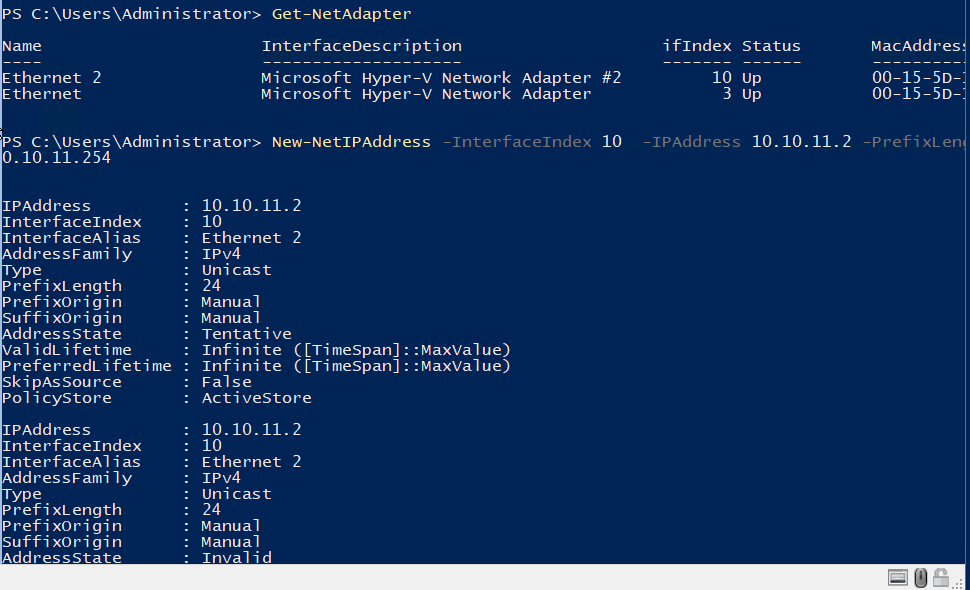
Đặt IP

New-NetIPAddress -InterfaceIndex 10 -IPAddress 10.10.11.2 -PrefixLength 24 -DefaultGateway 10.10.11.254

Configure a DNS Server

Set-DNSClientServerAddress -InterfaceIndex 10 -ServerAddress “10.10.11.1”

Enable Remote Desktop:

cscript C:\Windows\System32\Scregedit.wsf /ar 0

Hoặc sài Sconfig đặt nhé

Update

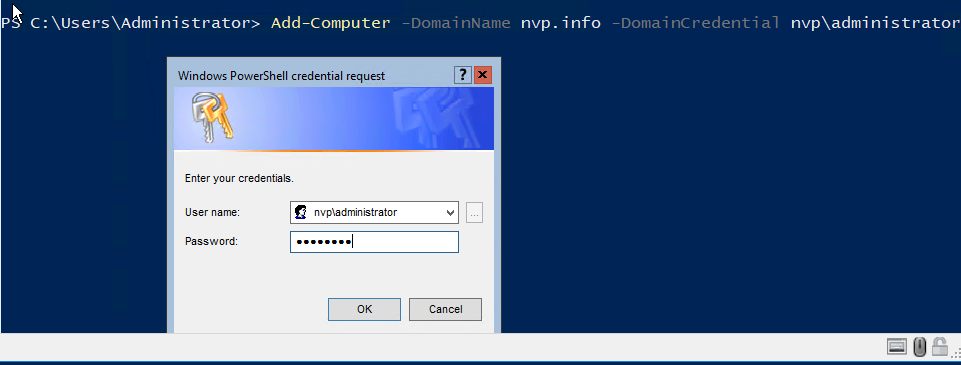
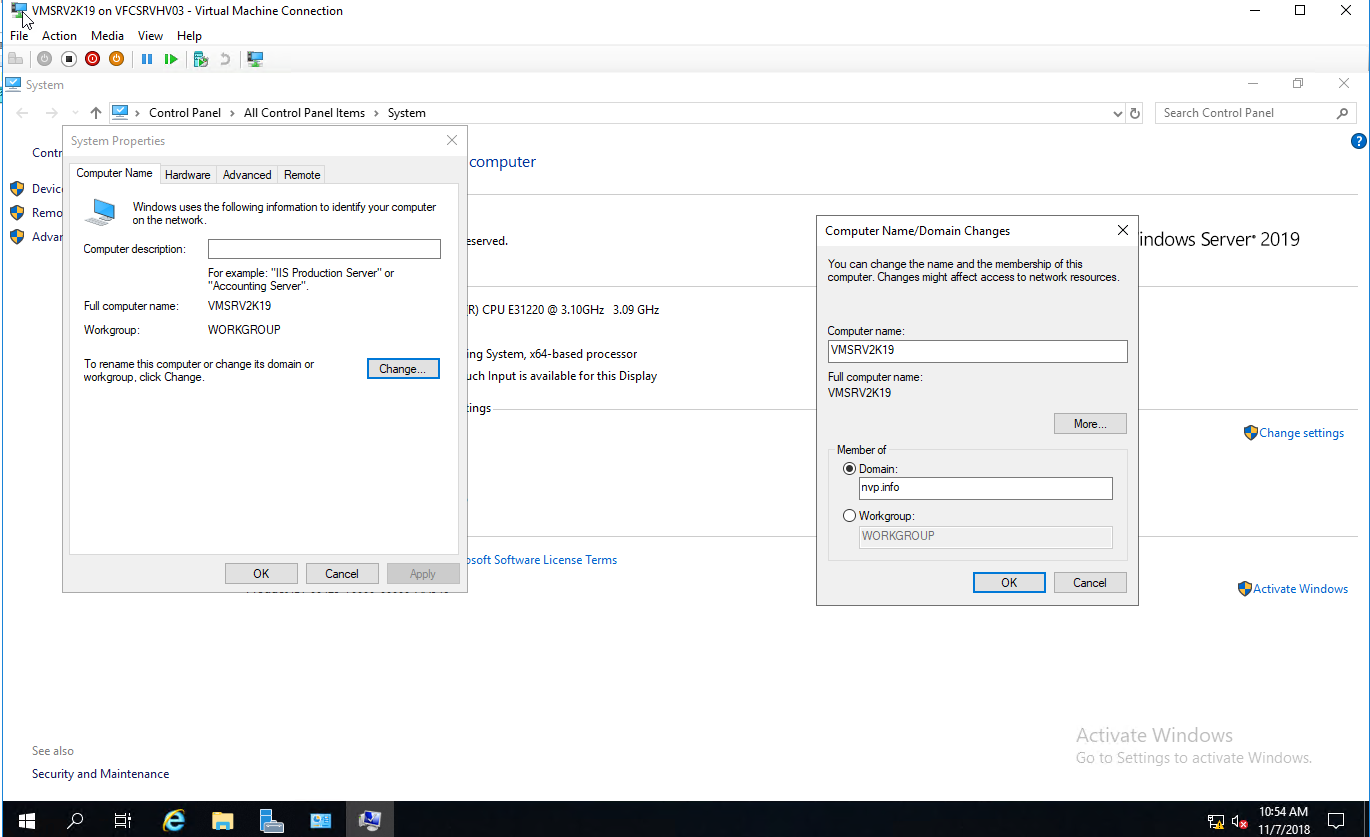
Join Domain nvp.info

Add-Computer -DomainName nvp.info -DomainCredential nvp\administrator

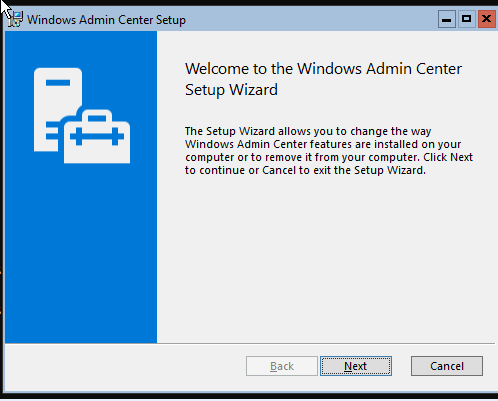
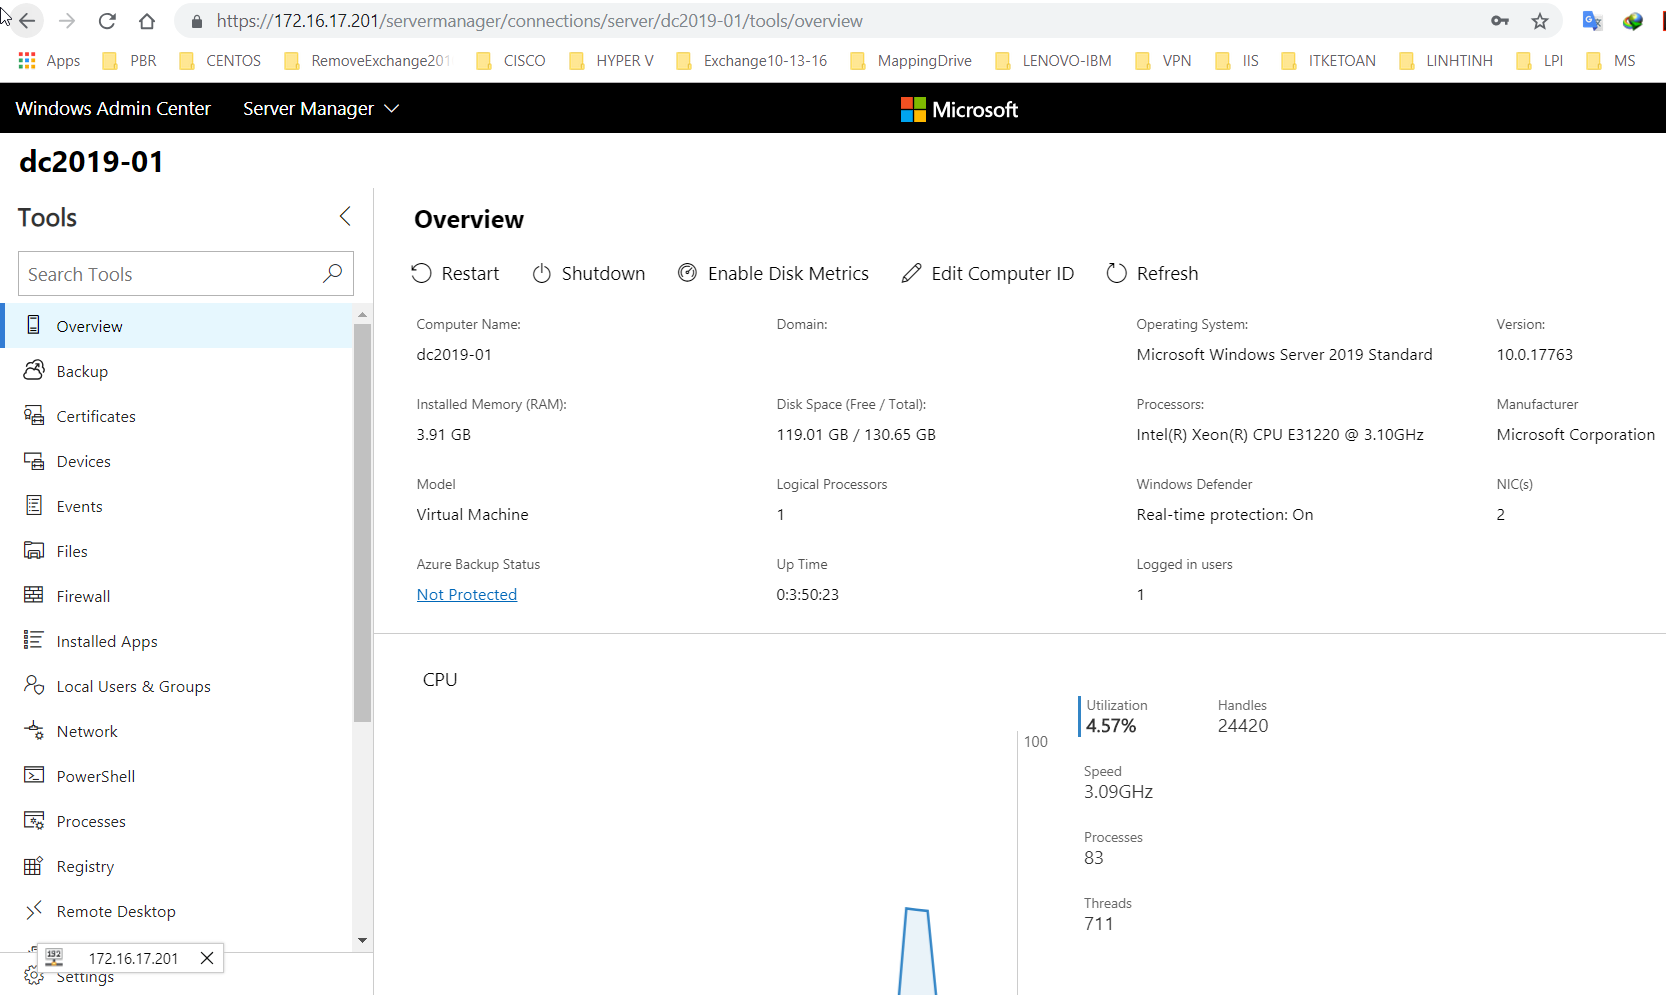
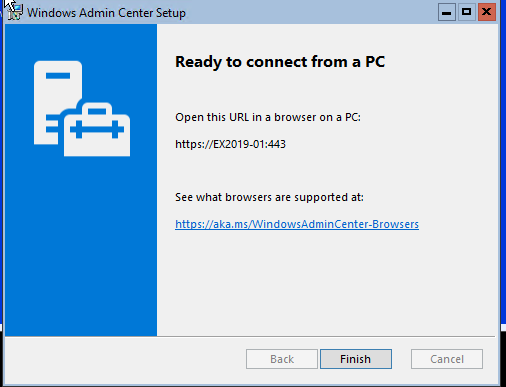
Cài đặt Windows Admin Center

Copy từ Host vào VM
Copy-VMFile “EX2019-01” -SourcePath “C:\Users\Administrator.VFC\WindowsAdminCenter1809.msi” -DestinationPath “C:\temp\WindowsAdminCenter1809.msi” -CreateFullPath -FileSource Host

Windows features

Use the following PowerShell command to install the OS component required for Microsoft UCMA 4.0 and the OS component required for Active Directory Preparation.

Install-WindowsFeature Server-Media-Foundation, RSAT-ADDS

Download các phần mềm cần thiết

Copy source vào Windows Server Core 2019 Exchange:

Có 2 cách 1:

  1. Copy từ host vật lý

Logon máy ảo tạo cây thư mục

C:\mkdir Exchange2019

Vào Host Hyper-V chạy lệnh

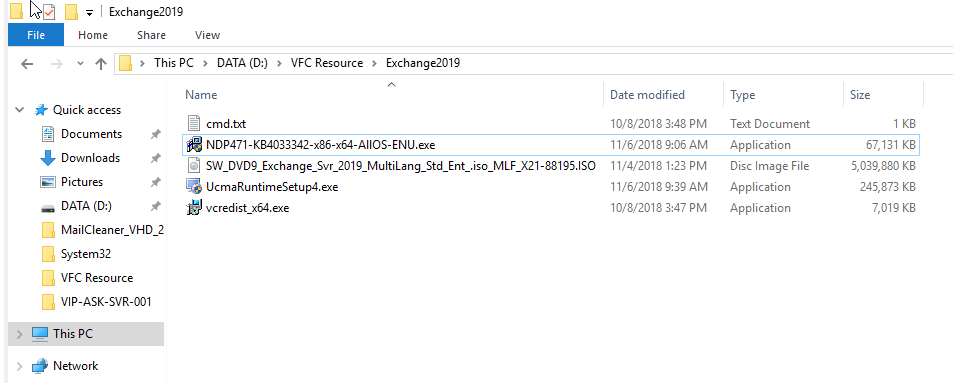
Copy-VMFile “EX2019-01” -SourcePath “D:\VFC Resource\Exchange2019\NDP471-KB4033342-x86-x64-AllOS-ENU.exe” -DestinationPath “C:\Exchange2019\NDP471-KB4033342-x86-x64-AllOS-ENU.exe” -CreateFullPath -FileSource Host

Copy-VMFile “EX2019-01” -SourcePath “D:\VFC Resource\Exchange2019\SW_DVD9_Exchange_Svr_2019_MultiLang_Std_Ent_.iso_MLF_X21-88195.ISO” -DestinationPath “C:\Exchange2019\SW_DVD9_Exchange_Svr_2019_MultiLang_Std_Ent_.iso_MLF_X21-88195.ISO” -CreateFullPath -FileSource Host

Copy-VMFile “EX2019-01” -SourcePath “D:\VFC Resource\Exchange2019\vcredist_x64.exe” -DestinationPath “C:\Exchange2019\vcredist_x64.exe” -CreateFullPath -FileSource Host

Copy-VMFile “EX2019-01” -SourcePath “D:\VFC Resource\Exchange2019\UcmaRuntimeSetup4.exe” -DestinationPath “C:\Exchange2019\UcmaRuntimeSetup4.exe” -CreateFullPath -FileSource Host

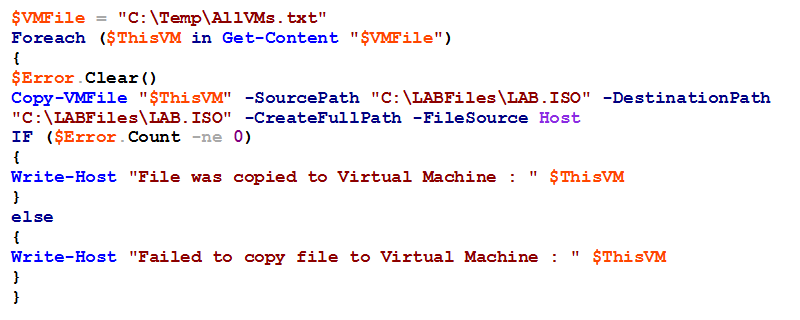
Copy nhiều máy ảo

https://cdn.ttgtmedia.com/rms/editorial/sSV_PowerShell_script_011818.png

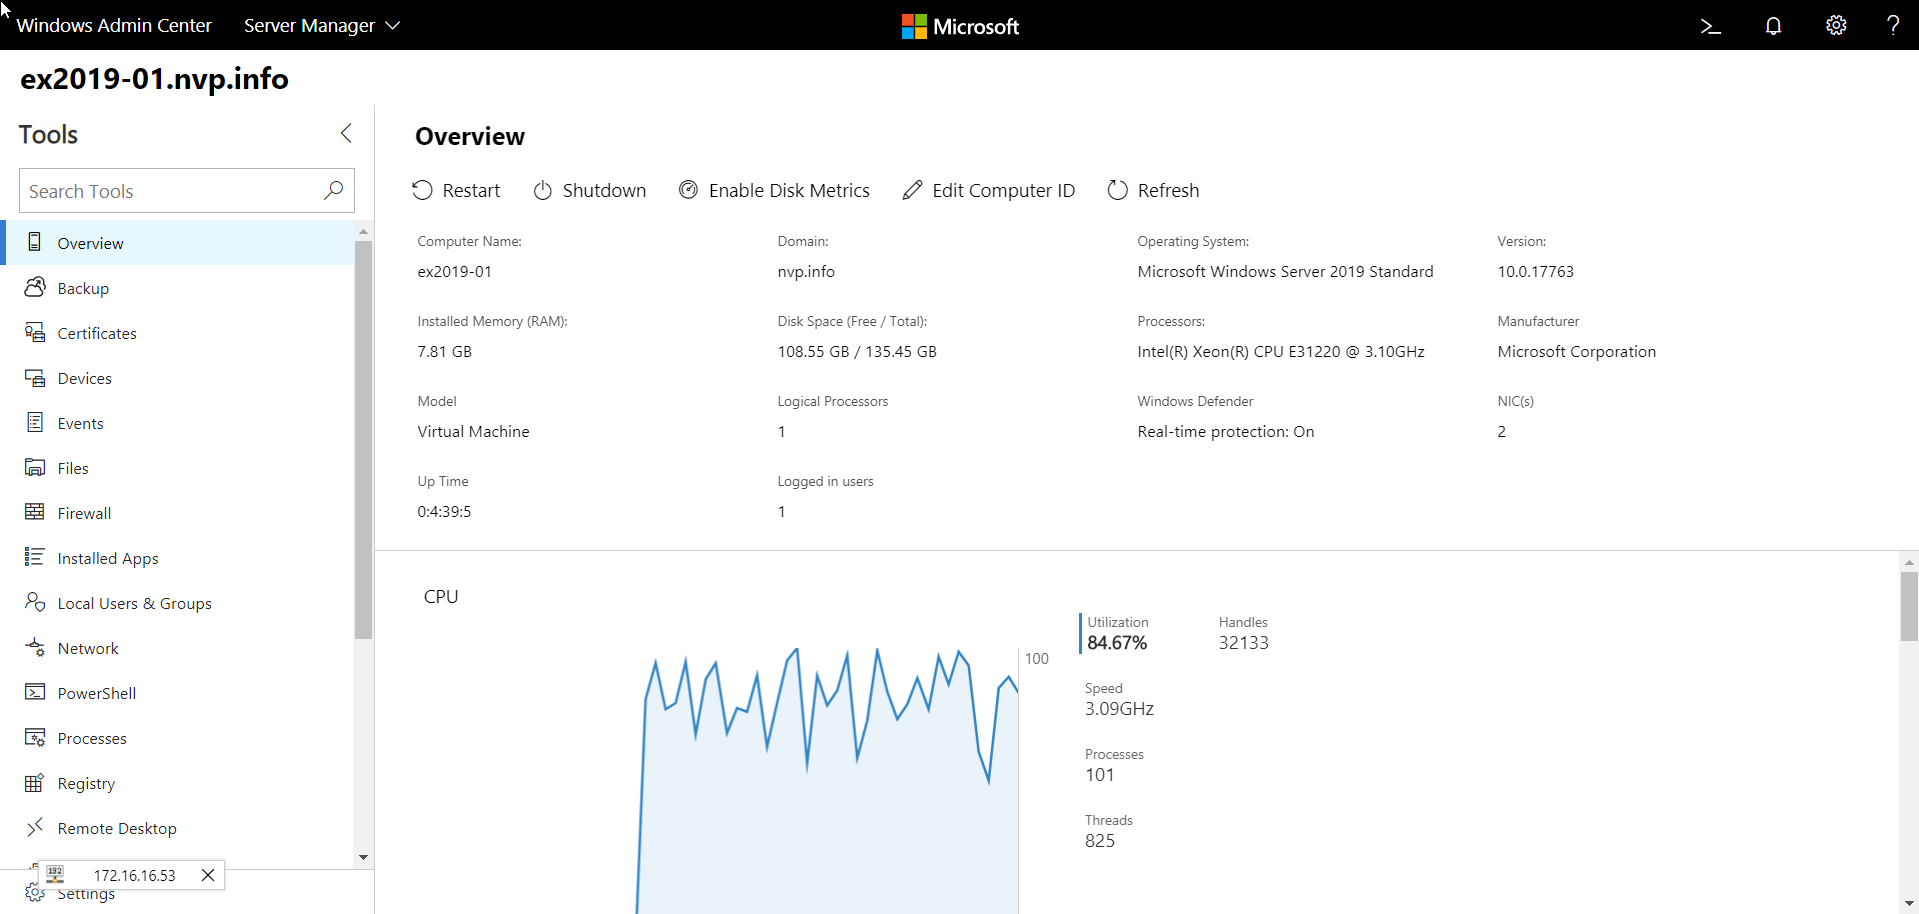
Kiểm tra lại máy Exchange 2019 nhé

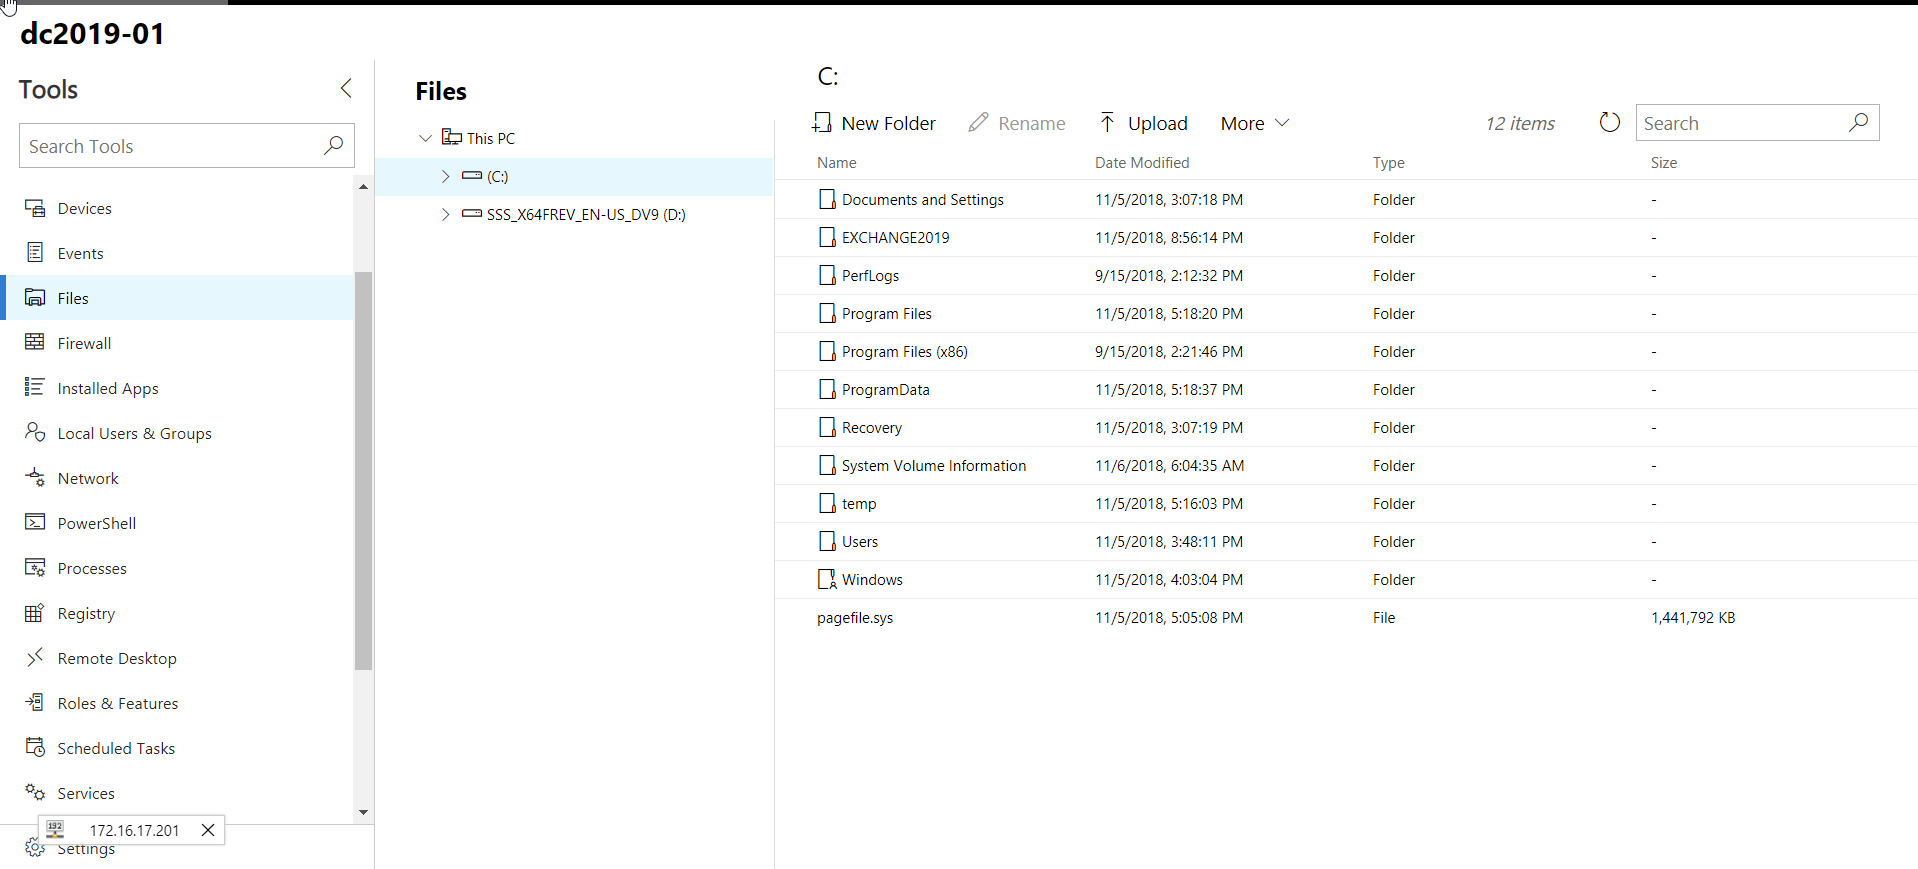
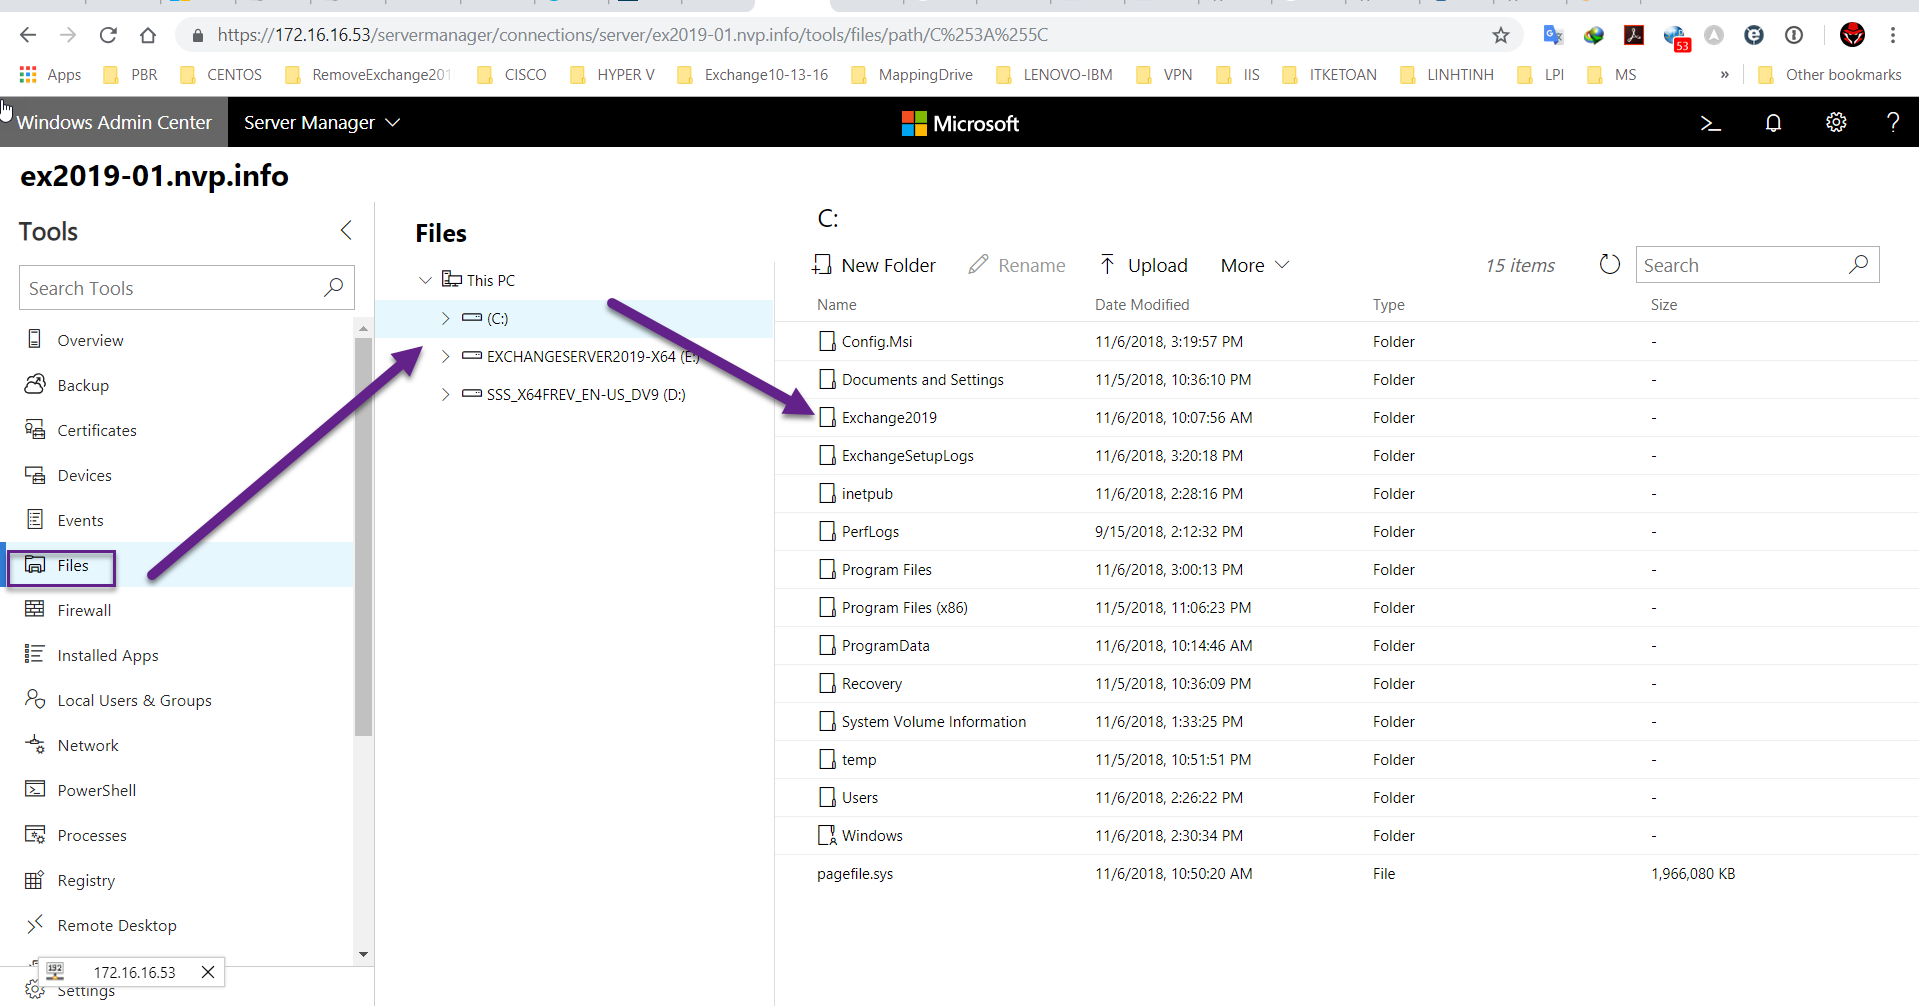
  1. Dùng Windows Admin Center

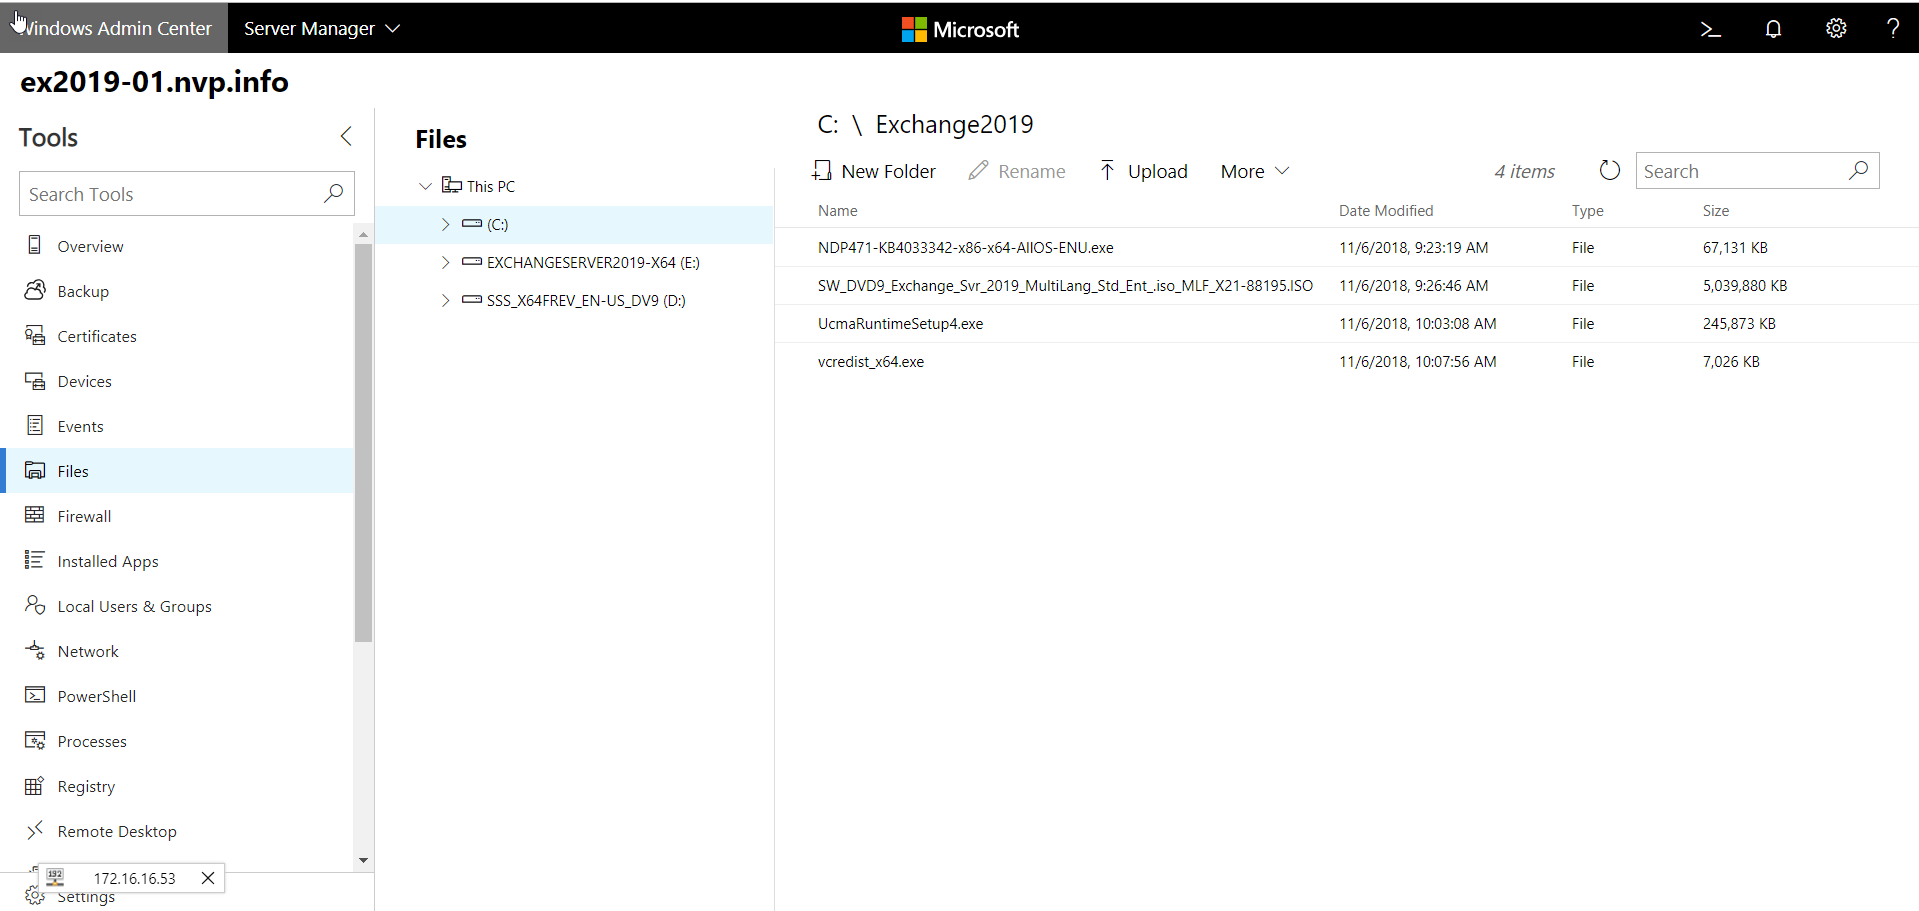
Vào https://ipexchange để upload nhé. vào file=>update file nhé

Chọn vào Upload nhé để đưa source lên nhé

Cài đặt thư viện

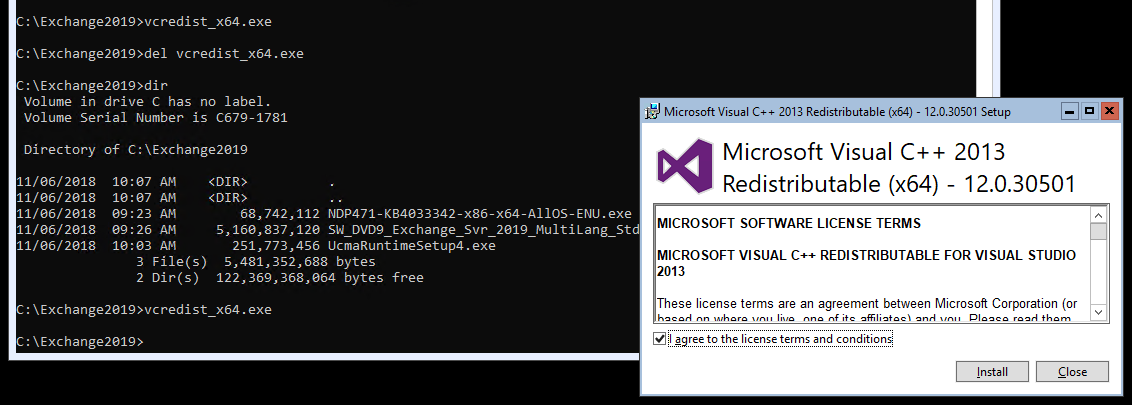
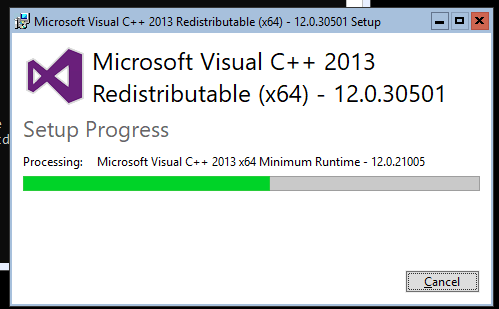
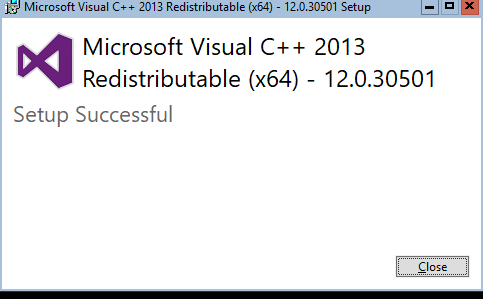
Cài đặt Install Visual C++ 2013 Redistributable

Tại CMD gỏ lệnh:

Install UCMA (Microsoft Unified Communications Managed API 4.0)

UCMA có thể download trực tiếp hoặc có sẵn trong đĩa ISO nhé tốt nhất download luôn cho roài. E:\Exchange2019\EX…\UCMARedist

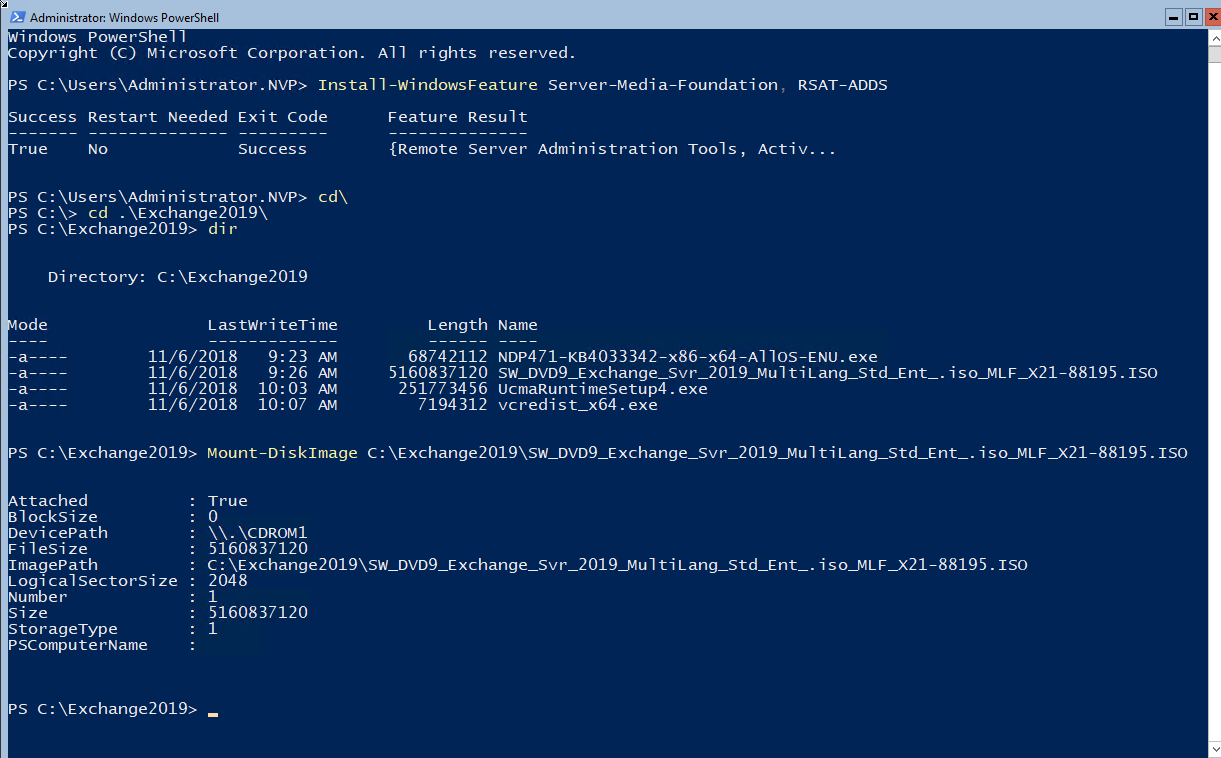
Mount disk

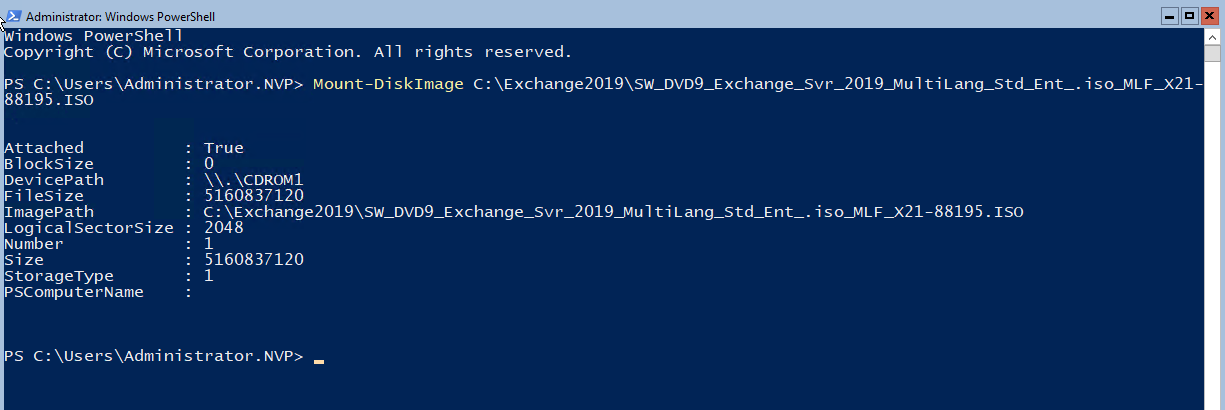
The UCMA installable is present on the Exchange Server 2019 media itself. Use the following PowerShell command to mount the Exchange Server media:

Mount-DiskImage C:\Exchange2019\SW_DVD9_Exchange_Svr_2019_MultiLang_Std_Ent_.iso_MLF_X21-88195.ISO

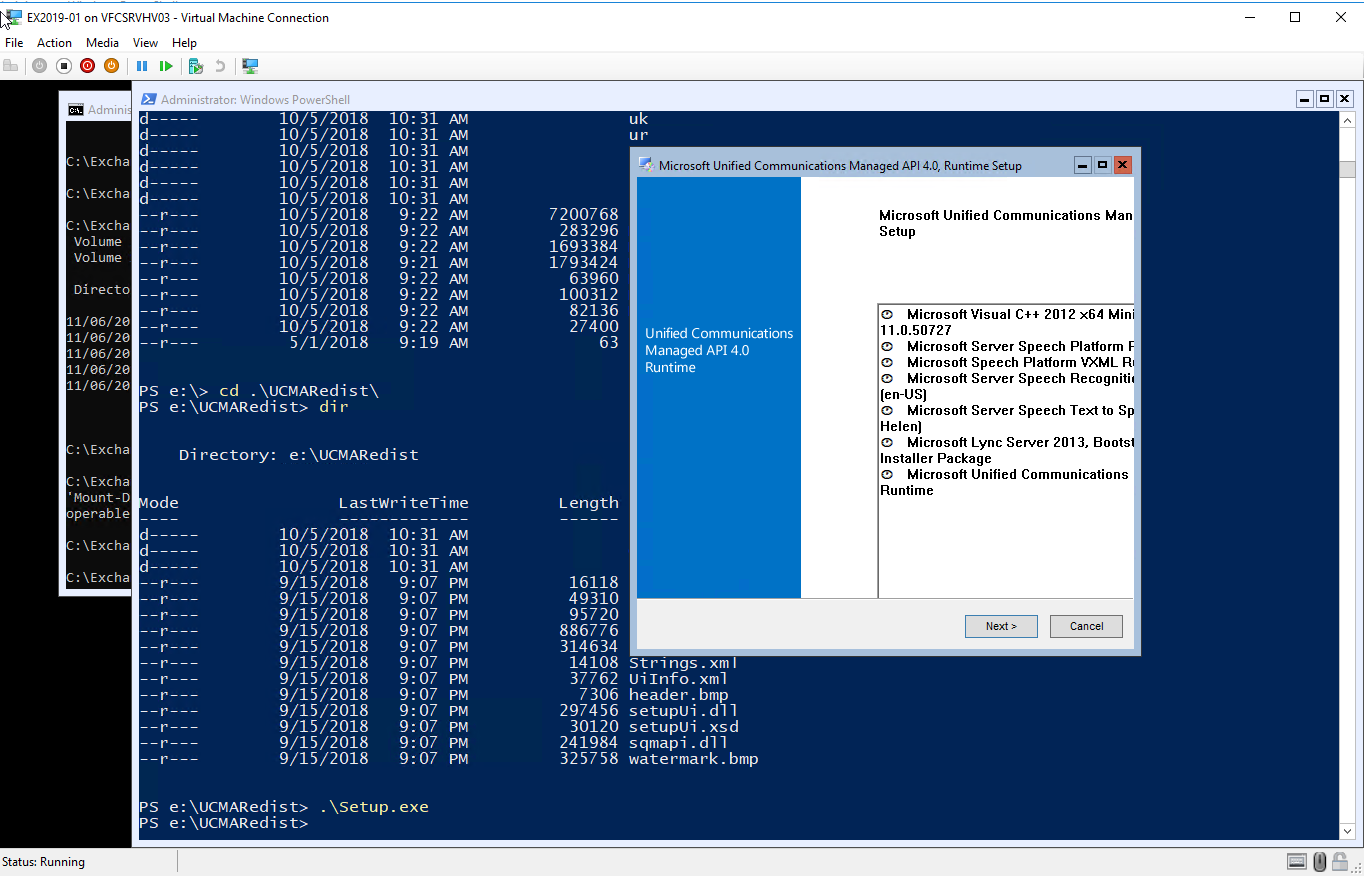
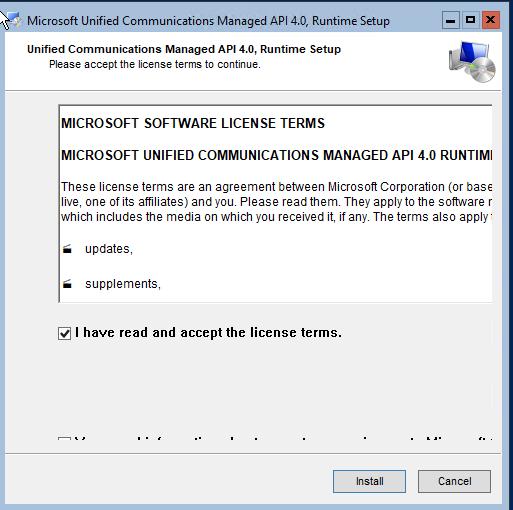
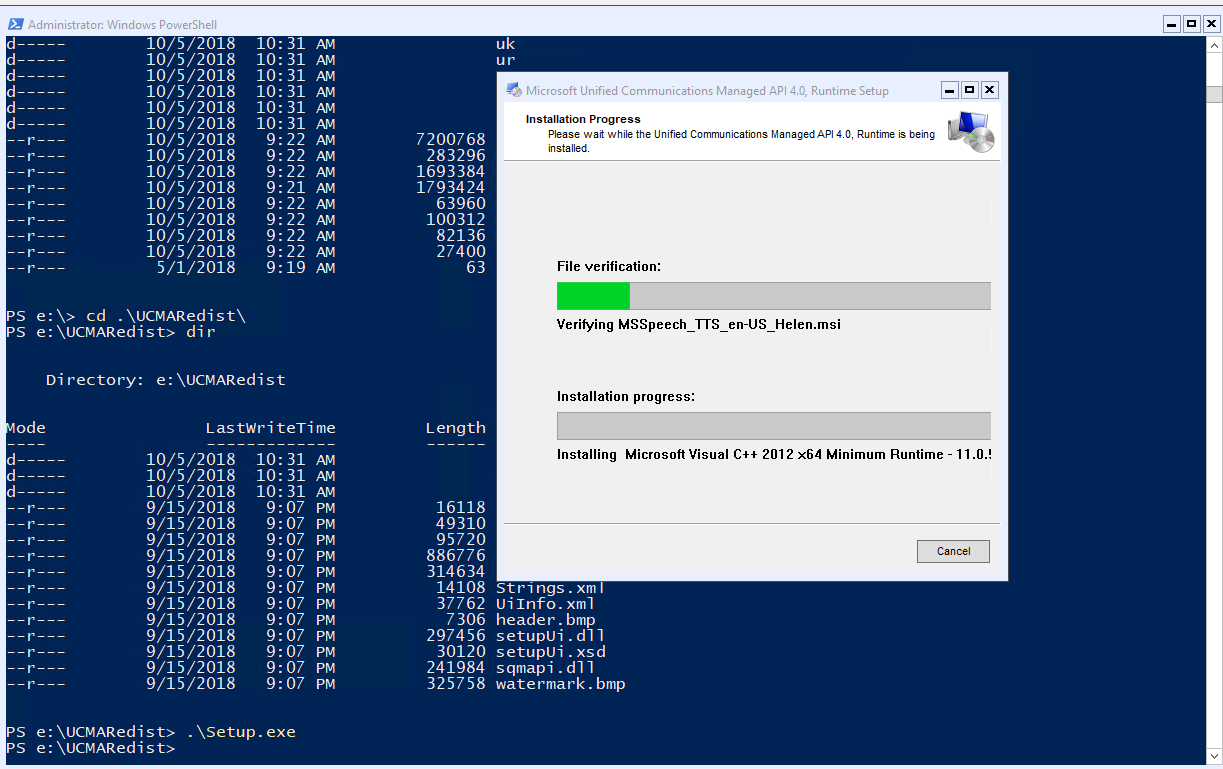
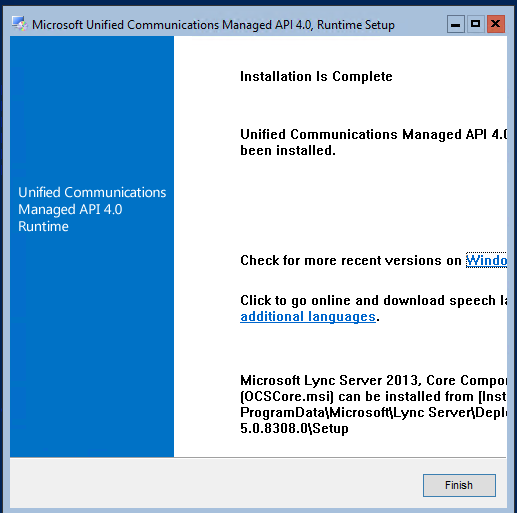
The UCMA installable is located under the “UCMARedist” folder on the Exchange Server 2019 .ISO. Start the UCMA installation:

CD E:\

CD UCMARedist

Cài Install .Net 4.7.1

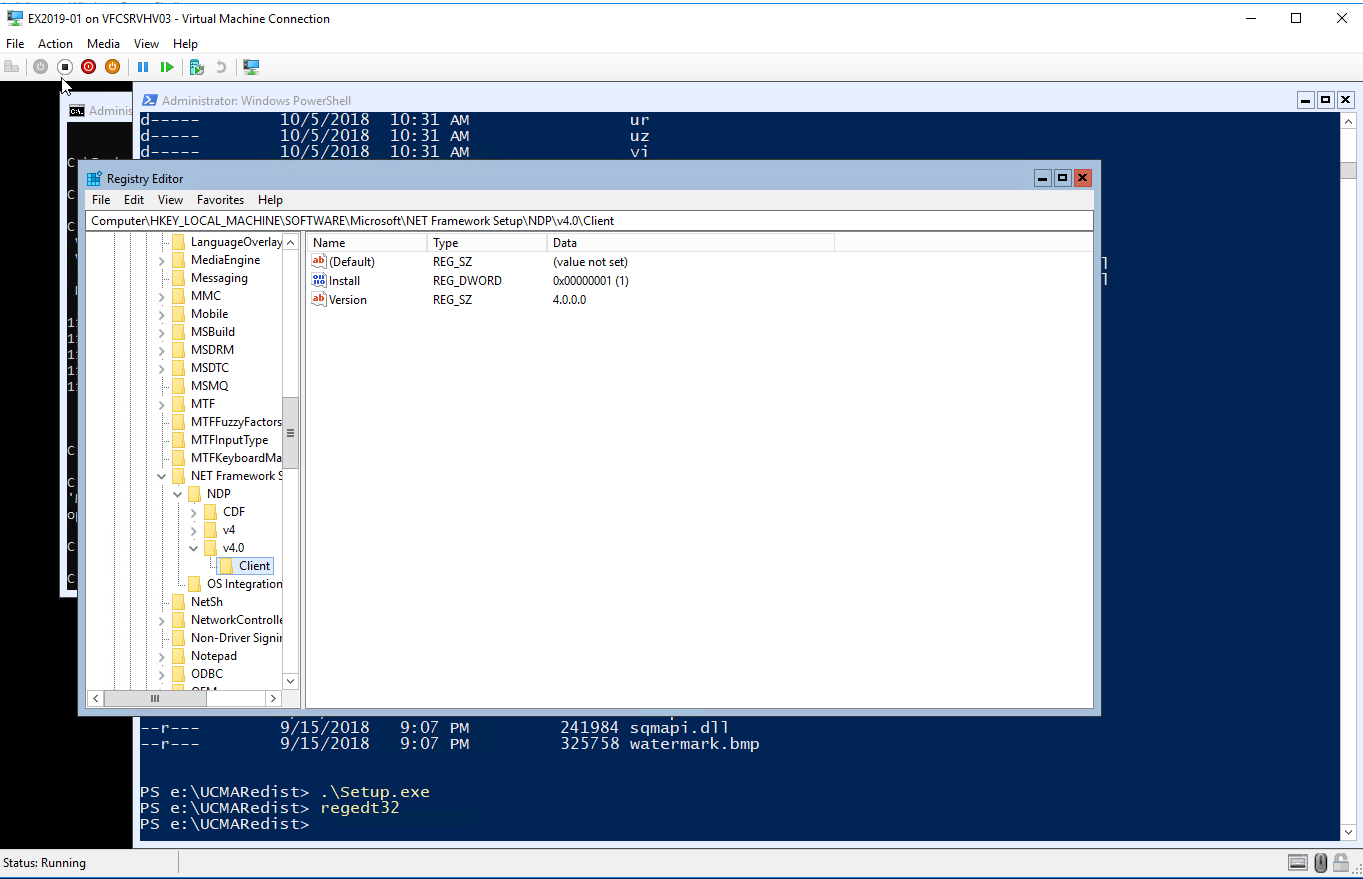
Kiểm tra xem cài chưa

Regedt32 chưa cài nhé

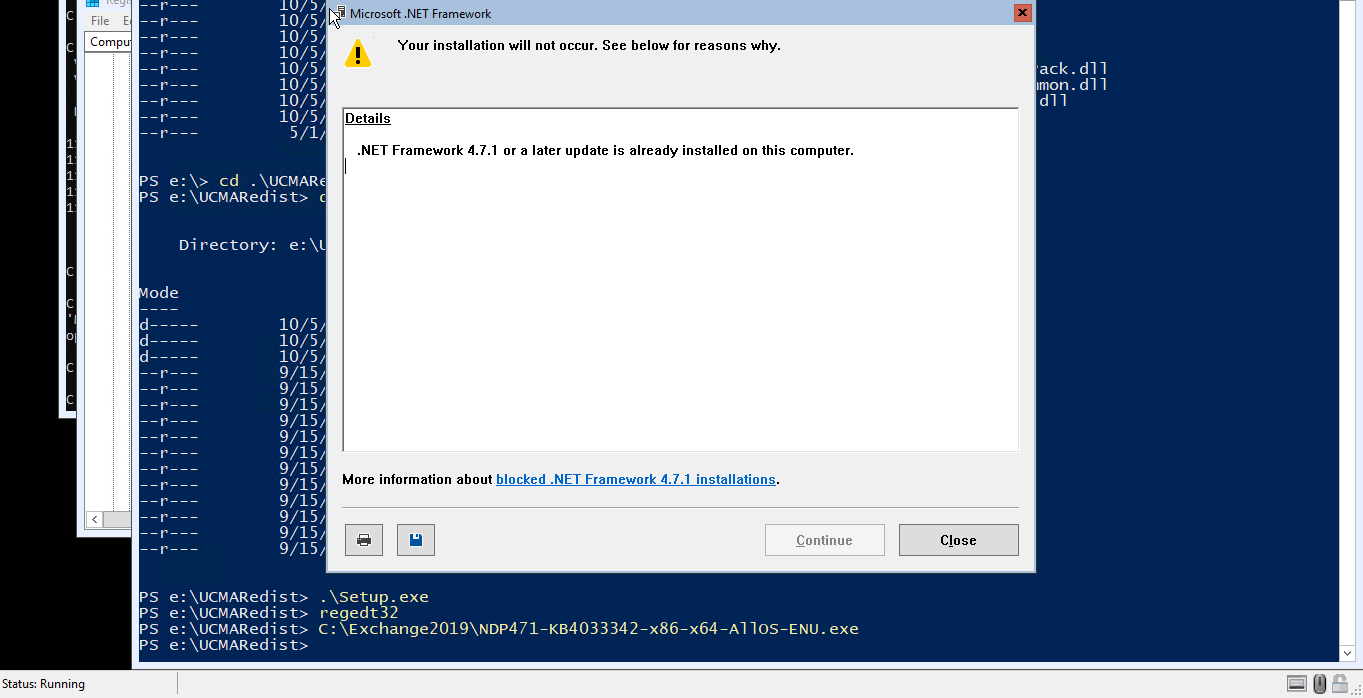
If you are not on .Net version 4.7.1 already, use the following command to install the .Net 4.7.1 (not required on Windows Server 2019 Server Core

.\NDP471-KB4033342-x86-x64-AllOS-ENU.exe /q /log c:\temp\ndp.log

Vì windows Server 2019 đã tích hợp sẵn 4.7.1

Restart-Computer –Force

CÀI ĐẶT EXCHANGE 2019 INSTALLATION

Sau khi reboot logon domain administrator

Start powershell gỏ lệnh để mount disk exchange 2019

Mount-DiskImage C:\Exchange2019\SW_DVD9_Exchange_Svr_2019_MultiLang_Std_Ent_.iso_MLF_X21-88195.ISO

CD e:

Gỏ lệnh:

E:\Setup.exe /IAcceptExchangeServerLicenseTerms_DiagnosticDataON /PrepareSchema

E:\Setup.exe /IAcceptExchangeServerLicenseTerms_DiagnosticDataON /PrepareAD /OrganizationName:”NVP”

E:\Setup.exe /IAcceptExchangeServerLicenseTerms_DiagnosticDataON /PrepareAllDomains

E:\Setup.exe /IAcceptExchangeServerLicenseTerms_DiagnosticDataON /PrepareDomain

3 Lệnh trên có thể gôm lại 1 lệnh bên dưới nhé

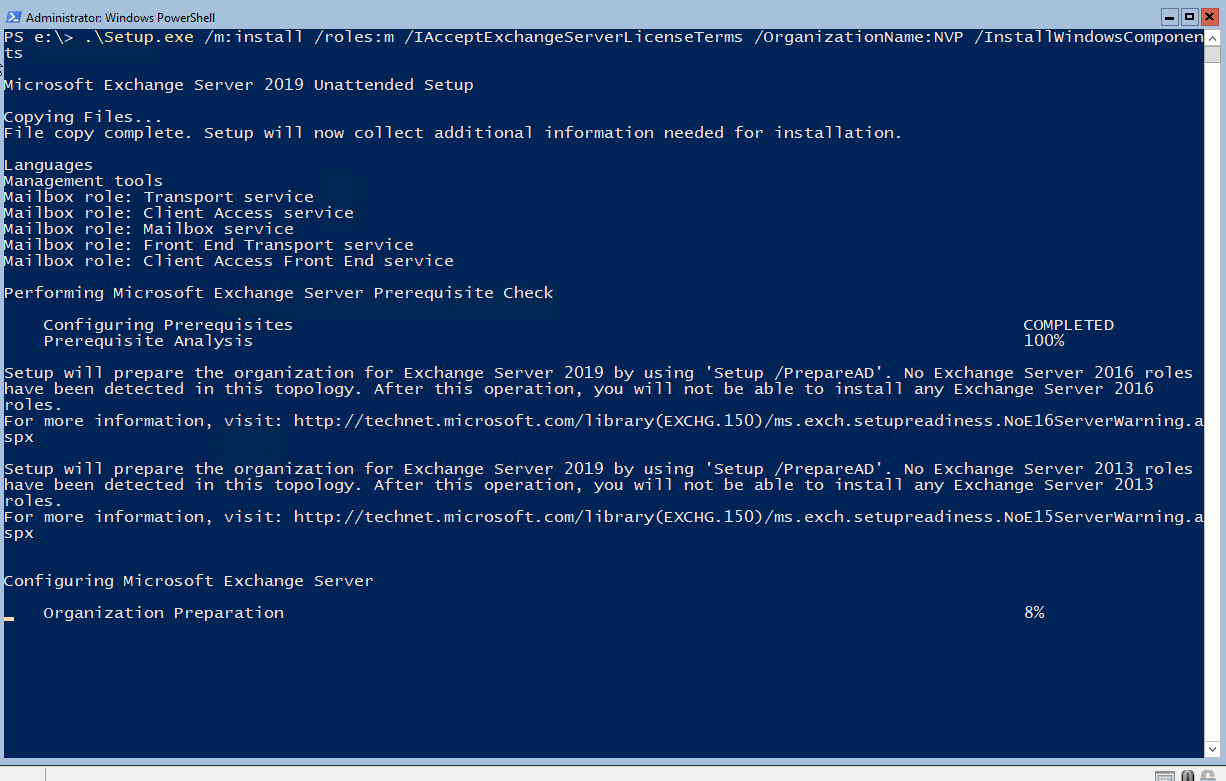
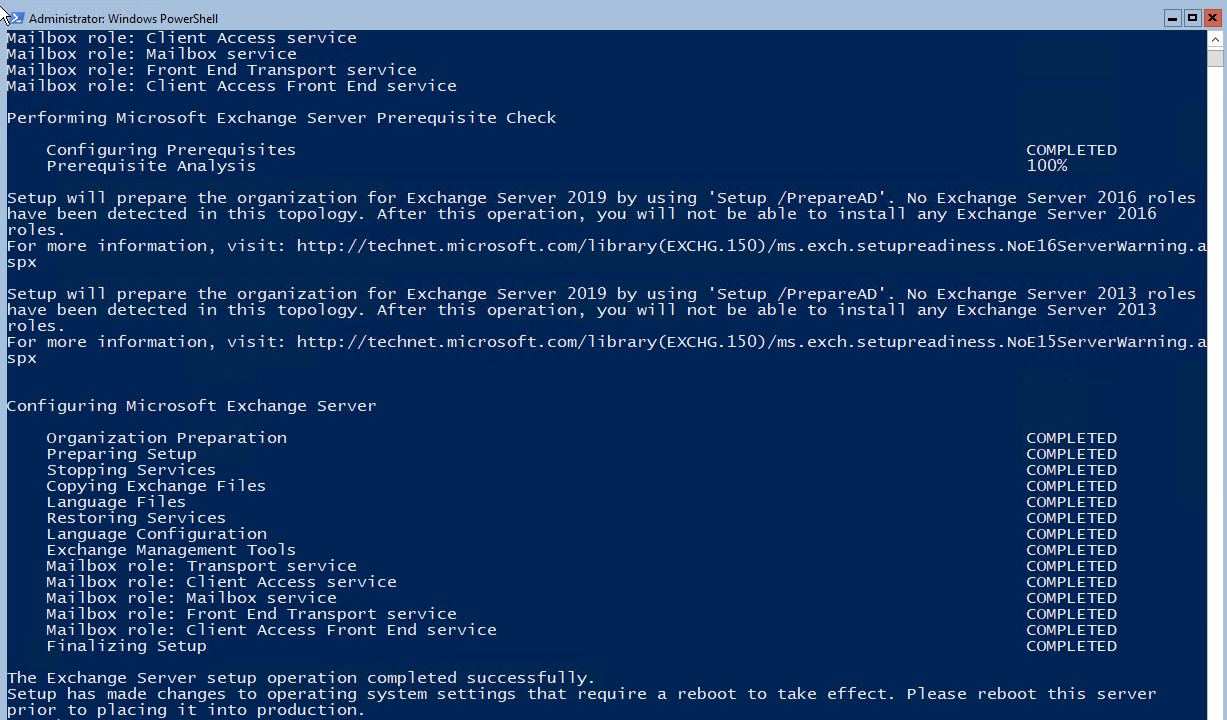
.\Setup.exe /Mode:Install /Roles:Mailbox /IAcceptExchangeServerLicenseTerms /InstallWindowsComponents

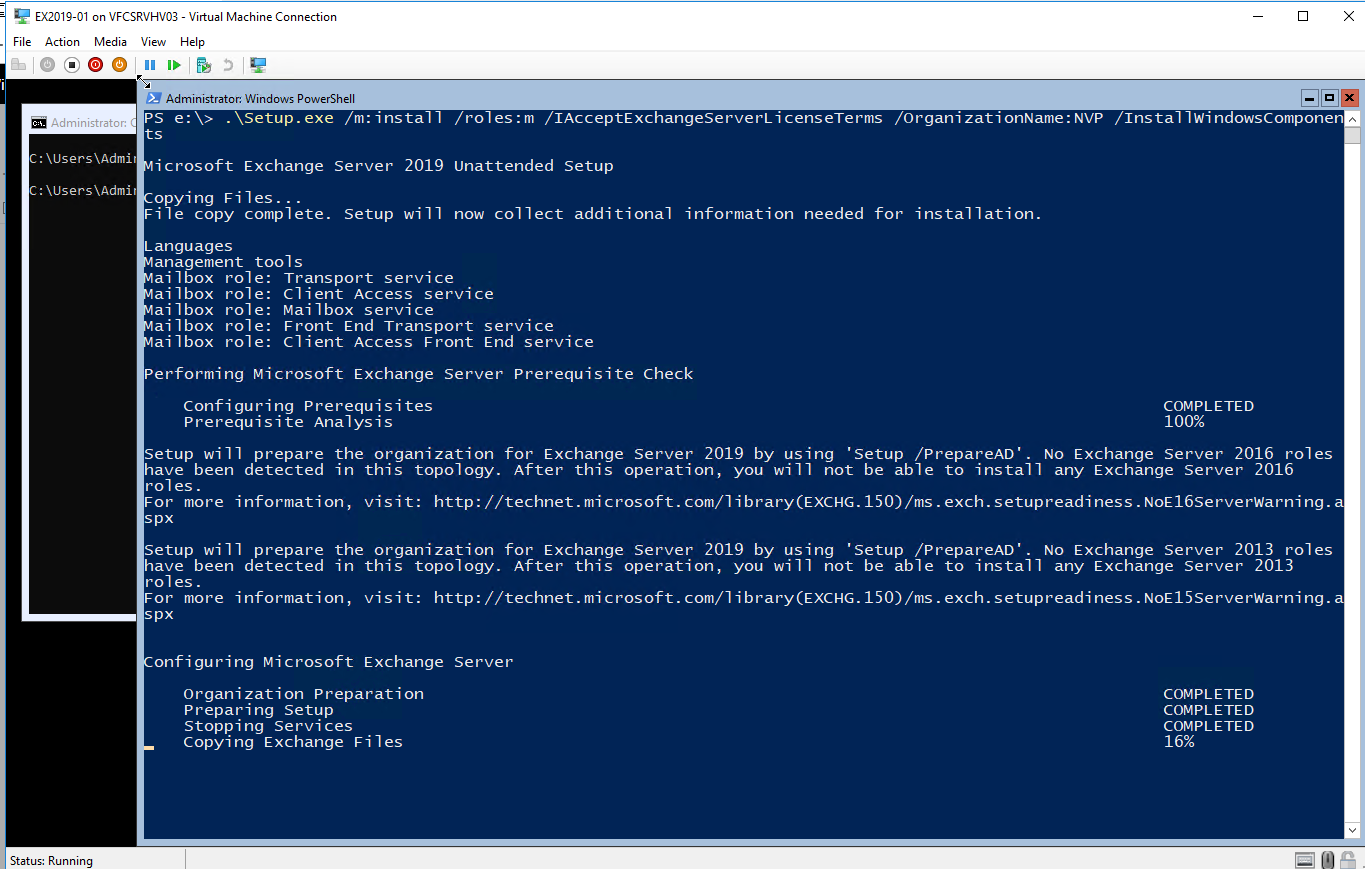
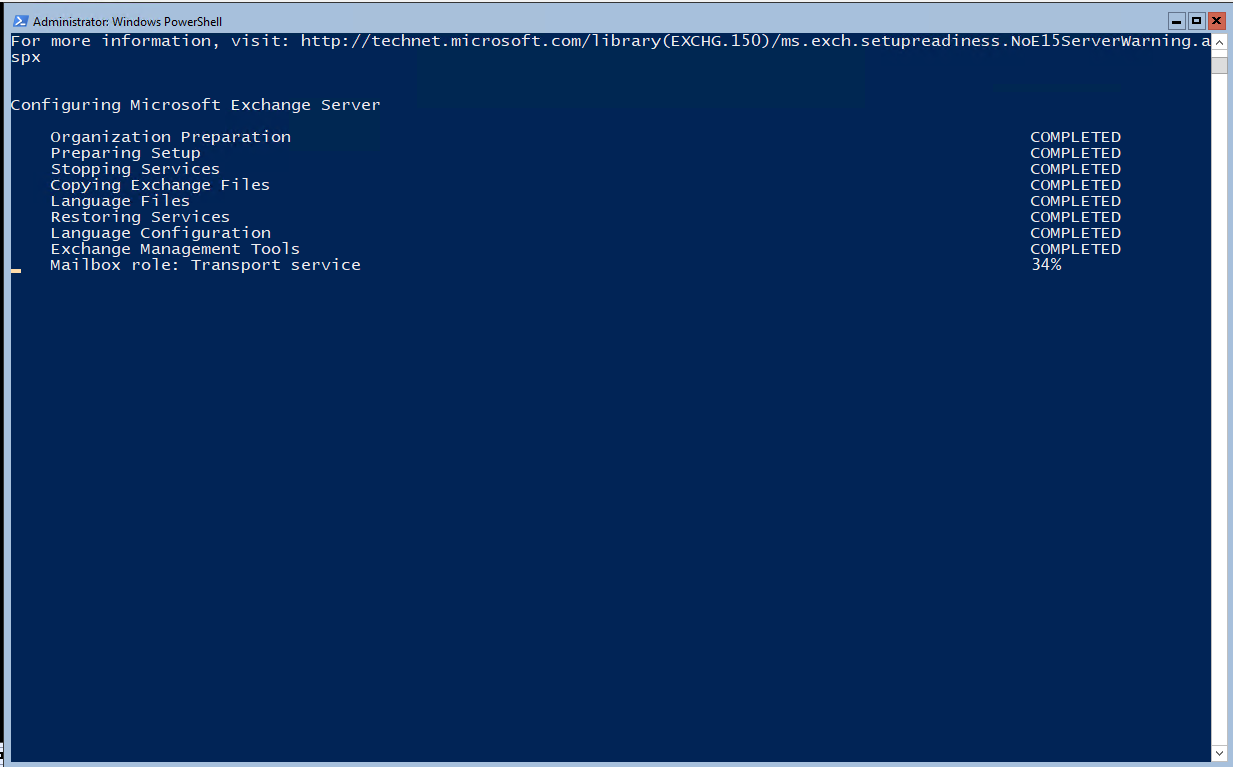
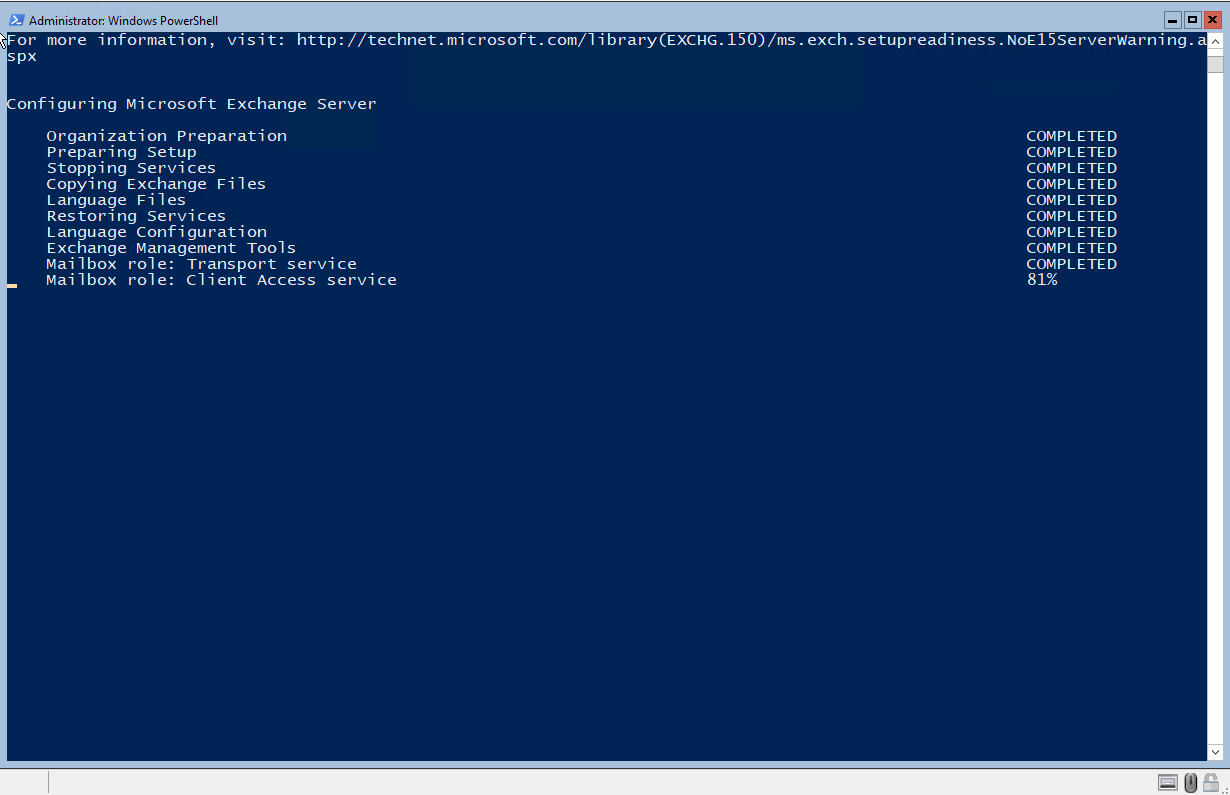
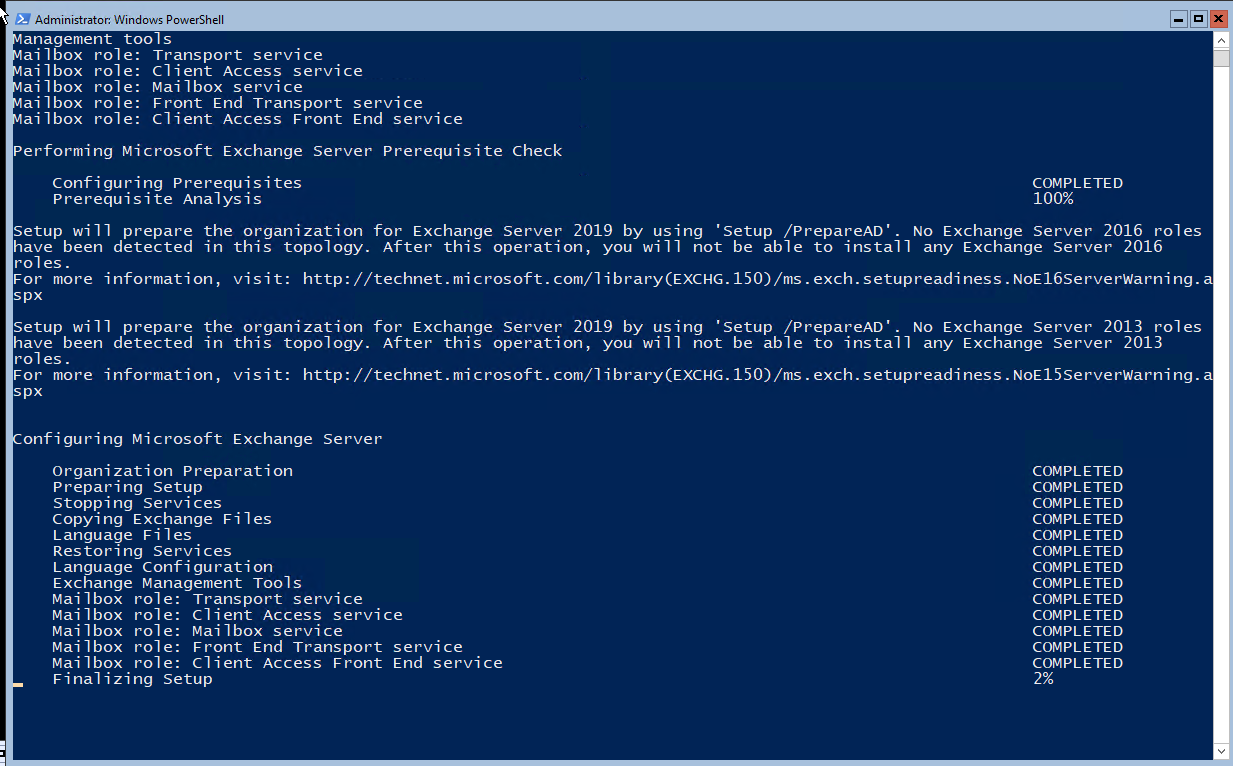
.\Setup.exe /m:install /roles:m /IAcceptExchangeServerLicenseTerms /OrganizationName:NVP /InstallWindowsComponents

Chờ hơi lâu 14:23

16:00

16:24

17:20

Nếu cài trên Windows Server 2019 Desktop GUI thì có giao diện nhé

Tiến hành reboot lại nhé

Logon vào giao diện nhé

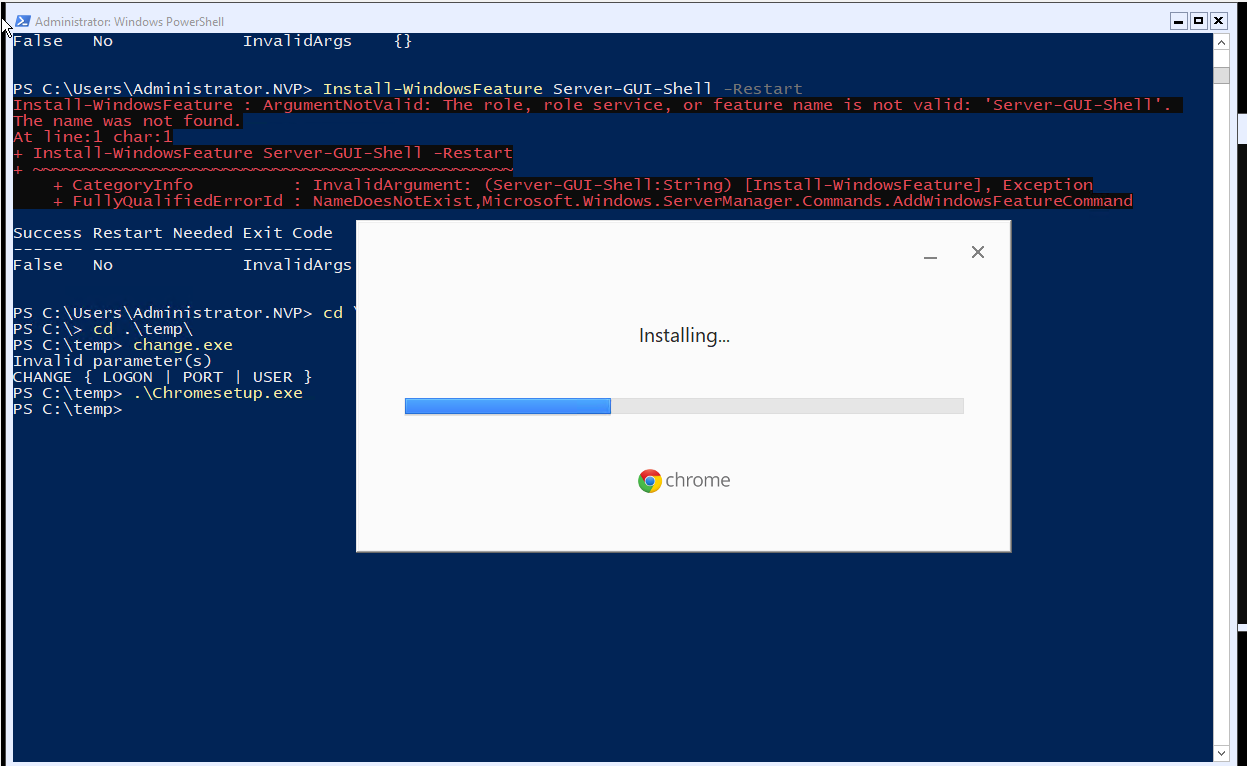
Start web trên local server core hơi khó nhe phải cài thêm feature. Tuy nhiên Server Core không khả năng cài GUI nhé

Cài phần mềm chrome nhé

“C:\Program Files (x86)\Google\Chrome\Application\Chrome.exe”

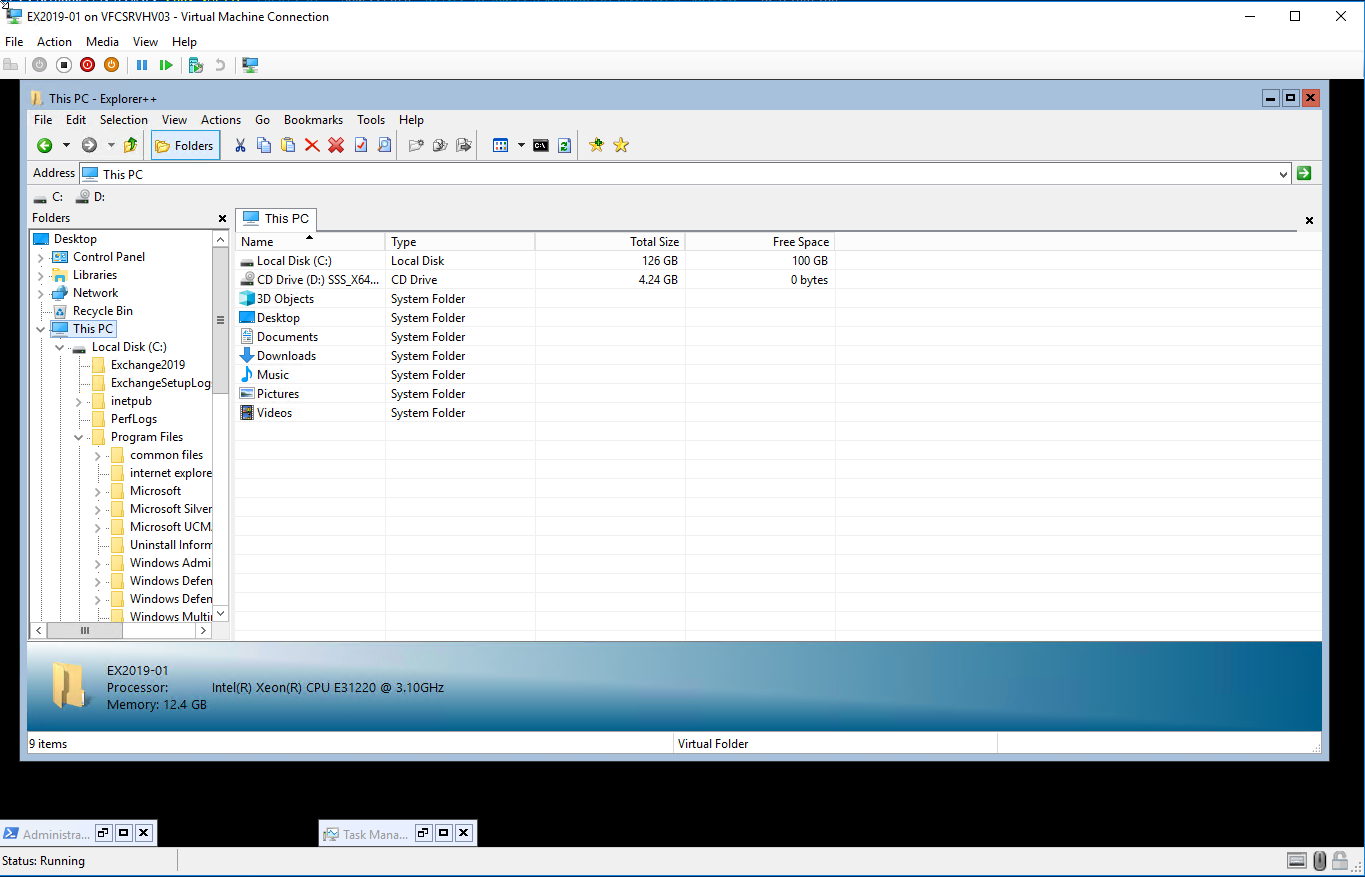
Có thể quản lý bằng công cụ Explorer++ nhé

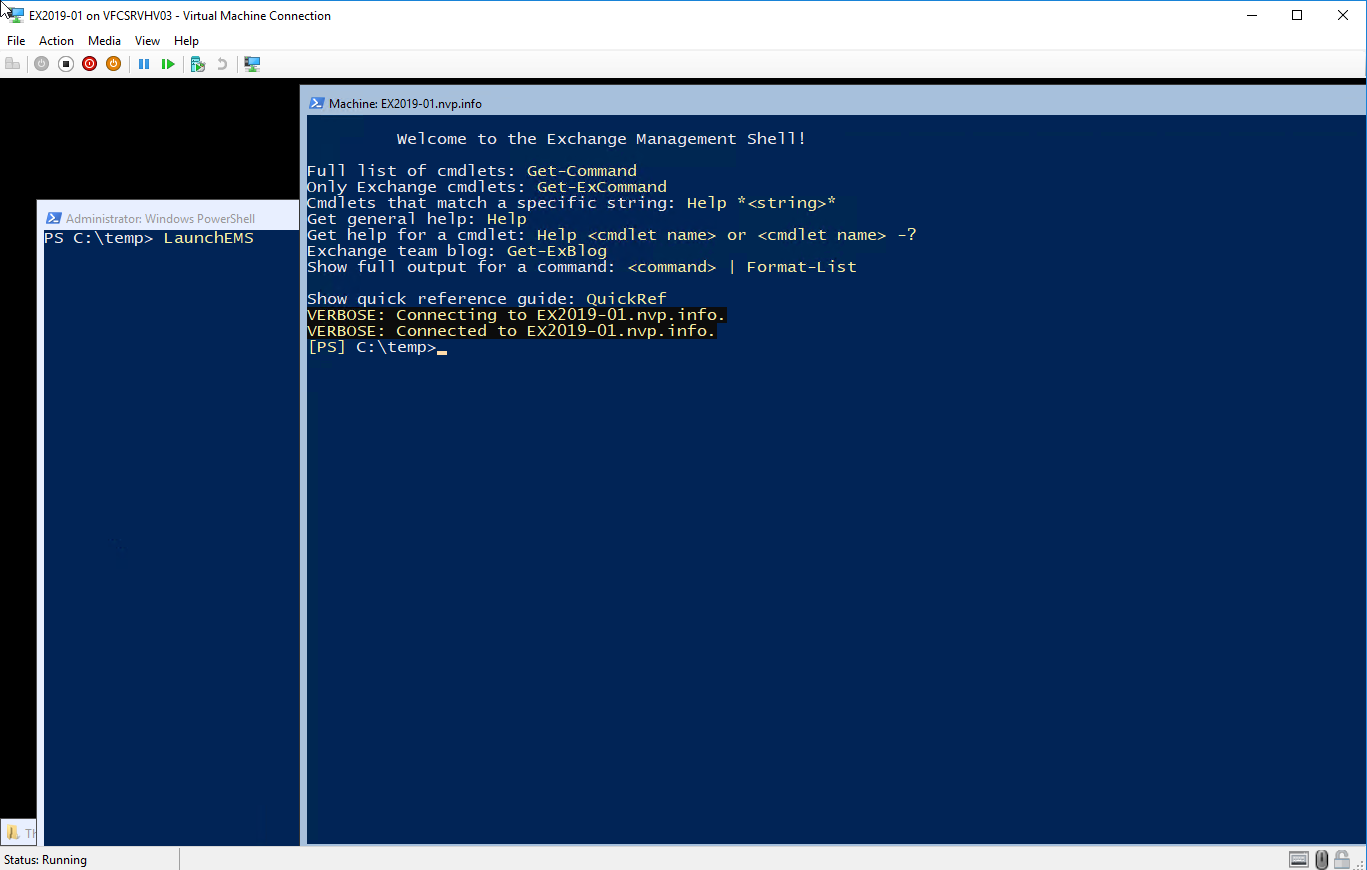
Load Exchange management Shell nhé

Gỏ lệnh LaunchEMS 

https://localhost/ecp/?ExchClientVer=15

Đúng là thật khó để start web giao diện trên local host vì đang bị xung đột với windows Admin Center

Đành tháo cái admin center ra vì trùng 443

exchange 2019

Cấu hình DNS trên Domain Controller nữa

Có thể quản lý DC trên administrator tools nhé

Join xong cài administrator tools

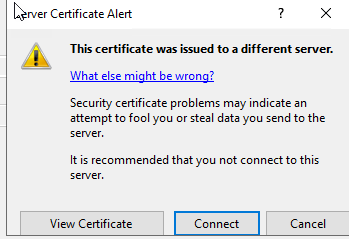
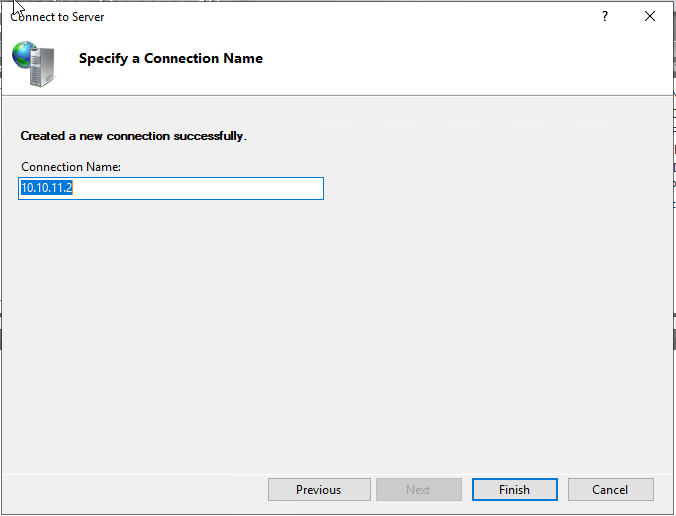
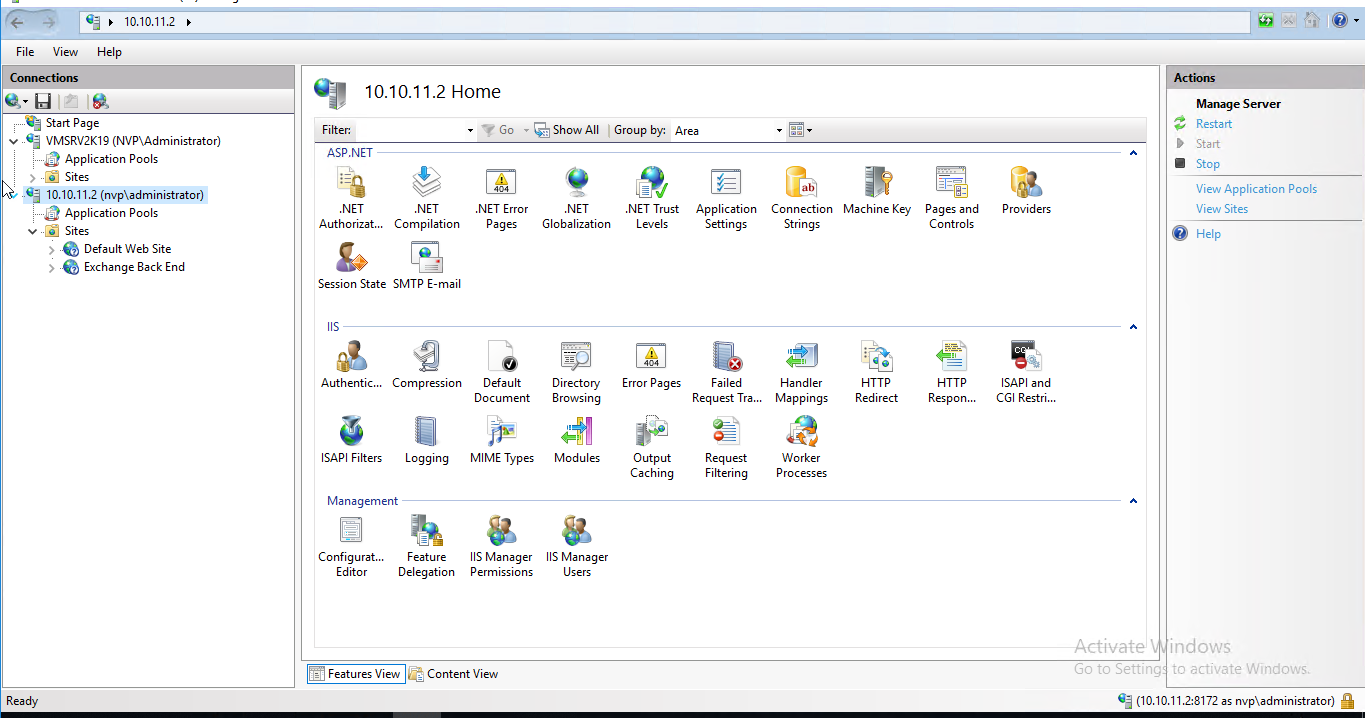
Remote IIS để quản lý IIS Exchange 2019 từ máy chủ khác nhé.

netsh advfirewall firewall add rule name=”IIS Remote Management” dir=in action=allow service=WMSVC

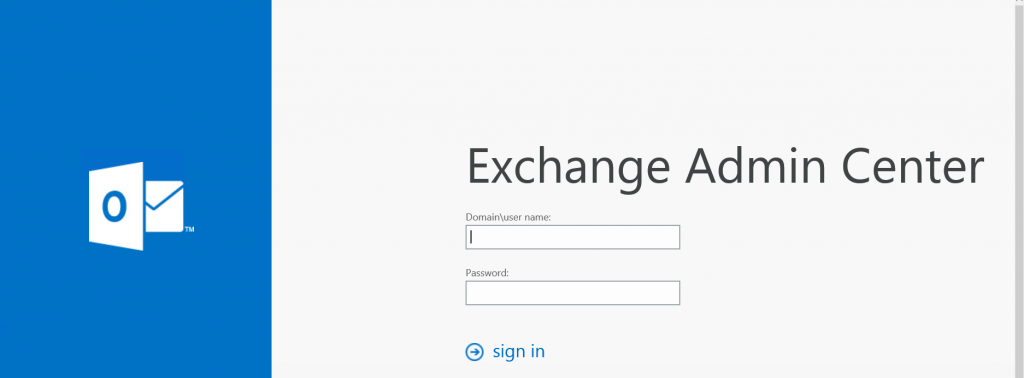
Như vậy là phương nguyễn đã hướng dẫn setup thành công cách cài đặt Exchange Server 2019 trên Windows Server Core, Còn việc cấu hình thì tương tự nhé. Chúng ta mốc vào web để quản trị

Chúc các bạn thành công

Phương Nguyễn Viết

CÁCH FIX LỖI SQL SERVER DATABASE IN RECOVERY MODE

CÁCH FIX LỖI SQL DATABASE IN RECOVERY MODE

Ngữ cảnh lỗi.

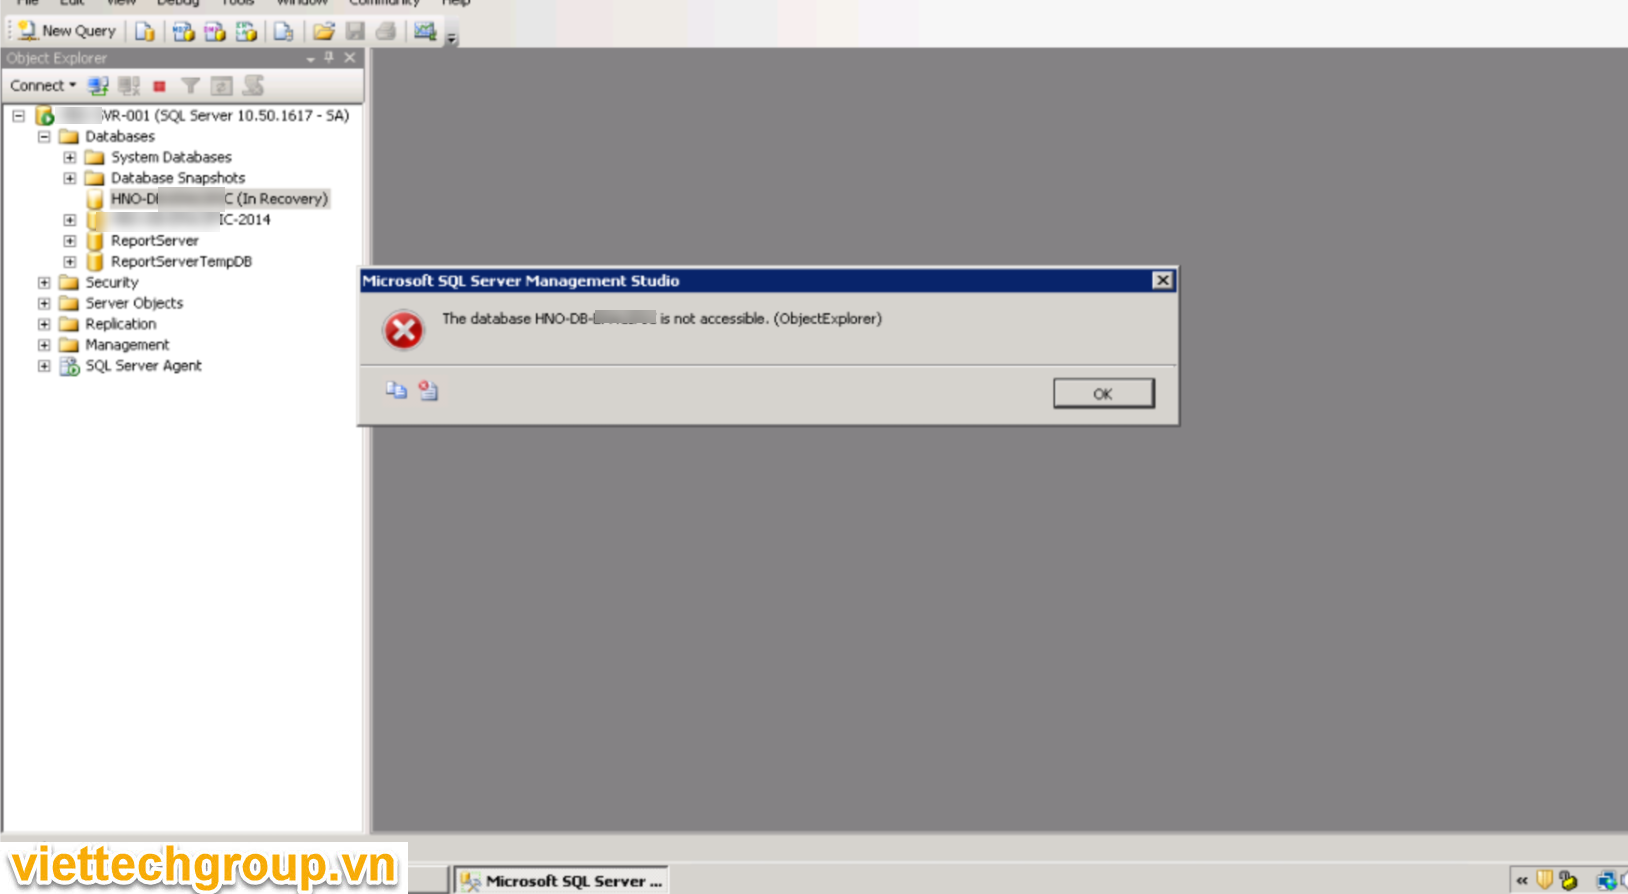
Máy chủ đang chạy SQL Server bị ngắt điện đột ngột sẽ bị lỗi databases vì dữ liệu đang ghi log chưa checkpoint cho nên sẽ bị in recovery mode hoặc recovery pending.

Kết quả chúng ta không thể truy cập như hình.

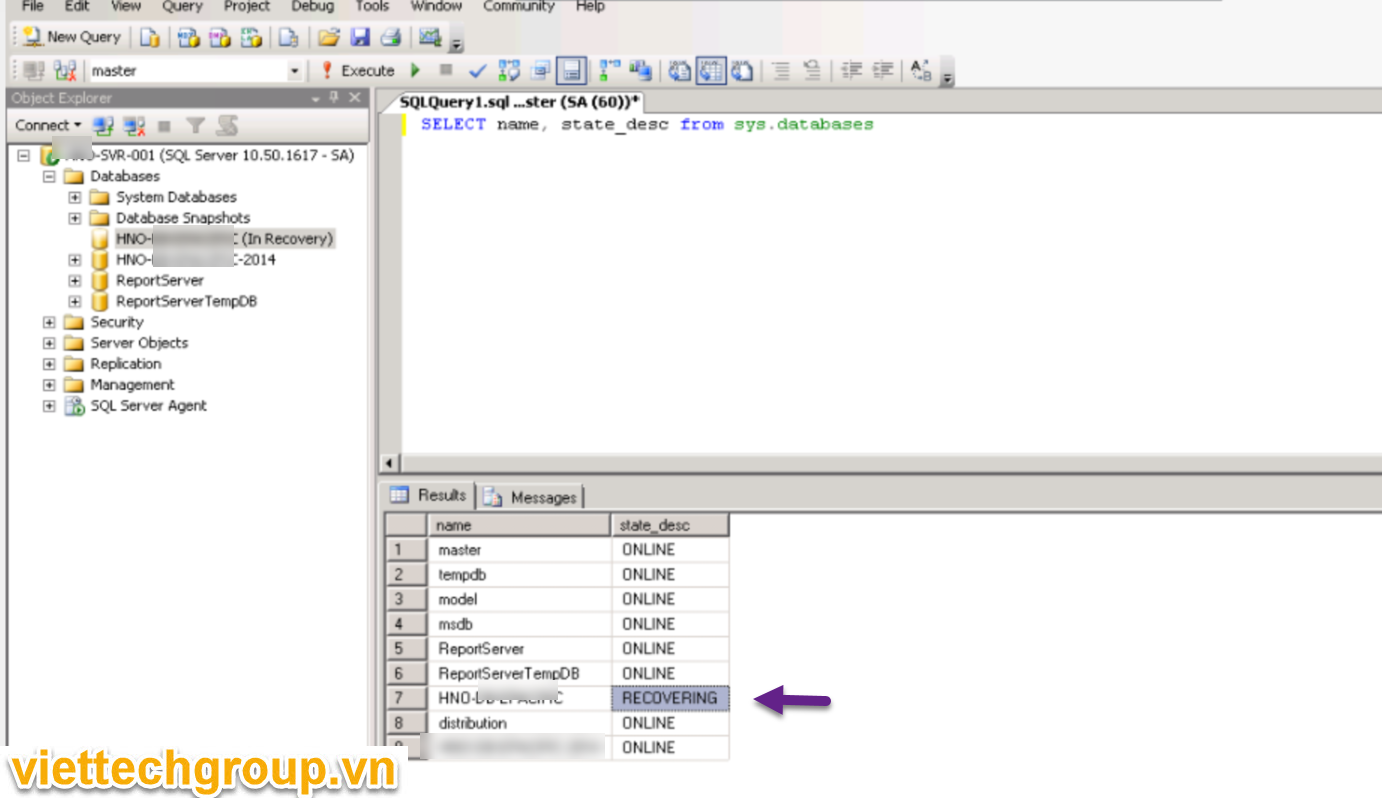
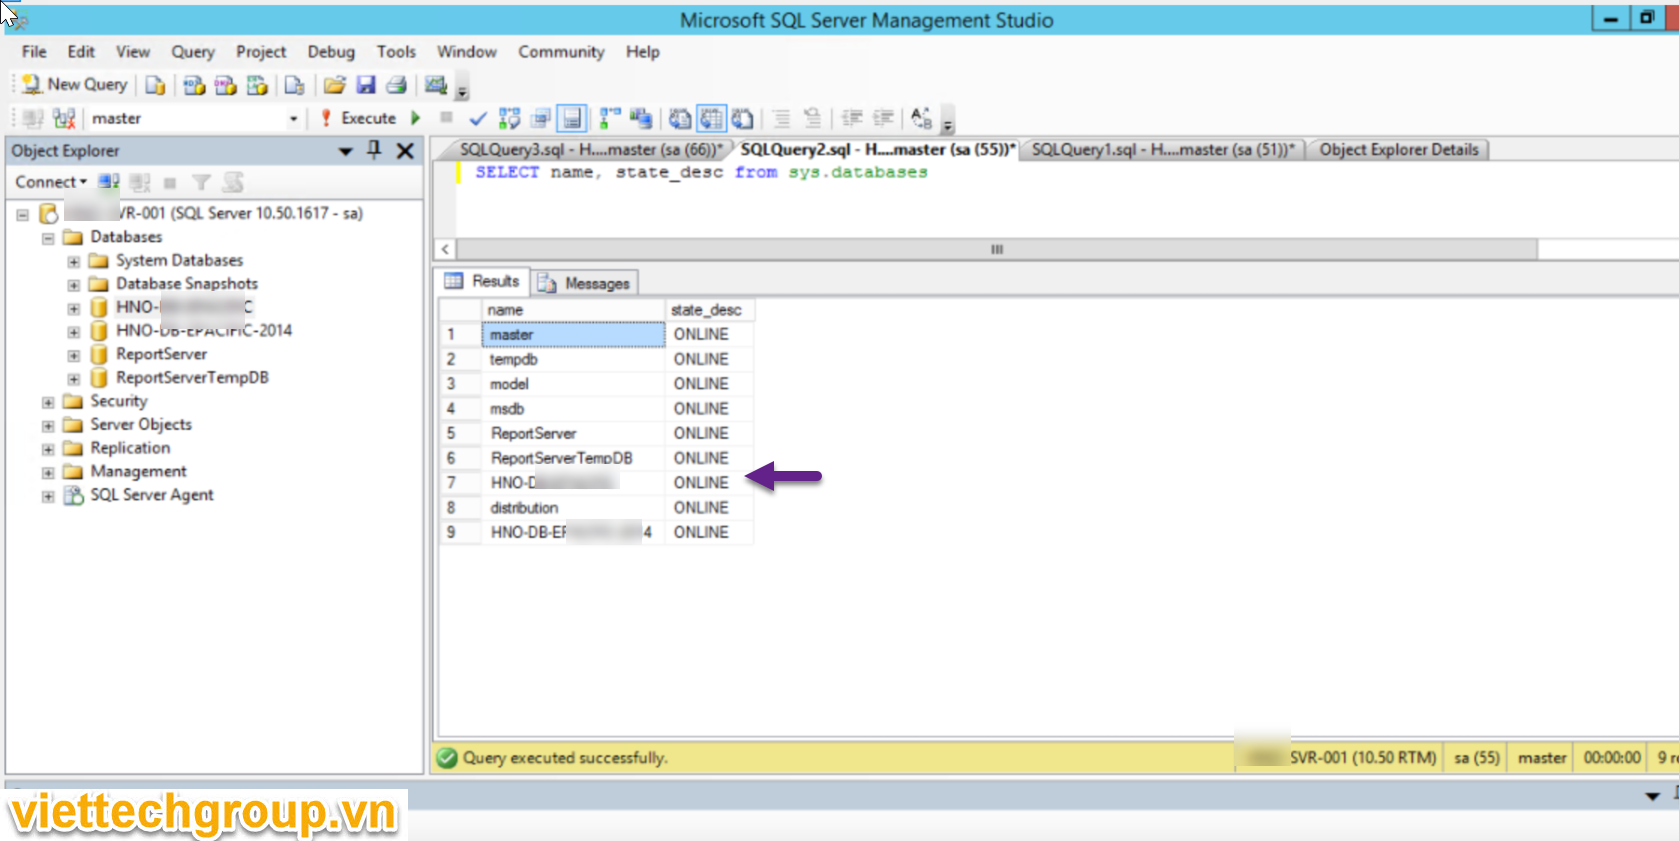
Kiểm tra tình trạng hay trạng thái databases

SELECT name, state_desc from sys.databases

Dùng lệnh bên dưới để kiểm tra

Một số trạng thái của dữ liệu như sau:

  • ONLINE
  • RESTORING
  • RECOVERING
  • RECOVERY_PENDING
  • SUSPECT
  • EMERGENCY
  • OFFLINE
  • COPYING
  • OFFLINE_SECONDARY

Trạng thái chúng ta đang bị là Recovering

Nguyên nhân gây lỗi

Một số nguyên nhân sư sau:

  • Máy chủ SQL bị tắt do lỗi. Nó có thể là phần cứng, sức mạnh hoặc thứ gì khác.
  • Đĩa có thể bị thiếu.
  • Tệp MDF hoặc LDF có thể bị thiếu
  • Đĩa đầy
  • Quá trình nâng cấp SQL không diễn ra tốt đẹp hoặc bị gián đoạn.
  • Sự thay đổi lớn đang được đưa ra nhưng có điều gì đó đã thất bại giữa chừng, chẳng hạn như những thay đổi đối với tính năng FileStream.
  • Tệp LDF (nhật ký) bị hỏng.
  • Tệp MDF (dữ liệu) bị hỏng. Tệp db của tệp MDF có thể bị hỏng vì nhiều lý do như sự cố đĩa hoặc SAN, lỗi phần cứng, vi rút, v.v.
  • Máy chủ đã khởi động lại và có gì đó đã thay đổi, chẳng hạn như thiếu đĩa hoặc thư mục hoặc thiếu quyền.
  • Cryptoware đã mã hóa các tệp SQL của bạn.

Cách xử lý

Trường hợp 1: Set Database state to ONLINE

Lỗi do disk full thì không thể set online cũng như start chúng ta phải mở rộng disk trước khi thực hiện.

ALTER DATABASE ‘AdventureWorks2019’ SET ONLINE;

DBCC CHECKDB(‘AdventureWorks2019’) WITH NO_INFOMSGS;

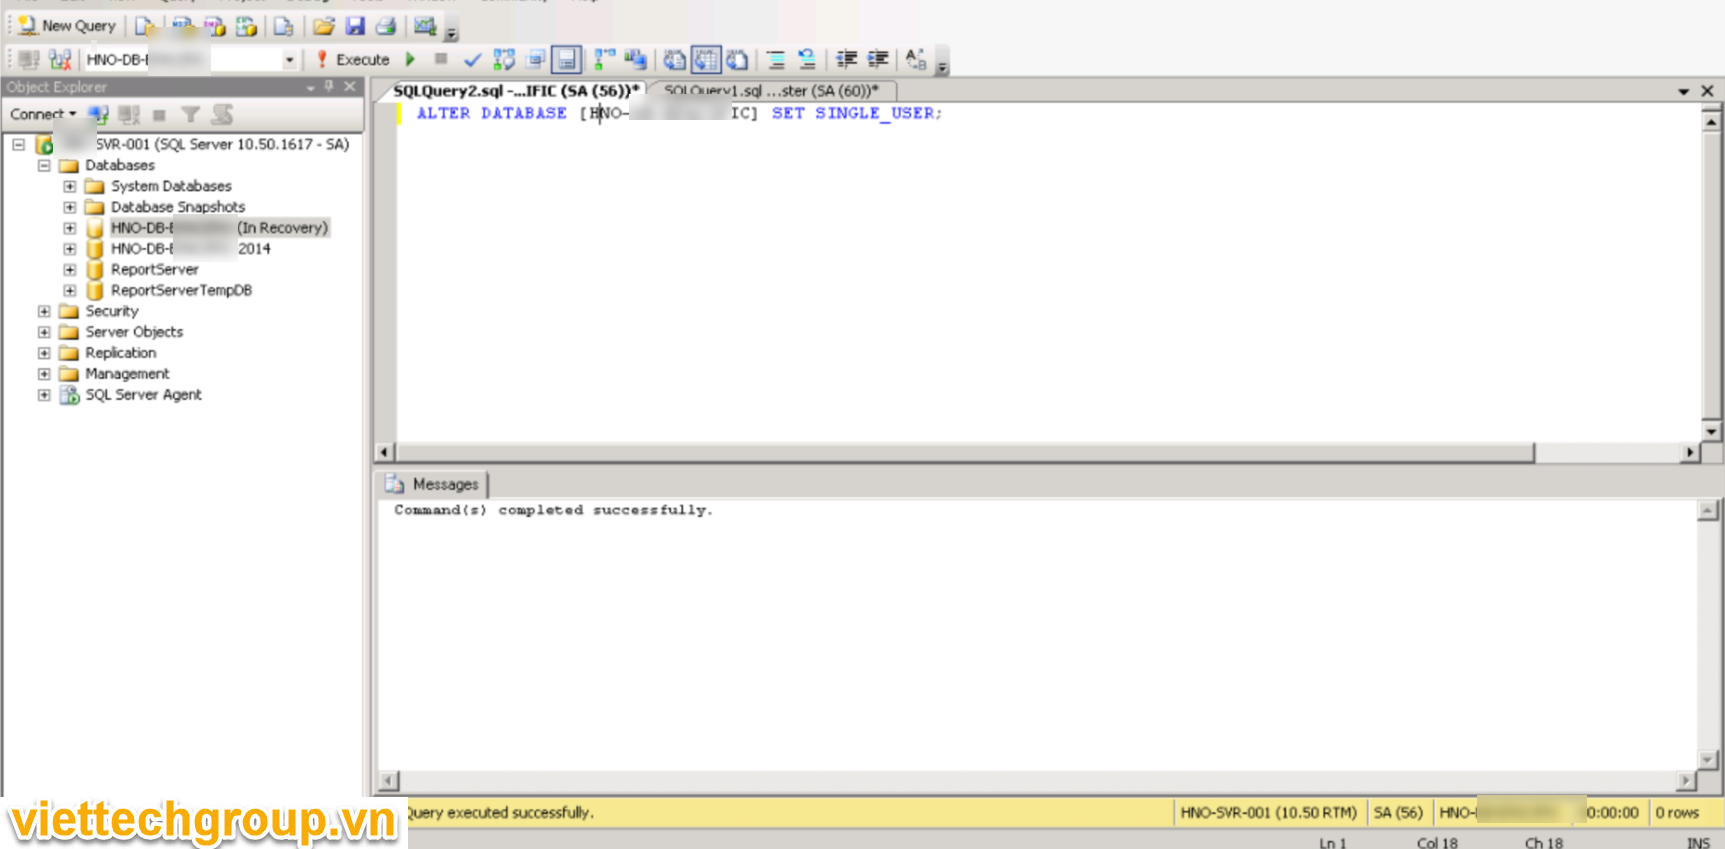
Trường hợp 2: Rebuilding lại log file và detach và attach file

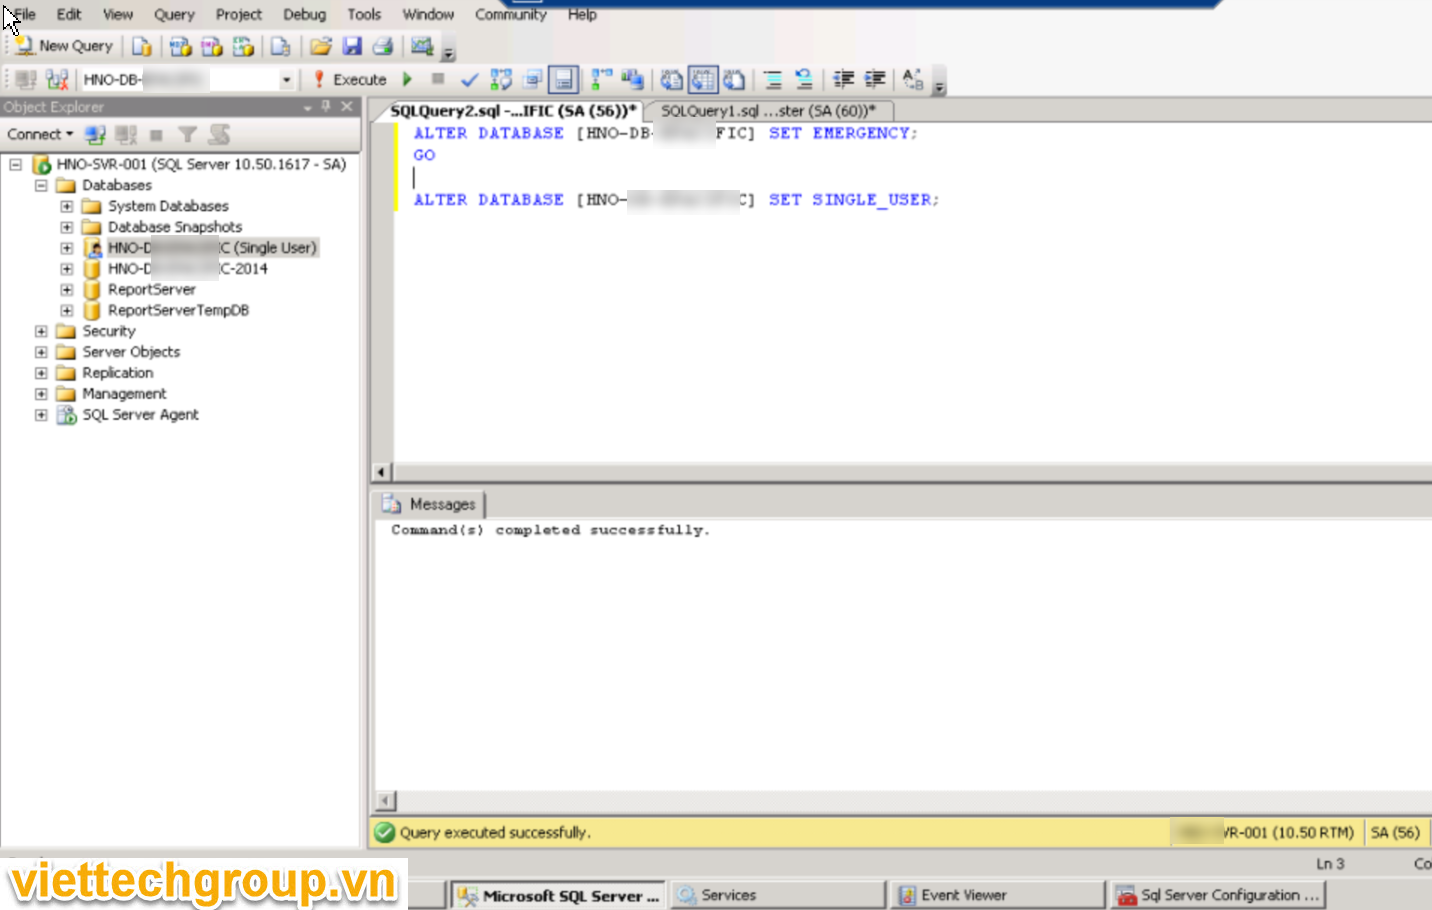
Nôm na là setup mode emergency, sau đó detach, attach lại.

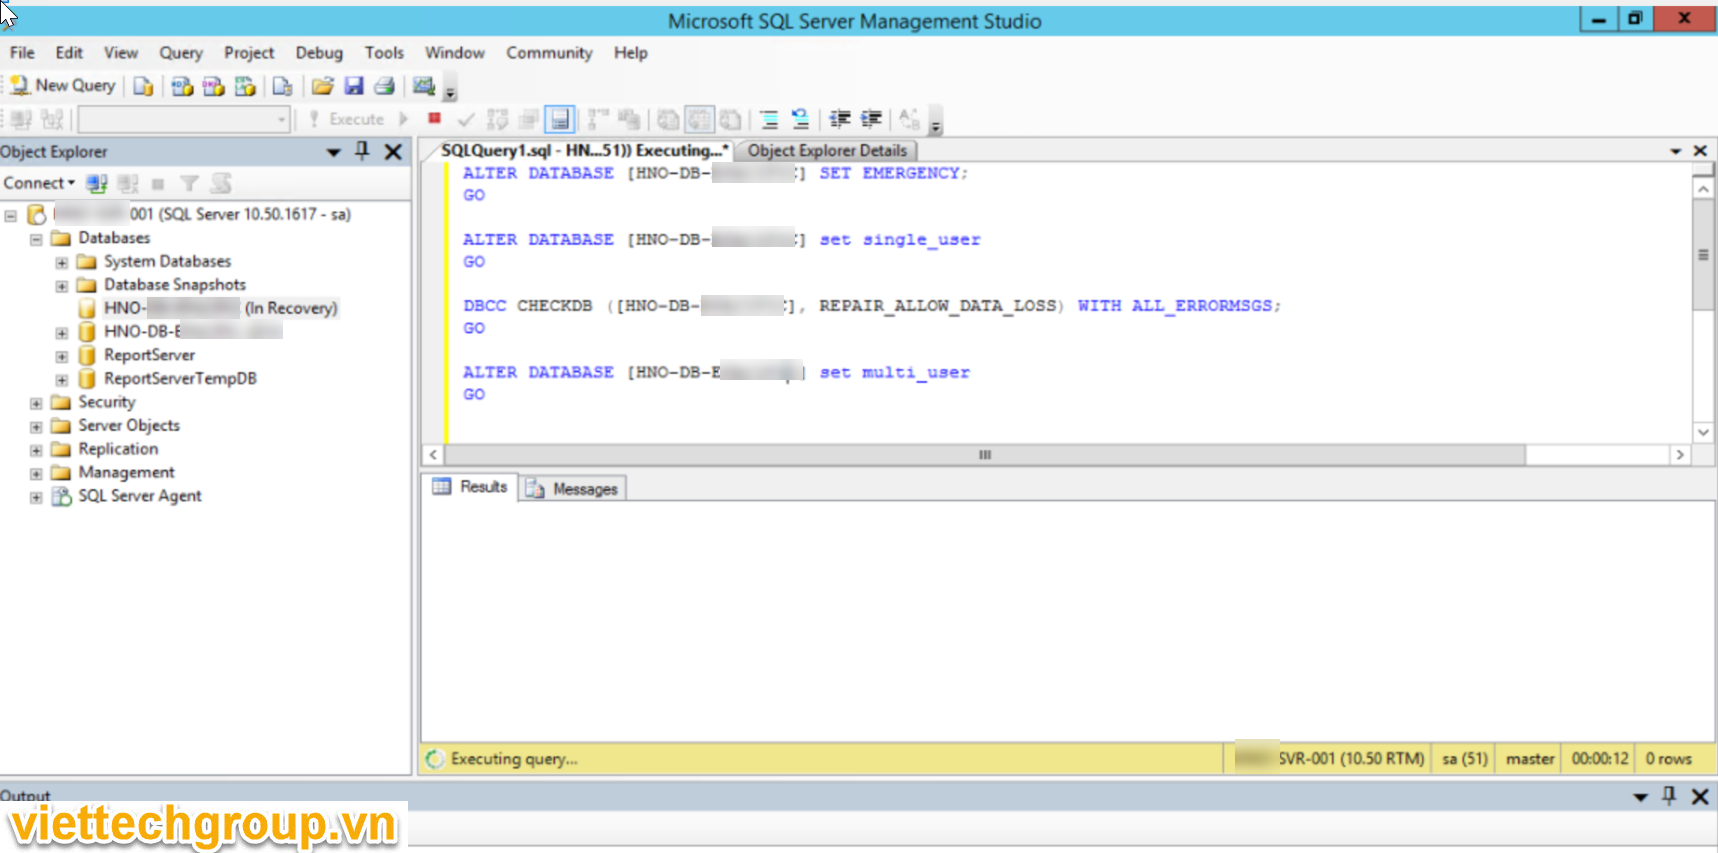
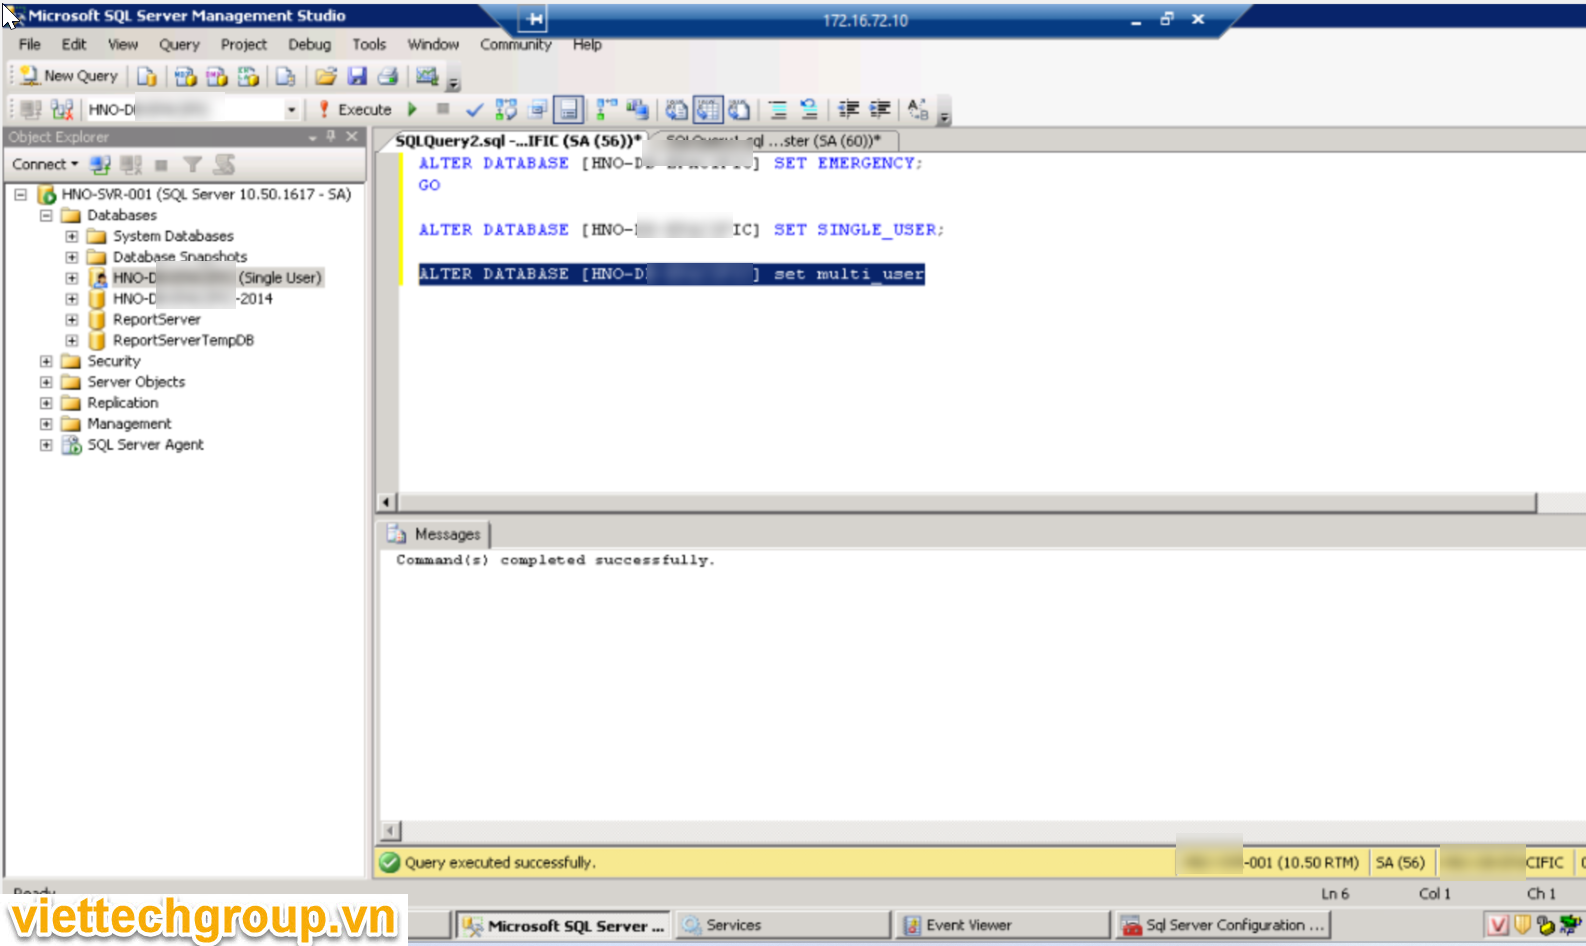
ALTER DATABASE [AdventureWorks2019] SET EMERGENCY;

ALTER DATABASE [AdventureWorks2019] set MULTI_USER;

EXEC sp_detach_db '[AdventureWorks2019]';

EXEC sp_attach_single_file_db @DBName = '[AdventureWorks2019]', @physname = N'MDF_FILE_FULL_PATCH';

Trường hợp 3: Initiate DBCC CHECKDB with REPAIR option

  • Admin bị và xử lý theo cách 3 sẽ ok chúng ta có thể rơi vào từng trường hợp để test nhé.
  • Trường hợp này có thể bị mất dữ liệu, tốt nhất có thể chuẩn bị bản backup, trước khi thao tác.
  • Hãy chắc chắn rằng bạn có một bản sao lưu. Đừng làm điều này trên db DUY NHẤT mà bạn có, vì sau khi sửa chữa hoàn tất, bạn có thể mất dữ liệu và bạn có thể không thích những gì đã bị mất!
  • DBCC CHECKDB với tùy chọn SỬA CHỮA là một giao dịch được ghi lại và có thể phục hồi. Điều đó có ý nghĩa gì với bạn? Điều đó có nghĩa là nếu bạn gói DBCC CHECKDB với REPAIR vào một giao dịch (thực thi BEGIN TRANSACTION trước khi chạy lệnh) và bạn không thích kết quả cuối cùng, thì bạn có thể hoàn nguyên giao dịch và quay lại nơi bạn đã bắt đầu. Bằng cách đó, bạn sẽ có thể Khôi phục các thao tác sửa chữa nếu cần thiết.
  • 3.1. REPAIR_REBUILD
  • Có nhiều cấp độ sửa chữa khác nhau. Hãy thử bắt đầu với “REPAIR_REBUILD”, thực hiện sửa chữa mà không có khả năng mất dữ liệu:
    1. Đặt cơ sở dữ liệu ở chế độ một người dùng
    2. Chạy DBBC CHECKDB với “REPAIR_REBUILD”
    3. Đặt cơ sở dữ liệu thành “online” và kích hoạt lại chế độ nhiều người dùng

Câu lệnh bên dưới lưu ý thay databases của các bạn vào nhé:

ALTER DATABASE DATABASENAME SET SINGLE_USER;

DBCC CHECKDB (DATABASENAME, REPAIR_REBUILD) WITH NO_INFOMSGS, ALL_ERRORMSGS;

ALTER DATABASE [DATABASENAME] SET ONLINE;

ALTER DATABASE [DATABASENAME] SET MULTI_USER;

Nếu sửa chữa thành công, cơ sở dữ liệu có thể được đặt lại về chế độ nhiều người dùng. Nếu không, mức độ sửa chữa “REPAIR_ALLOW_DATA_LOSS” là tùy chọn tiếp theo.

  • 3.2. REPAIR_ALLOW_DATA_LOSS

Bước này có thể bị mất dữ liệu nhé 😊

  1. Đặt cơ sở dữ liệu ở chế độ Khẩn cấp
  2. Chạy DBBC CHECKDB với “REPAIR_ALLOW_DATA_LOSS”
  3. Đặt cơ sở dữ liệu thành “ONLINE” và kích hoạt lại chế độ nhiều người dùng

Code Sql:

ALTER DATABASE [DATABASENAME] SET EMERGENCY;

ALTER DATABASE [DATABASENAME] SET SINGLE_USER;

DBCC CHECKDB (DATABASENAME,REPAIR_ALLOW_DATA_LOSS) WITH NO_INFOMSGS, ALL_ERRORMSGS;

ALTER DATABASE [DATABASENAME] SET ONLINE;

ALTER DATABASE [DATABASENAME] SET MULTI_USER;

Check data

Kiểm tra lại trạng thái

Trường hợp 4: Restoring from Backup

Trường hợp này là sau cùng, các trường hợp trên không cứu được chúng ta buộc phải khôi phục từ backup.

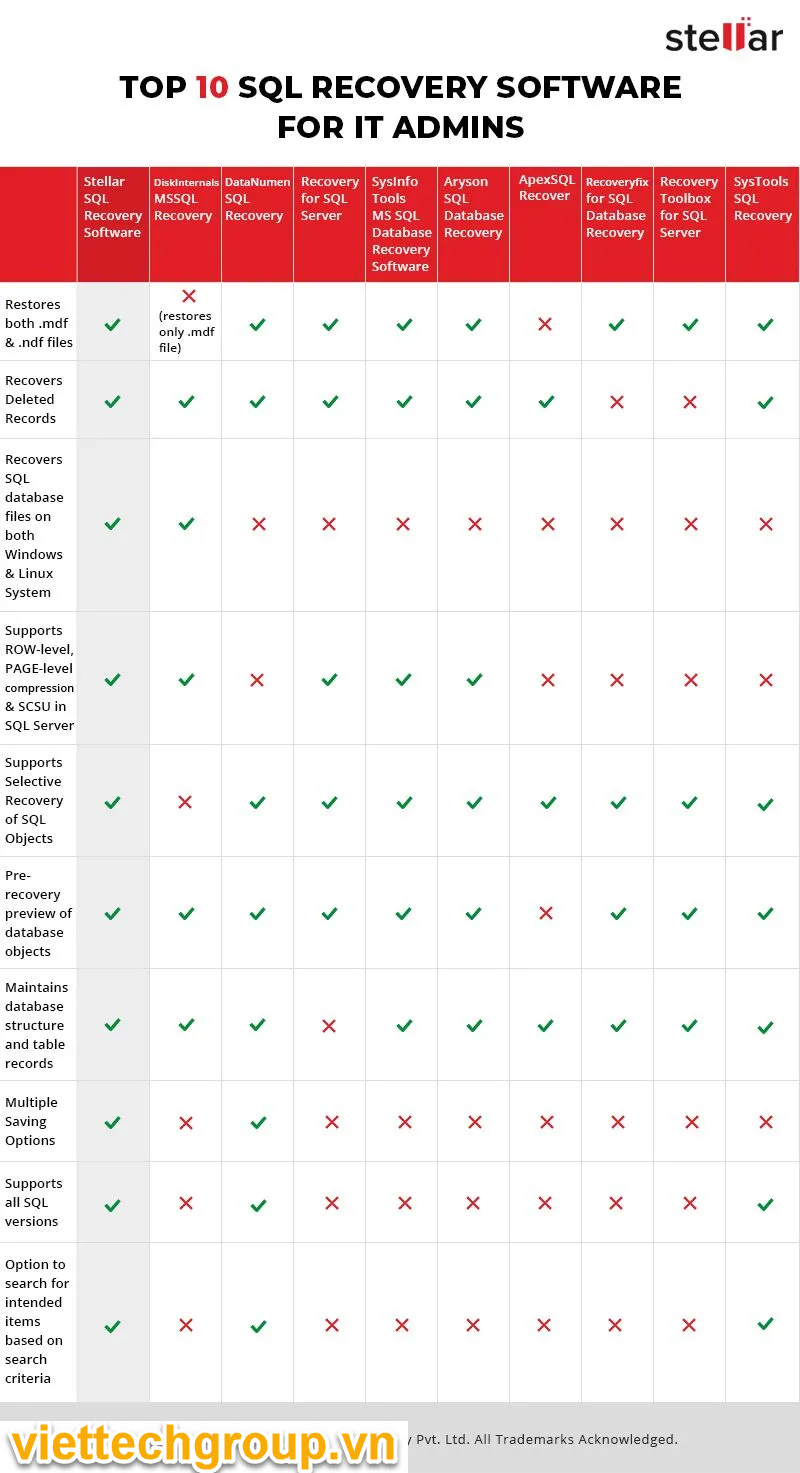
Ngoài các công cụ sẵn có của MSSQL chúng ta có thể sử dụng áp thứ 3 trả tiền license để khôi phục hoặc sửa chữa:

  • SysInfo Tools MS SQL Database Recovery Software,
  • Stellar Repair for MS SQL,
  • DiskInternals MSSQL Recovery Software
  • DataNumen SQL Recovery
  • Recovery for SQL Server
    Aryson SQL Database Recovery Tool
  • ApexSQL Recover
  • Recoveryfix for SQL Database Recovery
  • Recovery Toolbox for SQL Server
  • SysTools SQL Recovery Software

Chúc các bạn thành công trong công việc cứu dữ liệu

Phương nguyễn viết
Tài liệu tham khảo:

https://red9.com/blog/how-to-fix-recovery-pending-state-in-sql-server/

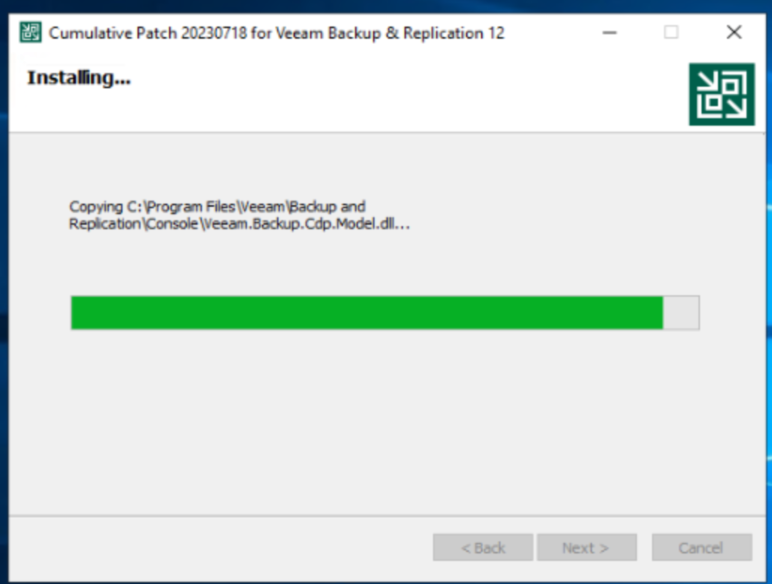
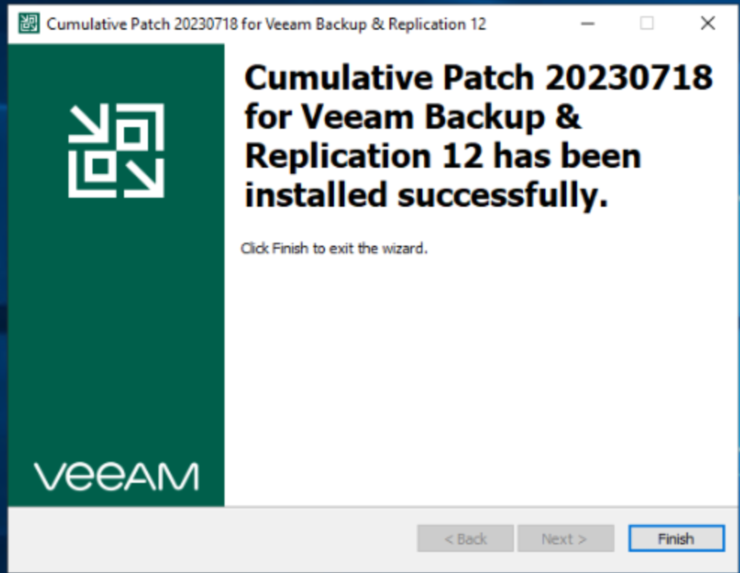
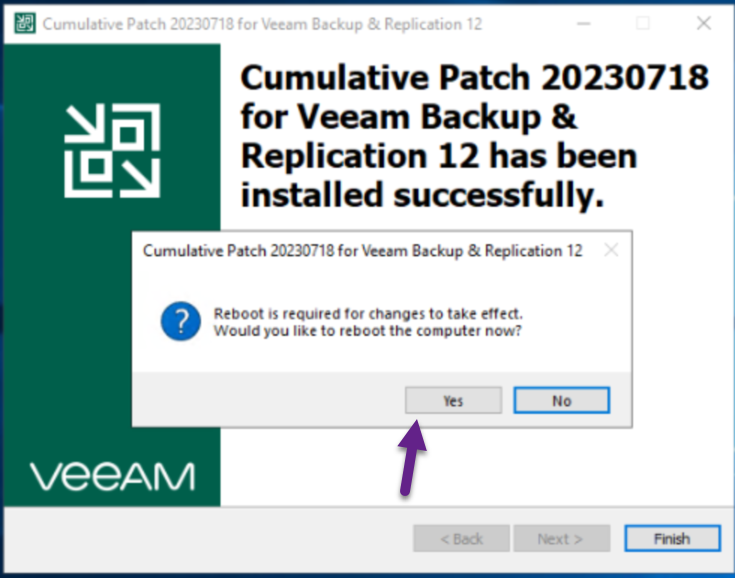
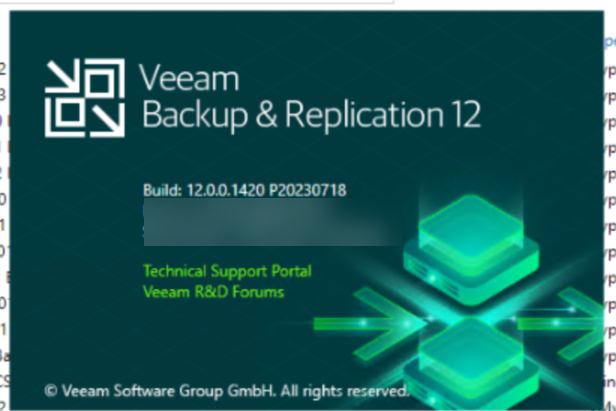
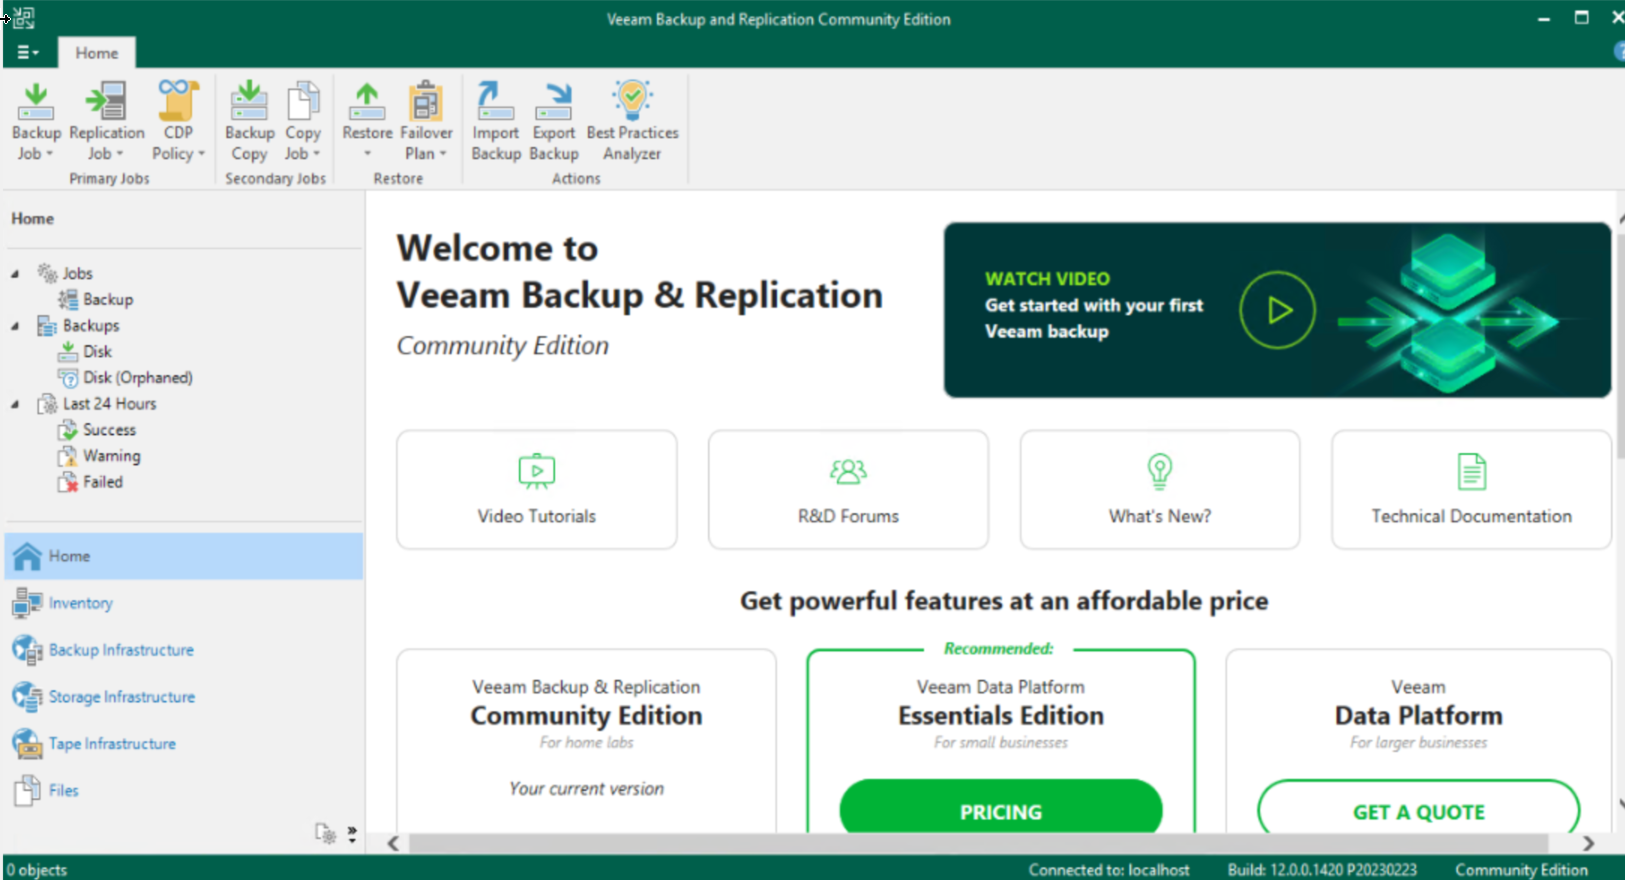
CÁCH UPGRADE VEEAM V12 KB LÊN VEEAM V12 KB4420

CÁCH UPGRADE VEEAM V12 KB LÊN VEEAM V12 KB4420

Chuẩn bị source KB

Link tải

https://www.veeam.com/kb4420 Tải iso file path

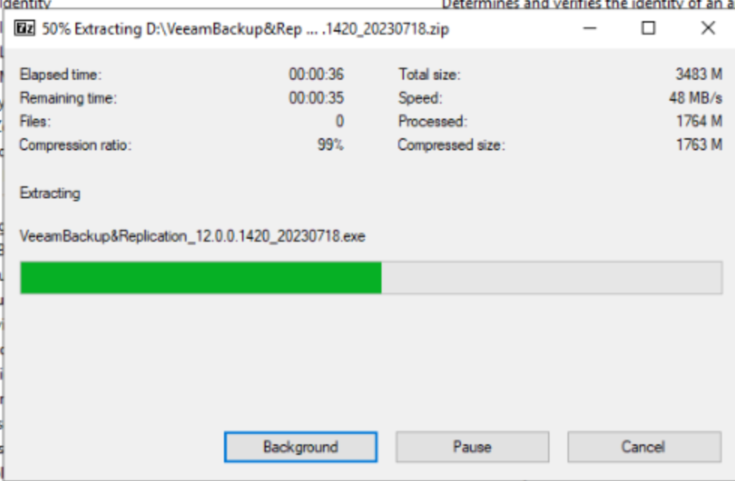
Filename: VeeamBackup&Replication_12.0.0.1420_20230718.zip

MD5: 1A89F6CD6E4D64F546E773548FA0FD63

SHA1: B08F58A9A2E51BCE2C5F7876C57B4E33AADEB9B0

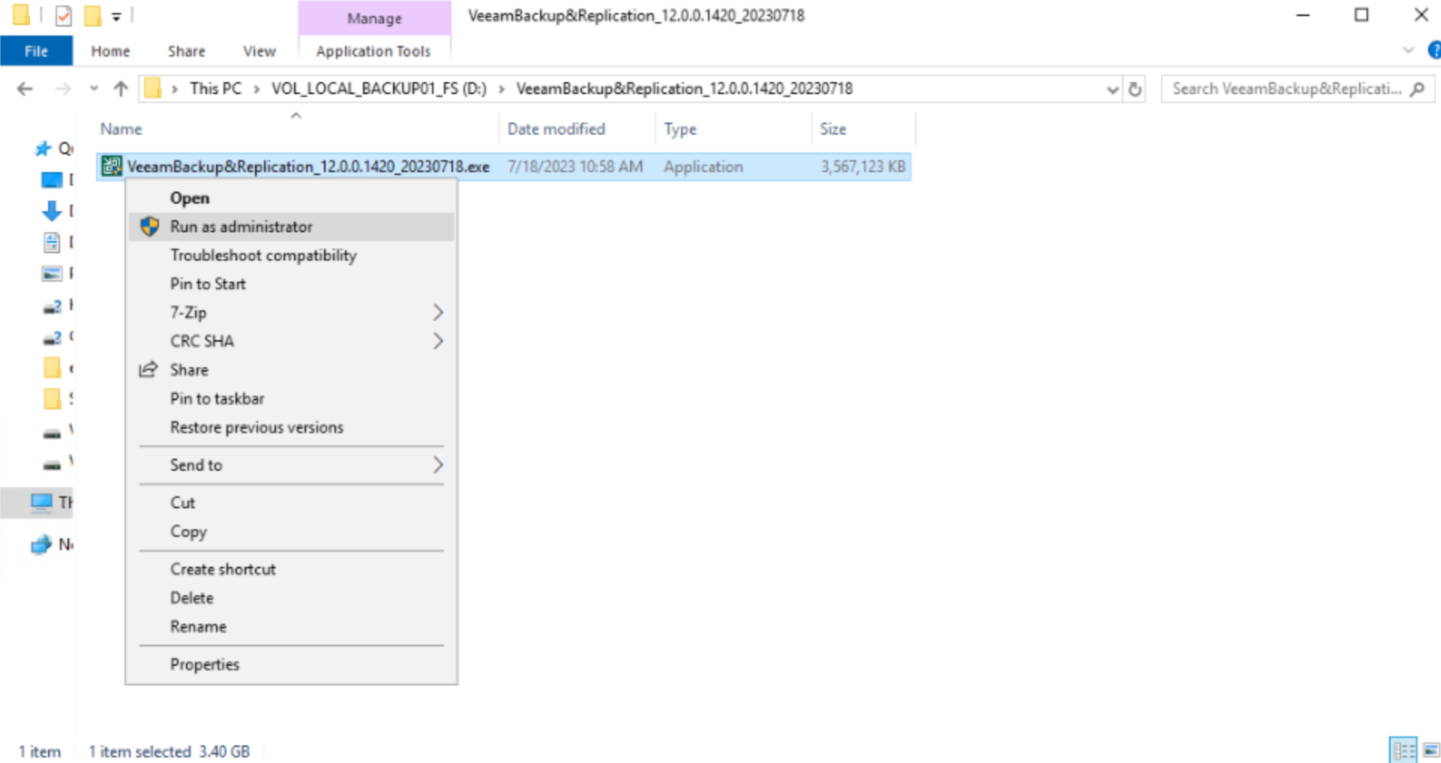
Giải nén file zip

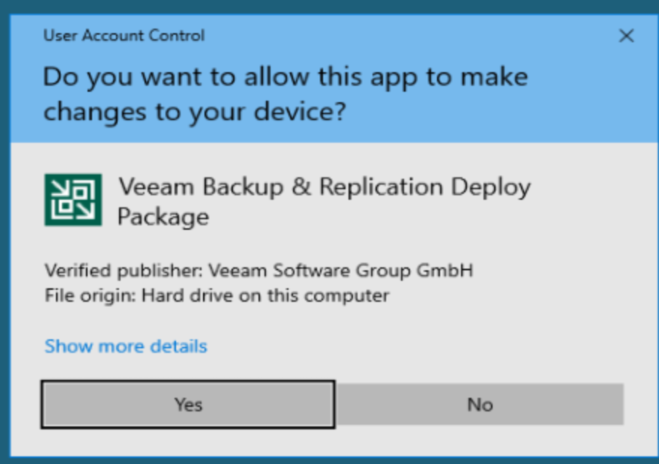
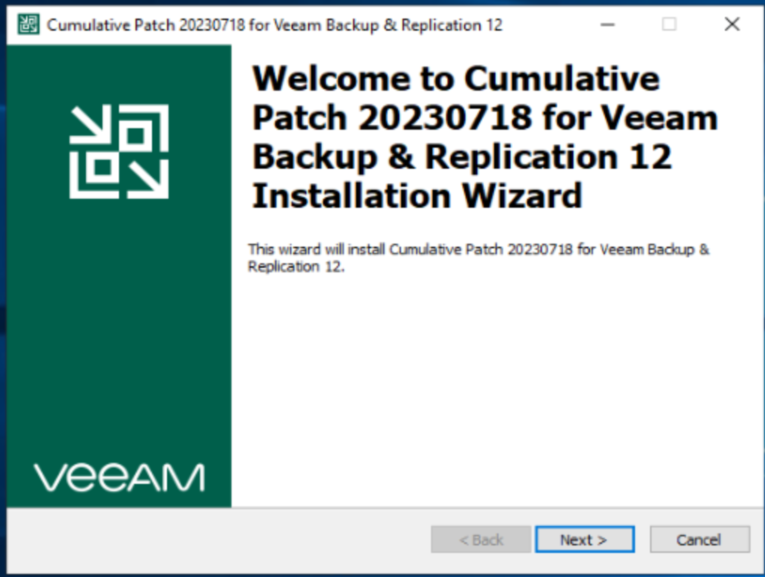
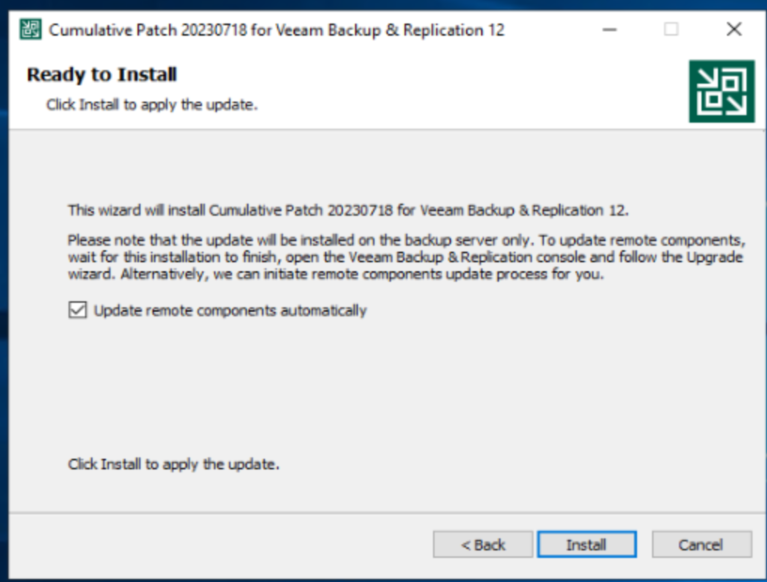
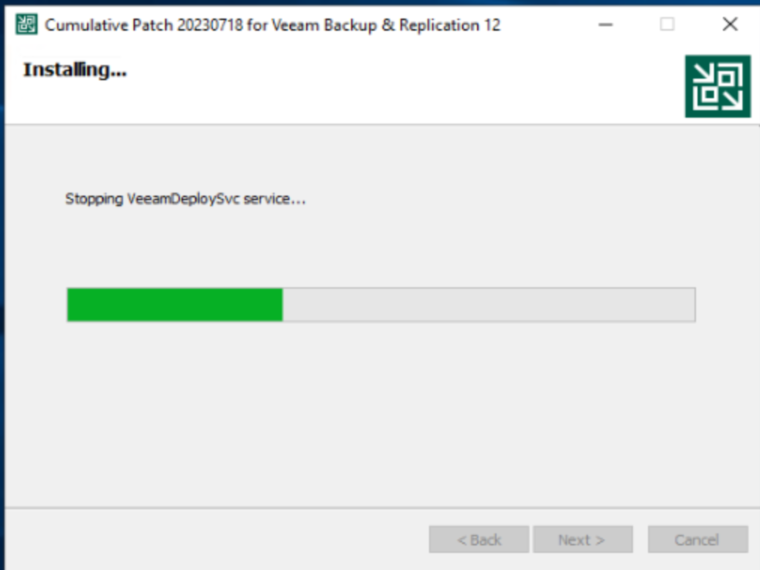
Setup

Stop All Services Veeam Backup & Replication

Hoặc chạy Powershell cho nhanh:

get-service veeam* stop-service

Stop-Service -Name Veeam*

Trước khi chạy backup file license lại nhé.

Khởi động lại Server Veeam.

Cập nhật các remote compoment

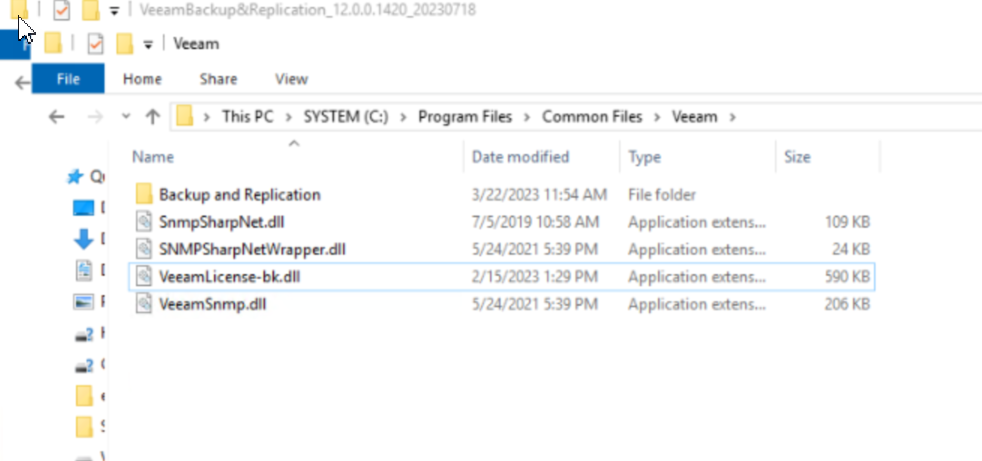
Rename file VeeamLicense.dll->old.

C:\Program Files\Common Files\Veeam

VeeamLicense.dll > to > VeeamLicense.dll.old
[ available in C:\Program Files\Common Files\Veeam\ ]

[ available in C:\Program Files\Common Files\Veeam\Backup And Replication ]

Sau khi udpate xong chúng ra trả lại file Veeamlicense.dll

  • C:\Program Files\Common Files\Veeam
  • C:\Program Files\Common Files\Veeam\Backup And Replication

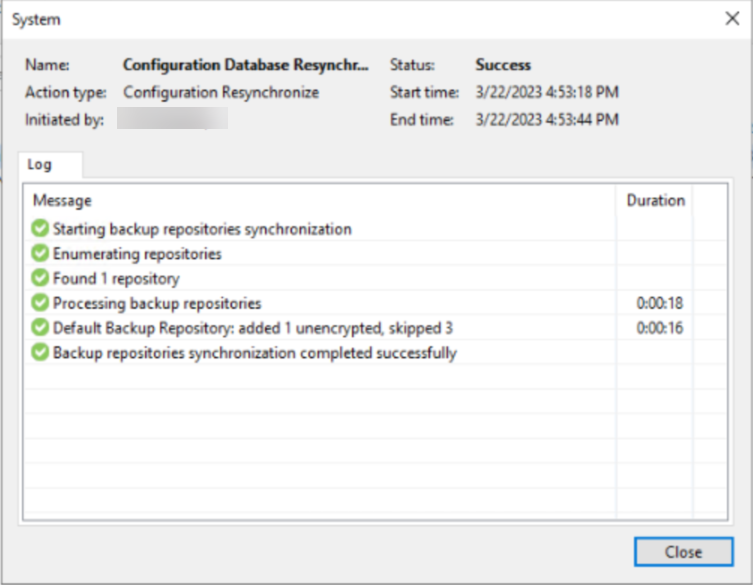
Công việc tiếp theo sẽ upgrade và scan lại reposibilites, các module upgrade.

Chúc các bạn thành công

Phương Nguyễn Viết
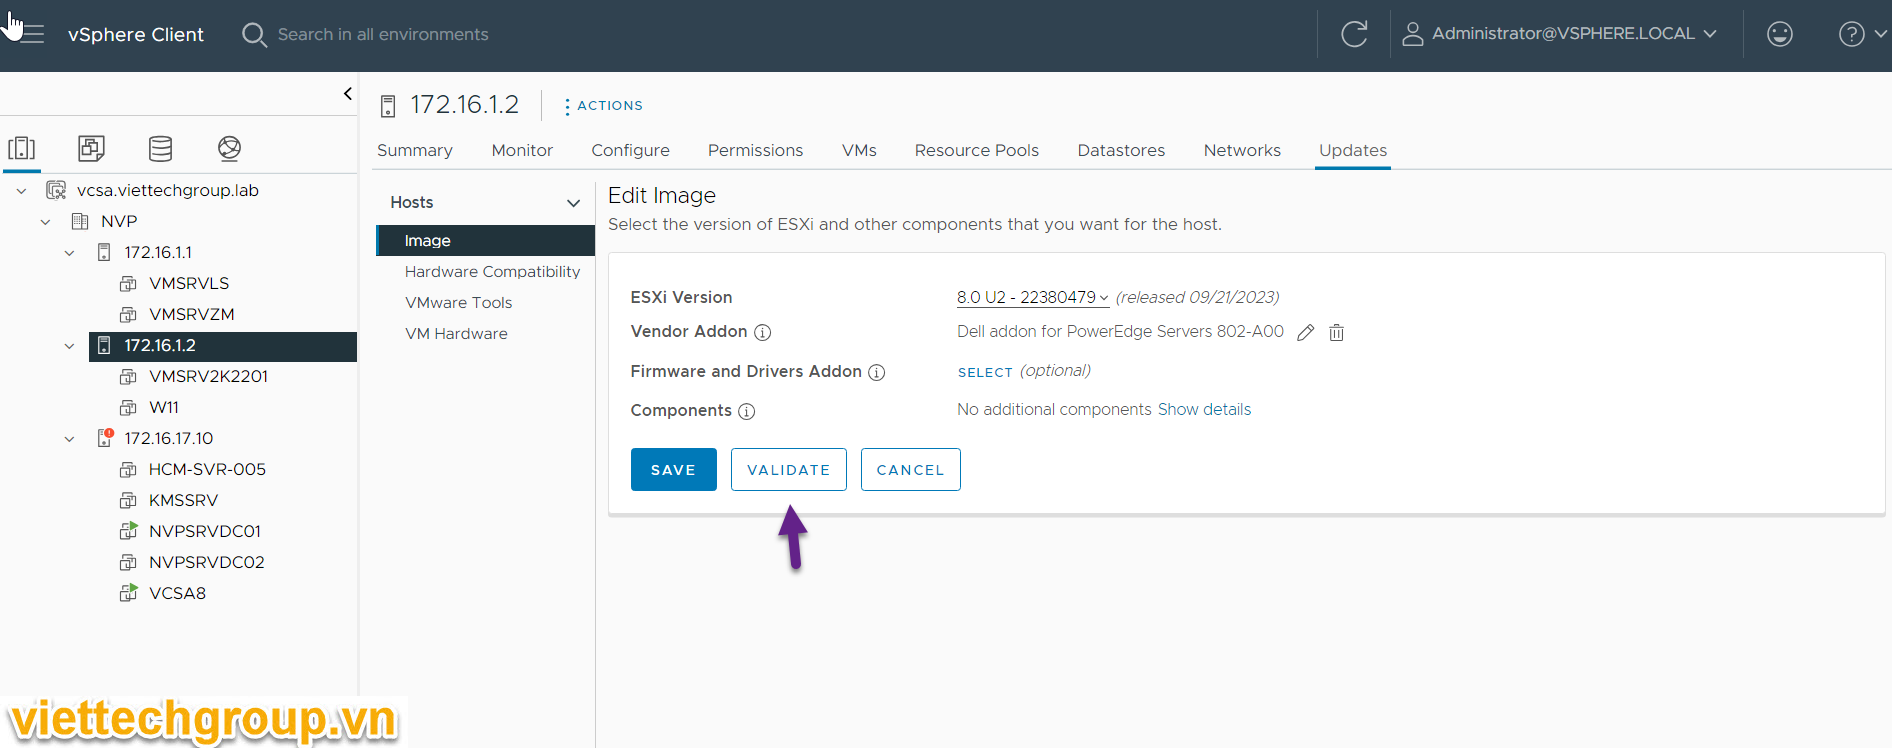
Optimal Window’s OS page file settings for SQL Server

Windows OS page file not optimal

What is the Windows OS page file?

This file is a form of virtual memory.

When your memory ram becomes full, Windows moves data from your memory RAM to your hard drive, placing it in the page file (also known as the swap file).

By the way, this check is a part of our SQL Server Health Check.

You never want your SQL Server to start paging.

SQL Server tends to go pear-shaped when it’s memory is paged to disk.

Optimal page file size settings for SQL Server

By default, the page file is auto managed by Windows.

You don’t want to trust the management of page file to Windows, as it won’t do what is optimal for SQL Server.

Page file sizing depends on the system crash dump setting requirements and the peak usage or expected peak usage of the System commit charge.

Both considerations are unique to each System, even for identical systems.

The old rules of thumb (Page file size = RAM * 1.5 or RAM * 2) makes no sense in modern systems, where the logic should be: the more RAM you have, the less you need paging file.

So, how should you size your Page File?

It depends on the specific workload and the type of server.

When sizing the page file, we need to consider our application’s memory needs and crash dump settings.

A good point of start is set 8-12 GB size for Kernel Memory dump on System with up to 256GB RAM.

You can learn more about it here.

How can I change the windows file size?

You can configure the page file by using System Properties:

  1. Run sysdm.cpl;
  2. Go to Advanced ;
  3. Select Settings under Performance ;
  4. Go to Advanced (again);
  5. Change under Virtual Memory.

Source Internet

HA Agent – Fault Domain Manager (FDM) overview

Fault Domain Manager (FDM)

Most important component in HA cluster is FDM (Fault Domain Manager) agent. It is responsible for some of following tasks:

  • Communicating host resource information,
  • VM states and HA properties to other hosts in the cluster.
  • Handles heartbeat mechanisms
  • VM placement
  • VM restarts
  • logging

As soon you enable the vSphere HA in a cluster, the Fault Domain Manager (FDM) agent service runs on each hosts in the cluster. There is one Master and other slave hosts in a vSphere cluster. Fault Domain Manager (FDM) agent is installed on all the slave or subordinate hosts that is used to communicate with the FDM of a master host.

FDM is installed into the ESXi hosts at /opt/vmware/fdm and stores its configuration files at /etc/opt/vmware/fdm.

FDM.log location and usage..

The log file named fdm.log is stored under /var/log/. If there is issue occurred in your environment, fdm.log is very helpful in order to troubleshoot it. For example if VMs are restarted without any known reason, this log file will show when and why this happened, for instance it could be due to host, network or storage failure.

How master host is elected?

An agent picks up the master host during election process (approximately 15 seconds) which is taken place between all the hosts. The host that can access the greatest no of datastores is elected as a master host. If more than one host sees the same no of datastores, the election process determines the master host by using the host Managed Object ID (MOID) assigned by vCenter Server

What happen if FDM fails:

when FDM runs it spawns a watchdog process, so in case of agent failure, the watchdog restart it.

Does vCenter talks to slave Hosts agents?

Yes when vCenter scanning for a HA master,
when a host is reported as isolated or partitioned, or
if the existing master informs vCenter that it cannot reach a slave agent.

How FDM communicates ?

FDM agent uses both the management network and storage devices for communication. All the HA agents (candidates for master) communicate with each other over the management network during election process by using User Datagram Protocol (UDP). All network connections are point-to-point. And once the mater host is elected, the master host and subordinate hosts communicate using secure TCP.

Source https://babarmunir.wordpress.com/2021/04/21/ha-agent-fault-domain-manager-fdm-overview/

Thông tin bản cập nhật bảo mật (SU) Tháng 08/2023 Exchange Server

Thông tin bản cập nhật bảo mật(SU) Tháng 08/2023 Exchange Server

Ngày 08/08/2023 Microsoft đã phát hành Bản cập nhật bảo mật(SU) cho các lỗ hổng được tìm thấy: EX2016 CU23, EX2019 CU12,CU13

1/ CVE-2023-21709

Điểm nỗi bật bản này là giải quyết được lỗ hổng CVE-2023-21709 (khai thác TokenCacheModule trong IIS). Các bước cần thiết để giải quyết CVE-2023-21709 tốt nhất cài bản vá trước rồi hãy chạy script CVE-2023-21709.ps1
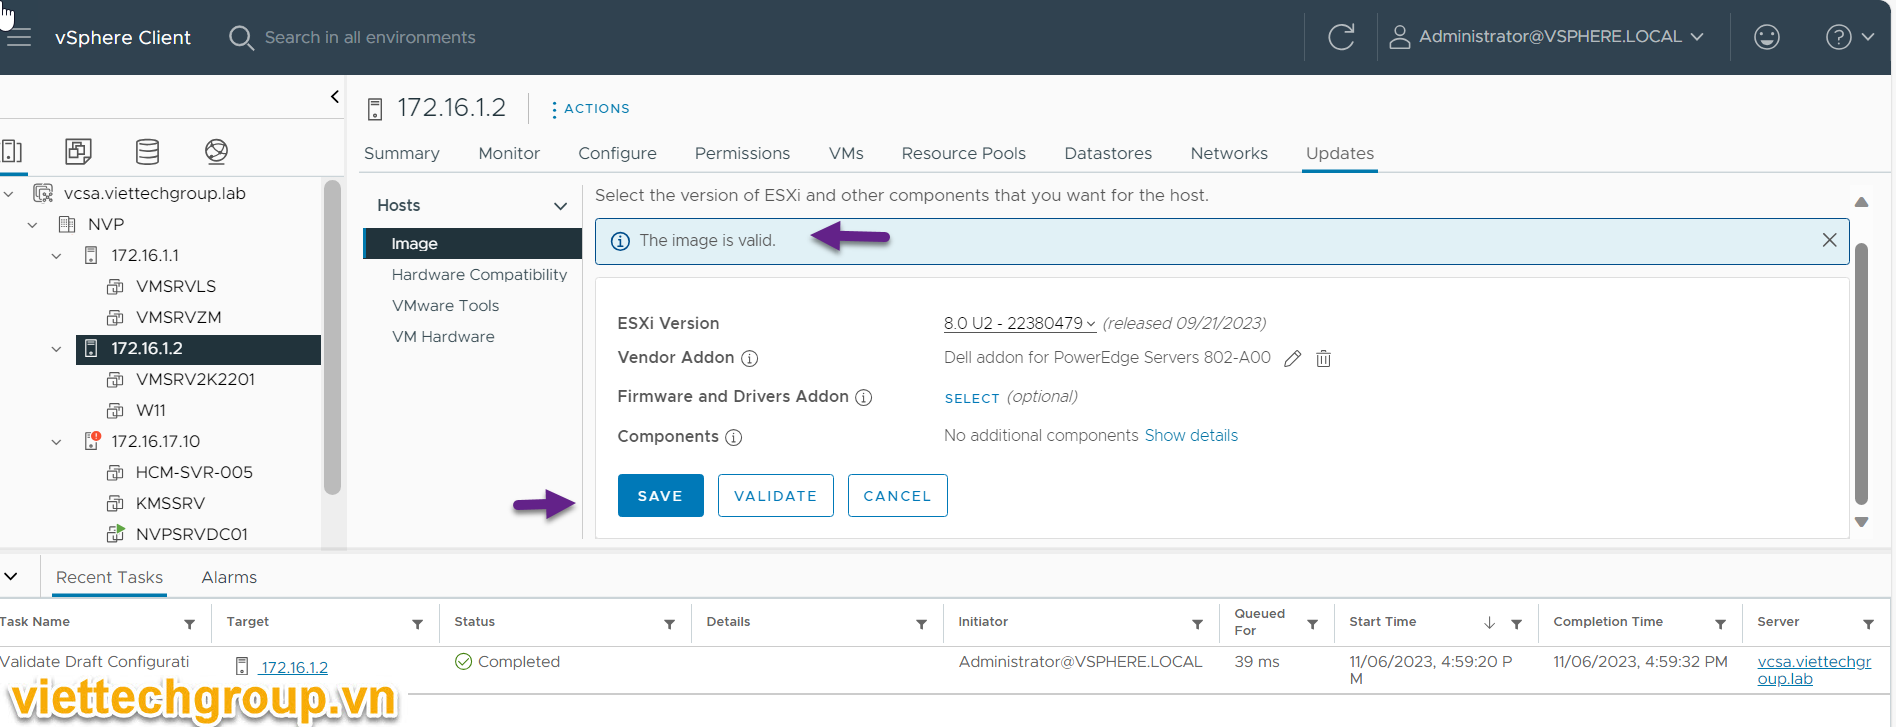
Cài đặt bản vá ngay lập tức để bảo vệ Exchange Server khỏi rủi ro có thể bị tổn thương:

Step 1. Cài bản vá  bảo mật tháng 8/2023 cho Exchange Server 2016/2019-> link

Step 2. Reboot the Exchange Server

Step 3. Run the CVE-2023-21709.ps1 script này bản chất sẽ remove tokencachemolude trong IIS-> link

Các CVE bên dưới được xử lý bằng Bản cập nhật bảo mật:

 CVE-2023-21709

CVE-2023-35368

CVE-2023-35388

CVE-2023-38181

CVE-2023-38182

CVE-2023-38185

2/ Hỗ trợ thay đổi thuật toán mã hóa mặc định trong Microsoft Purview Information Protection

Phần này chỉ áp dụng cho những khách hàng của MS sử dụng Exchange Server và Azure hoặc Dịch vụ quản lý quyền AD (RMS). Nếu bạn không biết đó là gì, những thay đổi về mã hóa Exchange Online CBC sẽ không áp dụng.

Bật hỗ trợ cho nội dung được mã hóa AES256-CBC trong Exchange Server đối với khách hàng nào sử dụng dịch vụ Azue hoặc AD (RMS) của MS.

Như đã thông báo trong phần Thay đổi thuật toán mã hóa trong bài đăng trên blog Microsoft Purview Information Protection, các SU Exchange Server tháng 8 năm 2023 chứa các bản cập nhật cho phép khách hàng sử dụng Exchange Server tại chỗ tiếp tục giải mã nội dung được bảo vệ bởi nhãn nhạy cảm Purview hoặc Dịch vụ quản lý quyền Active Directory. Vui lòng xem lại bài đăng trên blog đó để biết chi tiết và lịch trình, đồng thời đọc hỗ trợ AES256-CBC cho tài liệu Microsoft 365.

Nếu tổ chức của bạn bị ảnh hưởng bởi thay đổi này, sau khi cài đặt SU tháng 8 trên máy chủ Exchange của bạn, hãy xem bài viết về cách bật hỗ trợ mã hóa AES256-CBC. Xin lưu ý – bước này không cần thiết trừ khi máy chủ tại chỗ của bạn yêu cầu hỗ trợ cho AES256-CBC.
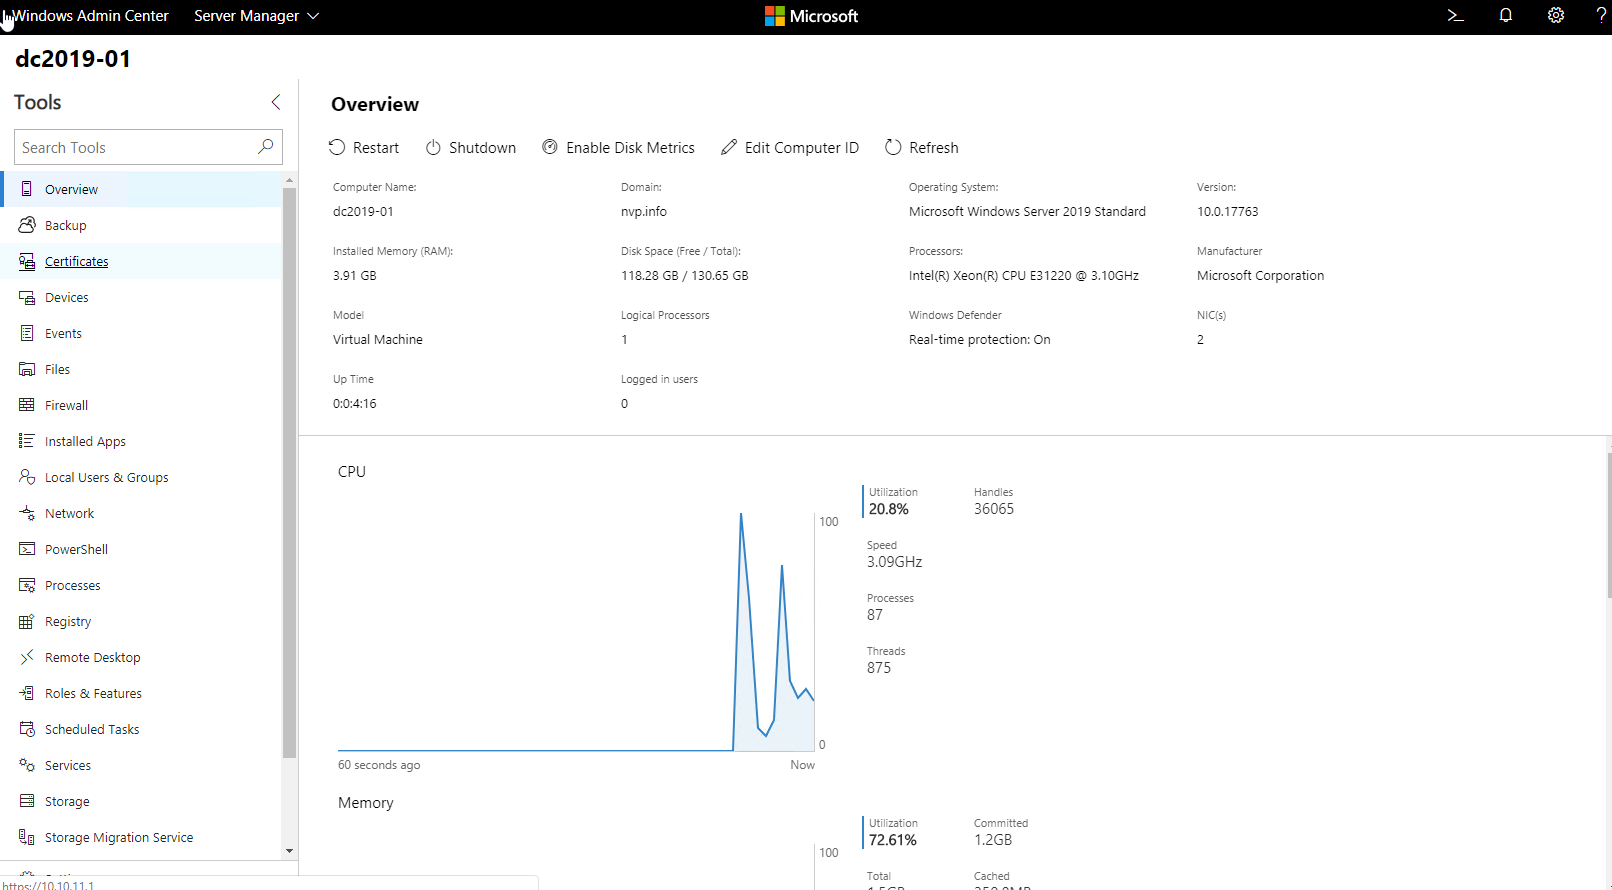
3/Giải quyết

Cài đặt DST không chính xác sau khi cập nhật hệ điều hành

4/Các sự cố đã biết với bản phát hành này

Những khách hàng bị ảnh hưởng bởi thay đổi mã hóa sắp tới của Microsoft 365 AES256-CBC cần thực hiện thao tác thủ công để bật thuật toán mã hóa mới sau khi SU được cài đặt vào tháng 8 năm 2023.

5/Note

Lưu ý rằng Exchange Server 2013 KHÔNG được hỗ trợ và bạn phải nâng cấp lên Exchange Server 2019 hoặc Exchange Online càng sớm càng tốt!

https://techcommunity.microsoft.com/t5/exchange-team-blog/released-august-2023-exchange-server-security-updates/ba-p/3892811

https://msrc.microsoft.com/update-guide/vulnerability/CVE-2023-21709

https://aka.ms/CVE-2023-21709ScriptDoc

https://support.microsoft.com/en-us/topic/description-of-the-security-update-for-microsoft-exchange-server-2019-and-2016-august-8-2023-kb5029388-86b365c0-21f1-4a10-a68c-a095536f0171

https://aka.ms/ExchangeCBCKB

https://techcommunity.microsoft.com/t5/security-compliance-and-identity/encryption-algorithm-changes-in-microsoft-purview-information/ba-p/3831909

#jsisen

#viettechgroupvn

#phuongit

#exchangeserver

#phuongit

#cve202321709

#AES256CBCa

Phương nguyễn Viết

HƯỚNG DẪN CÁCH SETUP VCENTER SERVER 8.0 U1 B Step by Step

HƯỚNG DẪN CÁCH SETUP VCENTER 8.0 U1 B Step by Step

Checklist cần thiết

  • Chuẩn bị source ISO, download Vmware
  • ESXI Host,Sizing :
    • Hardware Requirements for the vCenter Server Appliance
    • Storage Requirements for the vCenter Server Appliance
  • Required Ports for vCenter Server: 902, 443, 80, 389 tham khảo tại https://ports.esp.vmware.com/home/vSphere
  • DNS Requirements for the vCenter Server Appliance, lên DNS tạo các record A, PTR
    • Name vCenter Server 8
    • vcsa.viettechgroup.lab
    • IP: 172.16.23.3
    • Host Esxi or vCenter
    • IP: 172.16.1.1
  • If you want to deploy the appliance on an ESXi host, verify that the ESXi host is not in lockdown or maintenance mode and not part of a fully automated DRS cluster
  • Stage 1 Deploy new vCenter Server: 8 Steps
  • Stage 2: Setup vCenter Server: 5 steps
  • Configure Basic vCenter Server 8

Chuẩn bị Source ISO

Cần đăng ký tài khoản Vmware để tải bản trial

https://customerconnect.vmware.com/downloads/get-download?downloadGroup=VC80U1B

Mount ISO và run Setup

Chọn Installer.exe-> Install New vCenter Server

Stage 1: Deploy New vCenter Server

Gồm 8 bước điền các thông tin như các bước chuẩn bị

B1: Introduction -> next

B2: End user license agreement-> Chọn chấp chập và next

Bước 3: Khai báo thông tin host esxi hoặc vcenter cần triển khai

Chọn Yes trust SSL

Bước 4: Khai báo VM tên và user root của VM VCSA

Bước 5: Để default tiny

Bước 6: Chọn Datastores cần Setup

Bước 7: Bước này quan trọng khai báo về port group VM network nào cần sử dụng để VM VCSA có thể liên hệ với ADDS, khi báo như hình tùy theo nhu cầu thực tế mạng của các bạn để gỏ vào.

Bước 8: chỉ là confirm các setting vừa rồi chọn finish

Chờ Install Stage1 hoàn tất

Xong stage 1 chọn -> Continues chuyển sang stage2

STAGE 2: Set up vCenter Server

Chọn next

Như vậy đã setup xong stage 2

Chúng ta có thể logon quản lý VCSA bằng cách vào

https://ip:5480

và quản lý vcenter https://ip:443 bằng vsphere client html5

Đây là quản lý máy ảo của VCSA 8 nhé

Tại đây có thể cập nhật các tùy chỉnh theo ý đồ quản trị

Lưu ý ae quản trị viên hay quên, nhớ cập nhật lại lại hệ thống password không là bị change password sau 90 ngày. 😊 Ở đây tùy ae nhé. Tôi thì có mình nên chơi never expires cho chắc ăn.

Mật khẩu vẫn để phức tạp đi

Cái quản trọng nữa là backup config sau khi cấu hình ngon lành để có trường hợp còn khôi phục lại nhé.

Còn quản lý System VM các Esxi vào https://ip

Phần 2 Cấu hình cơ bản VCSA viết sau nhé.
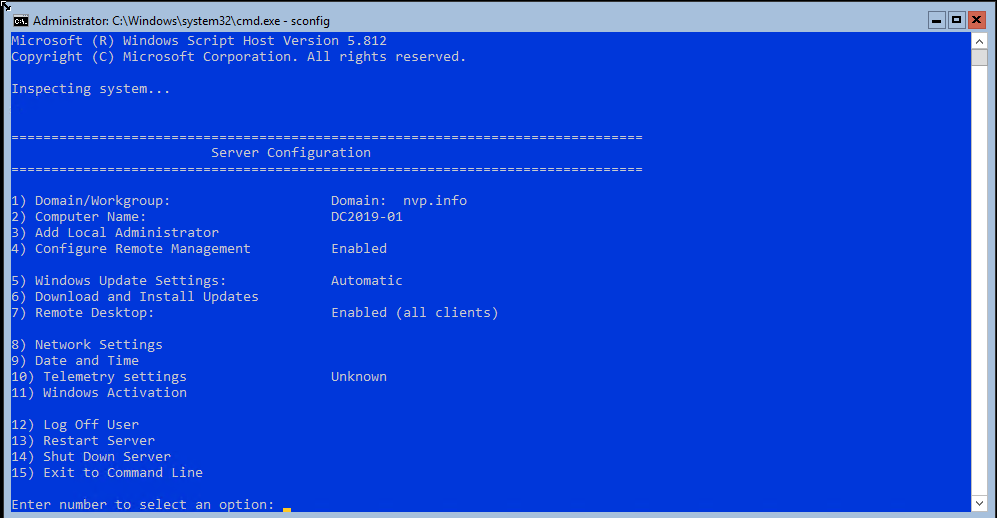
CÁCH CÀI SERVER ESXI VSPHERE 8.0U1 SERVER DELL EMC R750XS

CÁCH CÀI SERVER ESXI VSPHERE 8.0U1 SERVER DELL EMC R750XS

  1. CHUẨN BỊ SOURCE
  1. CÀI TỪ IDRAC LIFE CYLE CONTROLLER

Cài từ cosole của idrac

Chọn Virtual media=> connect virtual media =>mount iso vmware
Chọn ISO Vmware=> Map device

Reboot lại vào nhấn F10 vào LifeCycel controller hoặc để boot tự động sẽ vào Virtual

Chọn Virtual Keyboard-> Enter

Nhấn F11

Nhấn Enter

Nhấn Enter tiếp

Nhập password cho root

Nhấn F11 để cài

Cài thành công=> Enter để reboot tiếp tục cài

Như vậy là cài đặt xong ESXI 8.0 on Server DELL EMC R750XS

Chúc các bạn thành công